

In the third and last part of the Macfilos mini-series about exposure meters, we look at five light metering app solutions for iOS: Photometer, Lghtmtr, Luxi, Lightmate and MyLightmeterPro. They might do the job for anyone who wants to shoot with an old camera every now and then or who has no inclination to buy a standalone light meter. And you will find the big overview with all the 15 solutions that were discussed in the series.
We all have a device in our pockets that can do an amazing bandwidth of things including taking images (some people even claim that you can use it for such crazy things as a telephone call). There are numerous apps available to measure the intensity of light for photographic purposes. If you are already sure that you want to use such a light metering app, feel free to jump into the review section. And all readers might appreciate the big synopsis that comprises the light meters I wrote about in the first part and the second instalment of the series.

Proper device or just a smartphone light meter app?
With the emergence of smartphones, clever developers soon saw the idea of using the phone’s camera for measuring purposes. Rightly so, because a sensor that can take a photo is also suitable for calculating the energy of light reaching its pixels. However, most smartphone apps are only suitable to measure objects and not the light itself. There are extra devices to attach to your phone for incident light measuring. A real solution for virtually simulating the spherical cap you still have to use for this purpose is not available so far (to the best of my knowledge). But then again, if you need an extra device, you can carry a proper exposure meter right away, can’t you?
The smartphone has an unbeatable advantage however, you always have it with you. For this reason alone, an exposure meter app can be sensible. It might even save you in case you forgot your light meter, its battery is empty or so. Especially if you are new or coming back to film photography and you do not yet know if you will stick to it, downloading an app might cost you some euros if at all, whereas a proper handheld exposure meter (as we saw here) or an attachable meter (get the details here) will never be cheap. In terms of usability, I would argue that a good smartphone app will do the job in most cases especially if you are working on more forgiving film material such as Kodak Portra.
I will show you five different apps for iOS in this article. MyLightmeterPro has a large number of functions while Photometer is basic and Lightmate even more basic. Luxi can provide incident light metering with a small and inexpensive clip-on device while we will see what is lacking Lghtmtr apart from vowels. All five apps have their advantages and shortcomings. In any case, all of them are, under normal circumstances, pretty viable solutions if you need to know what aperture stop and exposure time to select on your camera and lens.
Get the details – five iOS light metering apps that might fit you
All light meter apps I will review here are iOS versions. This is just because I happen to have an iPhone. It is an old model 6S by the way, and most tests were conducted on this device. However, I had the chance to check the functions on a much newer iPhone11, and the apps worked equally well (both phones on iOS 15.3.1). There was no discernible gain in speed, accuracy or anything else on the much more powerful iPhone 11. I guess these apps are not so demanding as far as processor or camera is concerned.
I used the light metering apps mainly in the field with an emphasis on practical usability. Some tests were also conducted under controlled conditions in a small studio setup. In any case, I do not claim any scientific approach. I can make an educated guess about the repeatability and the precision of measurements, and I have some results on film that support my findings. But please keep in mind that there are many other factors that influence the exposure of an image on film such as age and storage history of your film, shutter speed accuracy of your camera, process stability in your lab, and some more.
Light Metering iOS App 1: Lghtmtr
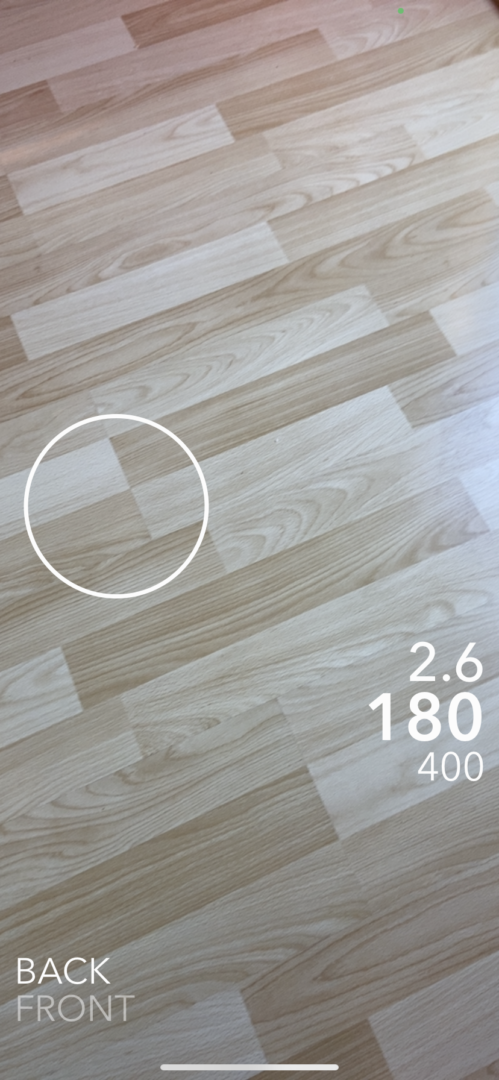
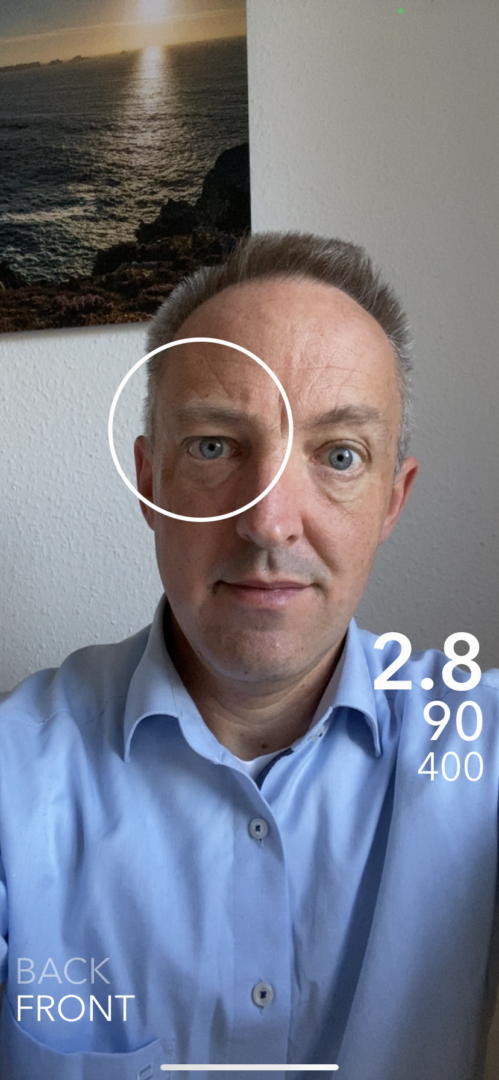
If they even made economies on the vowels, you might think, what else is missing in the app called Lghtmtr? It’s surprisingly little, especially if you consider that this is a free app. Lghtmtr works differently from the four other apps I tested. You start the app and see on your screen what your rear (or front, if you change to it) camera is capturing. It is as if you were taking a photo with your smartphone. You even push the familiar-looking shutter release button, and the app will evaluate the image you just shot for exposure values.
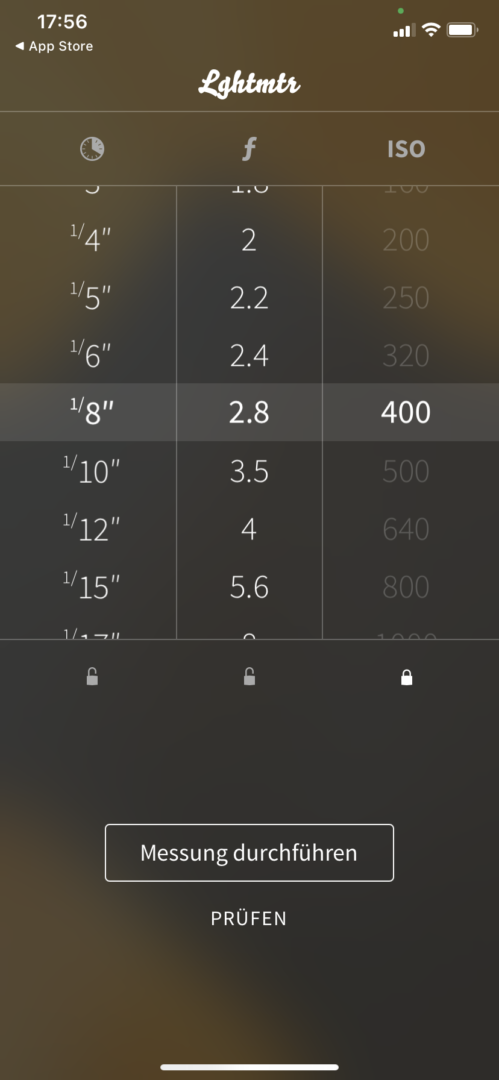
The result is displayed on a new screen. It consists of three columns, the first being exposure time, the second aperture value and the third ISO value. If you swipe one of the columns, one of the other will adjust itself. With a small symbol, you can lock any of these scales. I think this is an excellent way of learning how time, aperture and ISO depend on each other.
This exposure triangle is something everybody should have understood if she or he wants to go seriously into photography. In the olden days, this knowledge was essential and nobody questioned its importance, but nowadays your digital camera will not teach you these basics anymore. The Lghtmtr app fills this gap in a very smart and intuitive way. It should be installed on the iPhone of every photography student just for this learning effect.
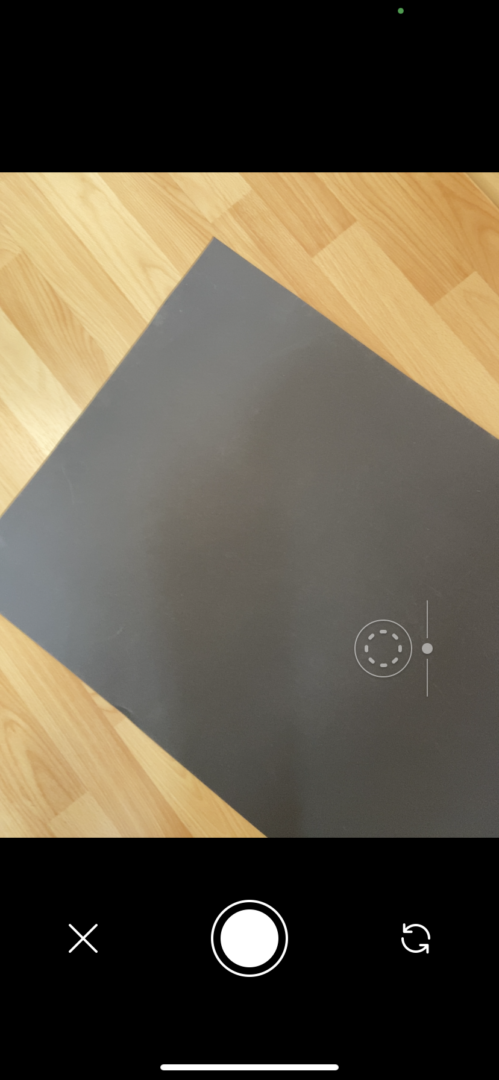
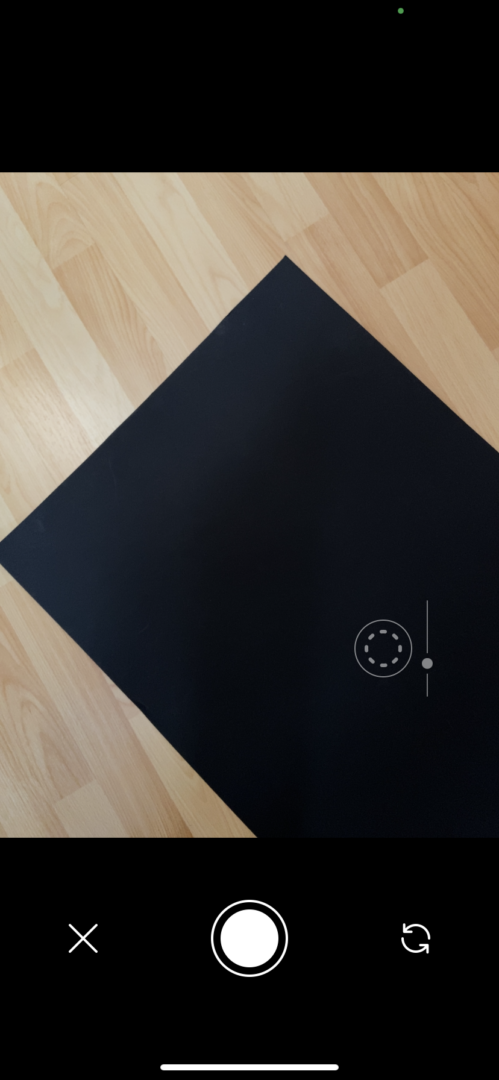
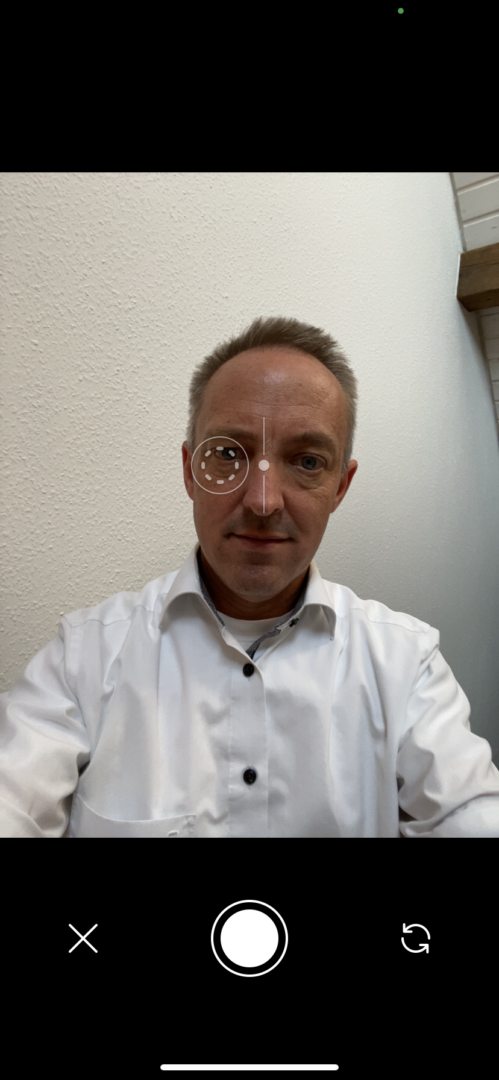
And there is another very nice feature in this app. If you tab onto the screen that shows you the camera image, you can select a detail to be measured. That is not so exceptional so far. But with a small slider next to the circle of measurement you can select an over- or underexposure. The estimated outcome will appear on your screen. It’s only a pity that the app does not show your correction value in half or third stops.
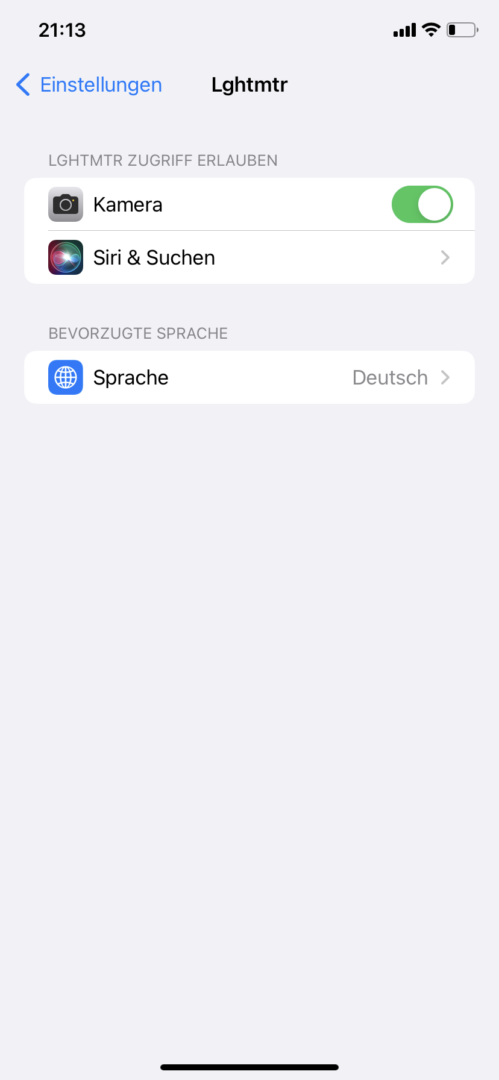
The Lghtmtr app is very easy to use, you can also switch to your front camera (I do not see so much use for this, but you might find it helpful), and you can choose a number of languages including English, Chinese, French and German. If your style of photography gives you enough time for this two-step approach (first, measuring and saving the image, second, reading your values), you cannot go wrong with this free, accurate, user-friendly and beautifully designed app. Here we go to the app store — or read the manufacturer’s page.
Light Metering iOS App 2: Photometer
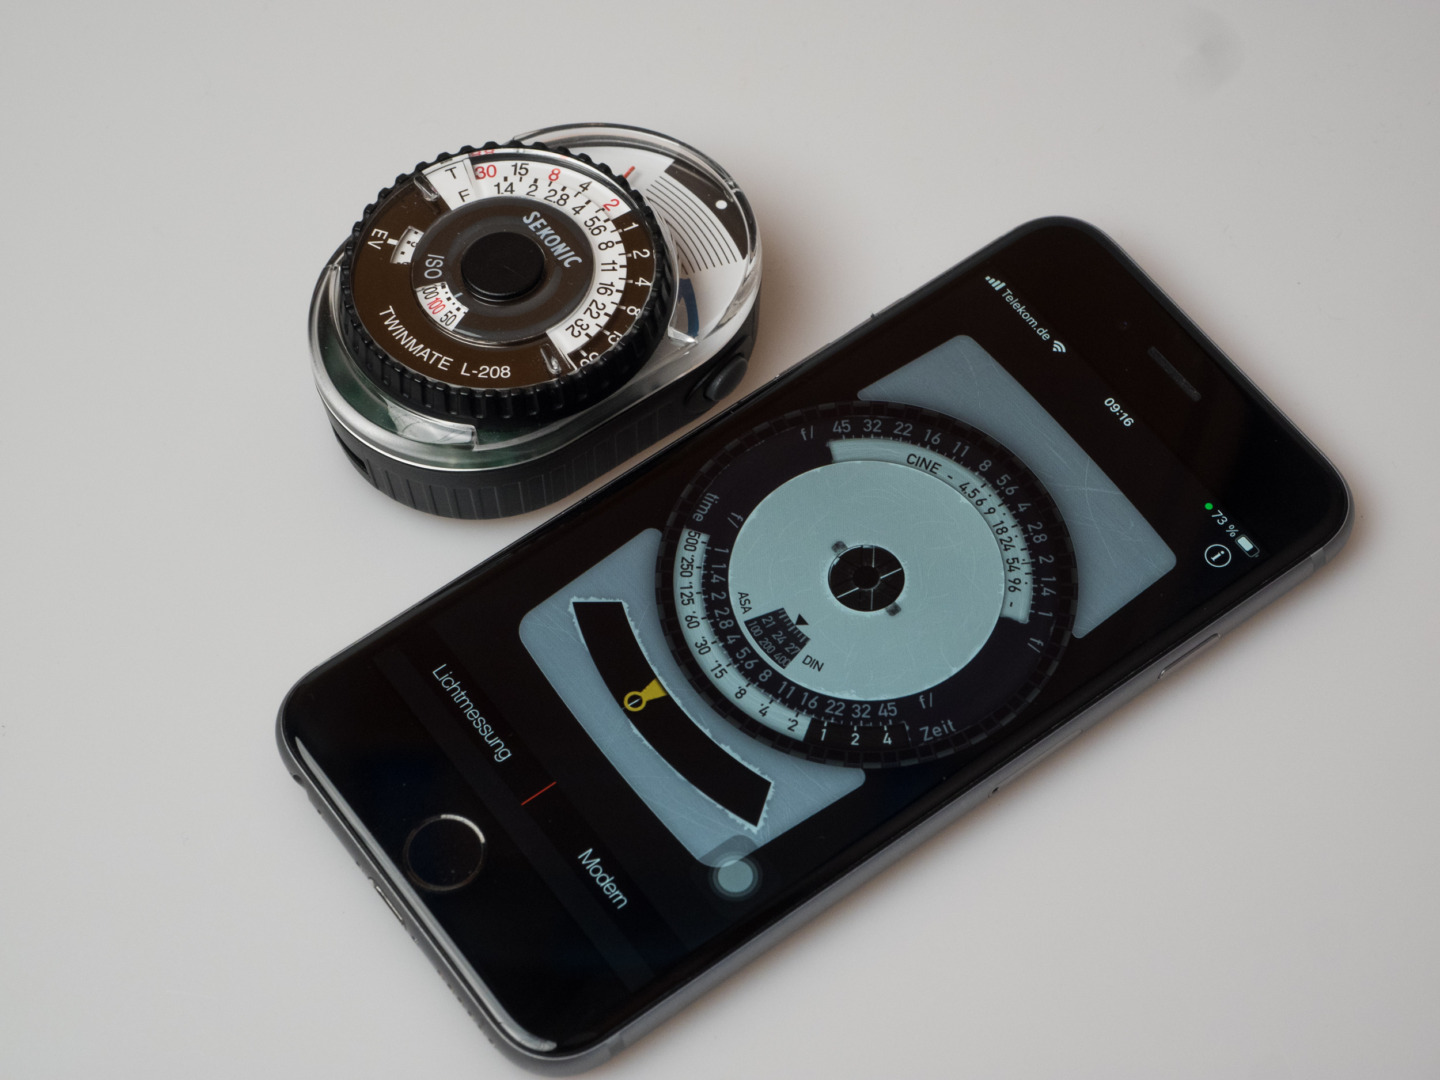
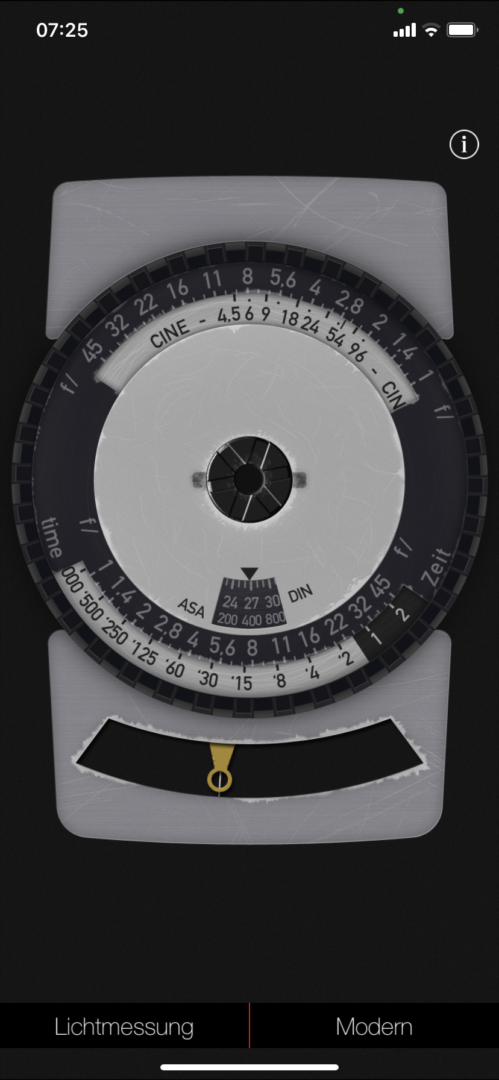
Photometer is a very different kind of app. By the way, I am quite fascinated by how much diversity is in all these apps that all serve the same purpose; that is, measuring the quantity of light by using your smartphone’s camera. Photometer offers a classic and a modern interface, and both have their advantages.
The classic interface resembles that of a hand-held light meter. It has a virtual disc to turn, and you basically make a needle and a small ring match. The needle represents the result of your measurement while the ring is linked to your disc. If ’125 (1/125) is opposite 5.6, you see at one glance that 1/60 and f/8 will also work or 1/500 and f/2.8. A double-tab in the middle of the disc makes the needle and ring match automatically and very quickly. The single tab lets you change your ISO value. A helpful “i” icon gives you these instructions.
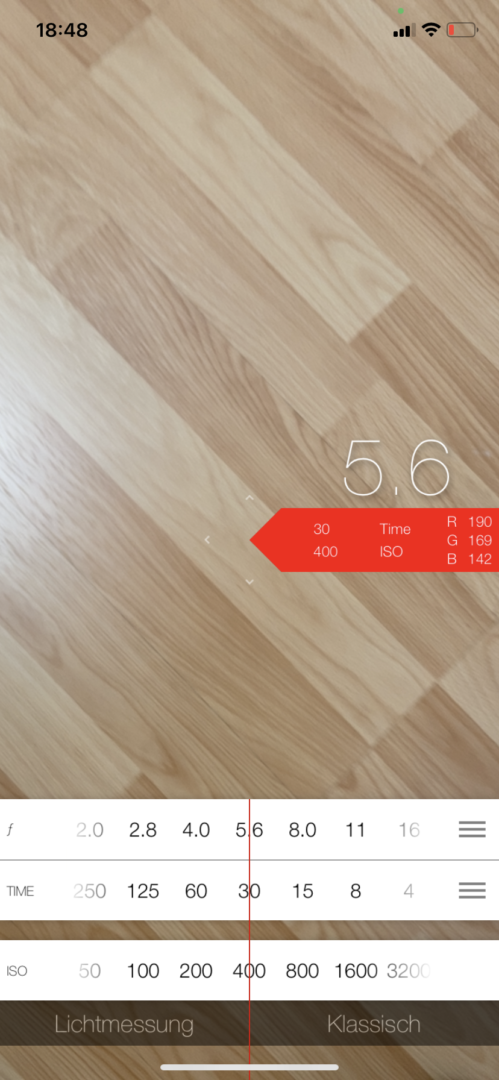
The modern interface is pretty different. You view the image that your camera is seeing in the background. To the right and on the bottom some figures and scales are imposed over this image. They show you the shutter speed, f stop and ISO values of the overall picture and in addition the RGB figures on a 1 to 255 scale. I have not seen any real use for this information, but maybe others need it. With a tap on the screen, you can freeze your reading. This is really smart. The three band scales on the lower part of the screen can be operated by swiping. If you change ISO, for example, you can see the results for aperture or time (depending on which value you placed on top).


What’s more to Photometer is that you can attach the Lumu device for incident light metering. This is a small hardware part that connects to your lightning jack (see the details on the Lumu website). The Lumu costs between $249 and $499 and offers a huge bandwidth of functions, depending on the model you chose even far beyond normal light metering, including colour temperature. There are favourable reviews around; I would, however, rather invest in a good and modern standalone light meter, but this is just my personal preference.
All in all, Photometer is a beautiful iOS app; especially if you like the classic interface. This one is very intuitive and fast to use. The modern interface lets you use both constant and memory metering which is also nice. Photometer is recommended for object (or: reflected light) metering while I cannot say anything about its incident light metering abilities.
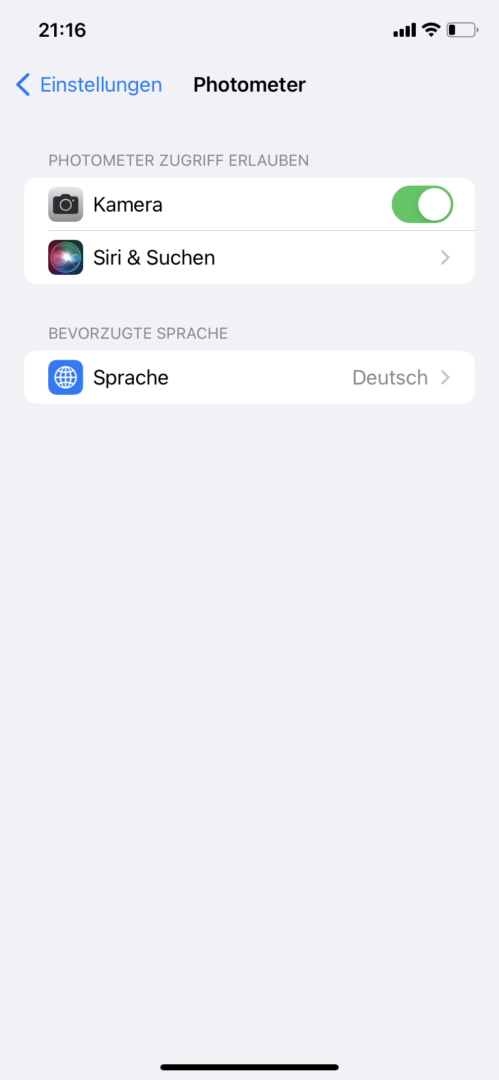
Photometer is very affordable (€0.99) and quite precise (I noticed a tendency to over-exposure of up to almost one stop). It has no calibration possibilities apart from deliberately setting a higher or lower ISO value. Photometer’s biggest disadvantage is that it offers no selective or spot metering. It can be set to English, French, Spanish, and German. Download it here.
Light Metering iOS App 3: Lightmate
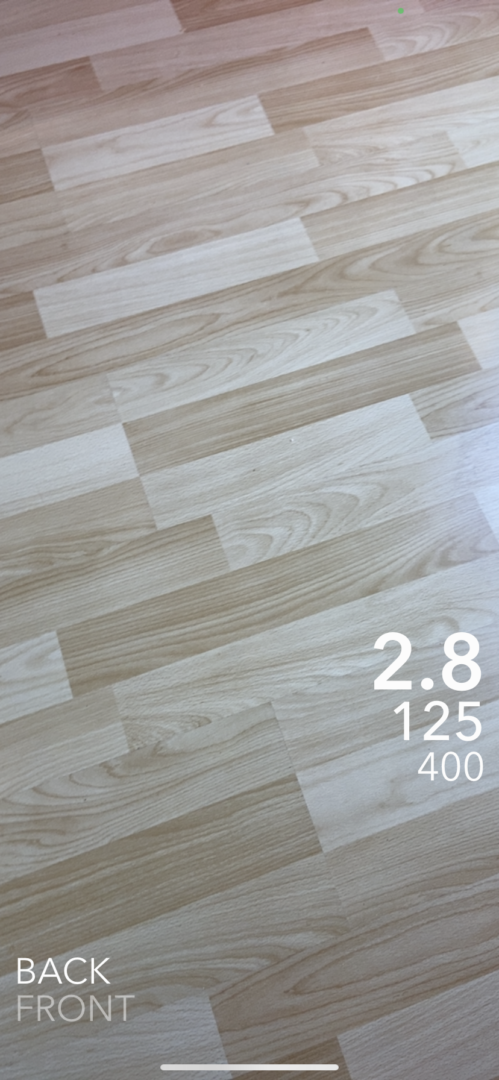
Lightmate is another kettle of fish again. This iOS app comes across as very purist since it consists of only a few figures on your screen (apart from the image your camera is recording). You tab on the detail you want to measure, and three figures will give you all the values: aperture, time, and ISO. If you want to alter any of them, just swipe the figure, and you will see a band of values. Stop it where you want, and the other values will adjust themselves.
Mind you, f/1.2 is the fastest value, and the app will not give you a warning if the range of available values is exceeded. Sure, this is not likely to happen in normal situations, but in very dark or very bright settings, Lightmate might send you on the wrong track. Generally, the values cover a sensible spectrum (f/1.2 to f/32; 30 sec to 1/8000, ISO 25 to 6400) for film photography.

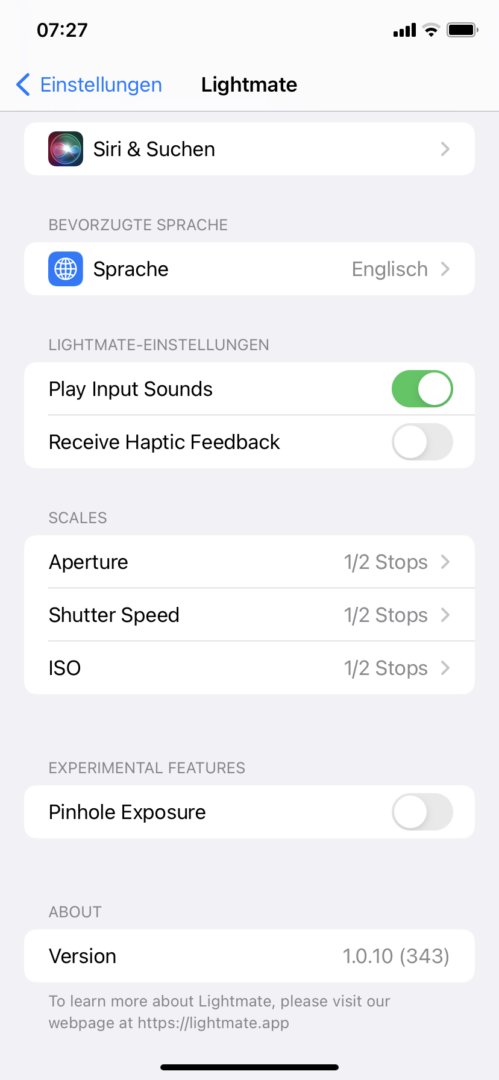
Lightmate supports your rear and front camera (just tab on the labels on the lower end of your screen) and offers quite a few settings such as ½ or ⅓ stops for aperture, shutter speed and ISO and haptic feedback. This iOS app supports English and Portuguese, and it’s free. Its biggest advantage is the purist and clean look, and I recorded good accuracy. Unfortunately, it has, like many light meter apps, no calibration feature.
Lightmate is easy to use and offers intuitive spot metering. A recommendation for all beginners or sporadic users. It takes only a few minutes to (re)learn working with the Lightmate app for iOS. And that is definitely not the worst thing you can say about an app. Get the app here or read the manufacturer’s homepage.
Light Metering iOS App 4: myLightmeterPro
MyLightmeterPro is one of the best-known and most reviewed light meter apps for iOS. And rightly so. This application for your smartphone offers you a wide range of features related to photography. Light metering is the core of it, but this app has some more options.
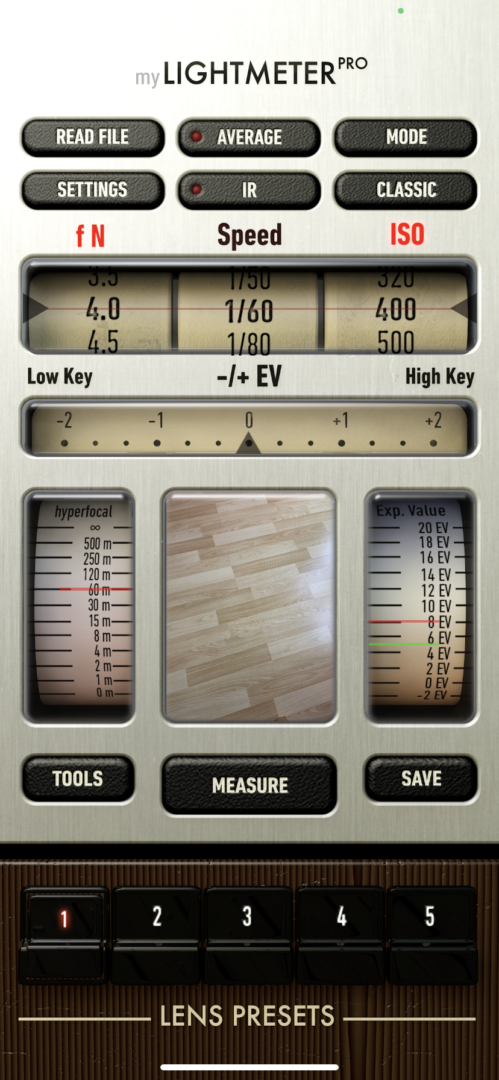
All key features of this app are shown in the “Pro” interface. In the middle, you see a window with a small representation of what you are about to measure. It uses the full (wide) angle of view of your camera. With a tap, you can enlarge the window and select an area of spot-type metering. You can choose a global correction factor between -2 and +2 EV, and three reel-styled readings show you aperture, shutter speed and ISO.
But there is more to this app. You can store up to five lens profiles. Depending on your pre-set focal length and sensor size, it will give you the hyperfocal distance when focussed on infinity, depending on your aperture value. For me, this is more of academic interest but anyone who is into zone focusing might find that helpful. Furthermore, myLightmeterPro offers you an average measuring option if you want to use a kind of multi-spot metering. And there is a function to save an image with its exposure dates for further reference. I know that quite some photographers work that way. If you want, you can also open any photo in your library and let myLightmeterPro show the exposure values.
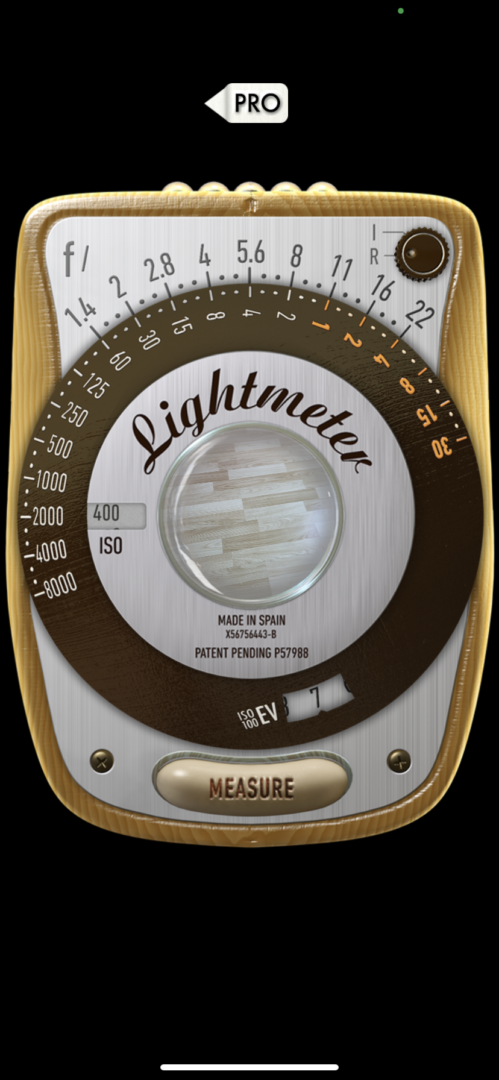
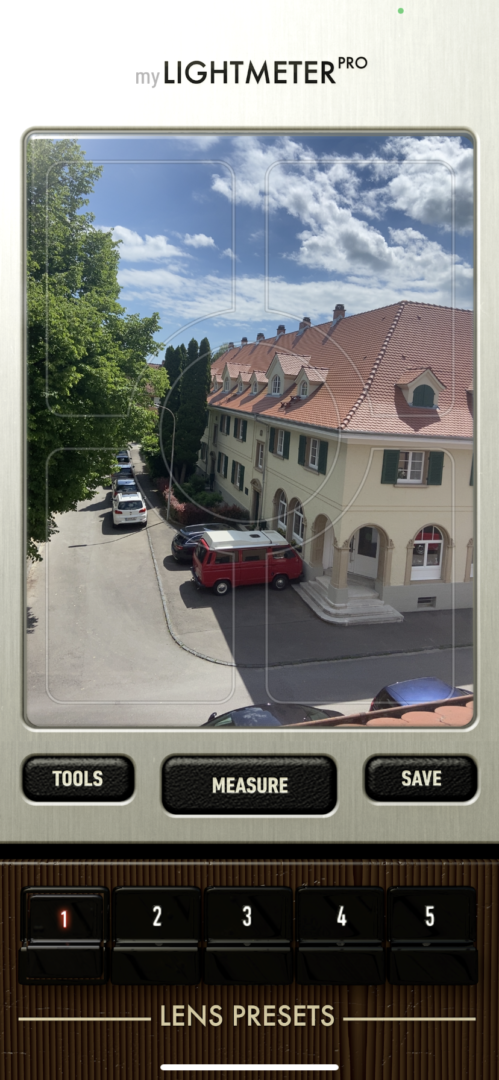

The “Classic“ interface is much easier. It mimics an analogue hand-held meter, and the small round window in the middle shows you your camera view. A disc-style interface gives you the last measurement you took, and a small switch icon lets you change between reflected and incident light metering (you will need a diffusor for this, more about that in the next chapter).
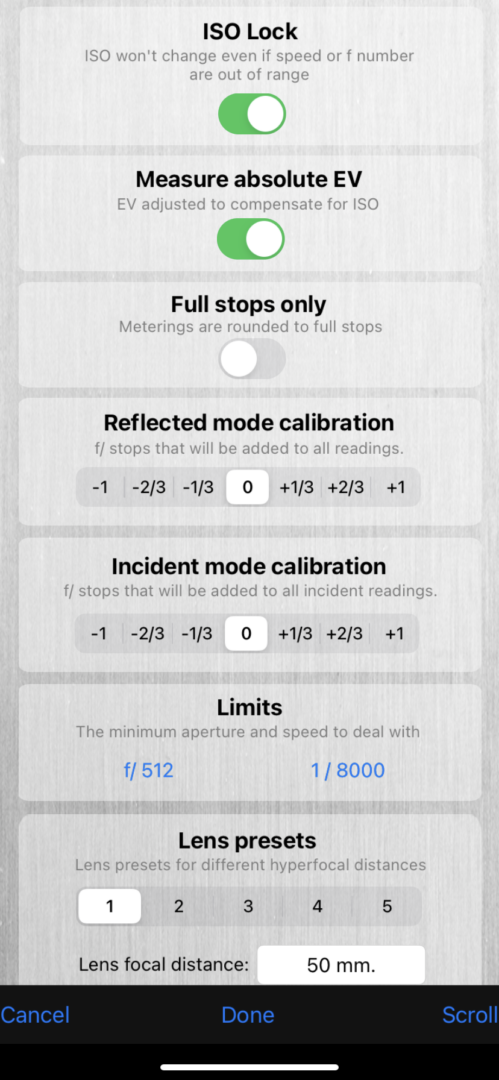
MyLightmeterPro offers a number of calibration options and also personal settings. All this is done within the app itself which I prefer by far as opposed to doing it in the general settings menu. There, you mainly select your language (English and Spanish are available). Special praise is due for the instructions PDF that you can download directly within the app. Well done, David Quiles, this is a useful feature, and it shows that you spent a lot of time thinking about the user experience.
Are you looking for a comprehensive, very accurate, full-featured light metering app? Then myLightmeterPro might be the way to go. It leaves little to be desired if you can cope with the somewhat baroque look. I personally prefer the purist approach, but the great functions in this helpful app let me get over the design kitsch.
If you are not a die-hard fan of hand-held light meters and if you can do without flash metering and incident light measurement, I dare to say the myLightmeterPro app might be the only tool you ever need to get your exposures right. It’s worth every cent of its modest €3.99 price. Get it here in the app store.
Light Metering iOS App 5: Luxi
Finally, Luxi. This is probably the app that comes closest to what a hand-held light meter can offer you – at least if you extend it with a clip-on diffusor. With this combination, you can seriously try to use incident light metering, and the Luxi app has its biggest strength exactly in this field. The Luxi app can also be used for reflected light metering and works then with the rear camera which is convenient.
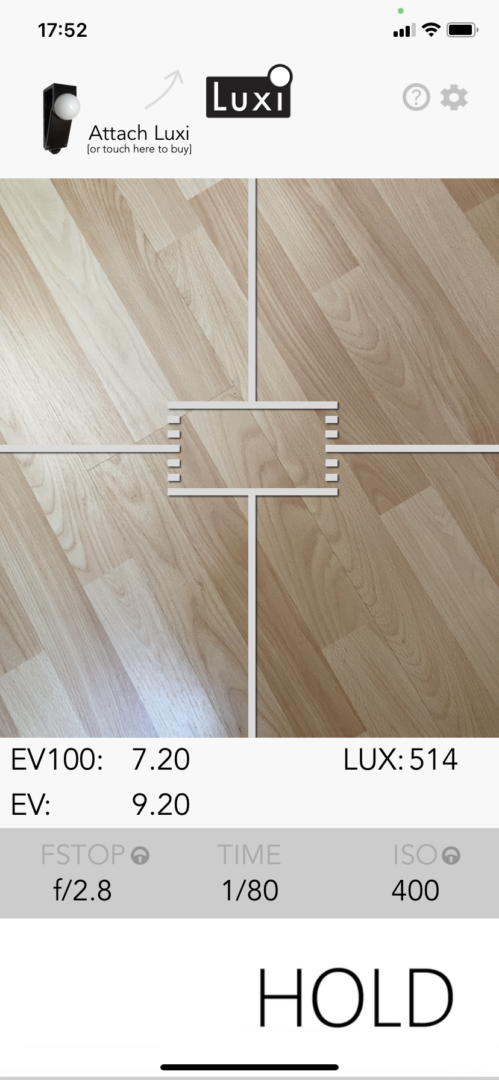
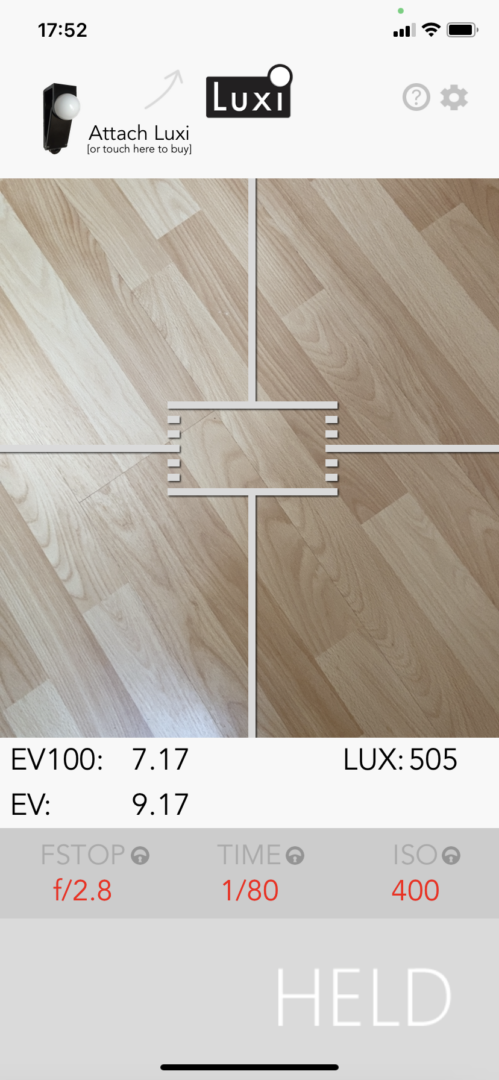
The Luxi app shows the results on a well-designed, clean screen. Apart from f stop, time and ISO, it also shows EV on an ISO 100 basis, EV based on your selected ISO value, and brightness in Lux. That is quite impressive. The app measures continuously until you tap the prominent HOLD area. Your readings turn red then and the HOLD changes to HELD. That is pretty intuitive.
Unfortunately, I found no option to change one of the values after freezing the metering. That means the Luxi app gives you 1/60 at f/4. It would be convenient to change from f/4 to f/2 for instance and to get 1/250 immediately. For standard values, we all can calculate that for sure. But how good is your algorithm if the app gave you f/2.4 and 1/13 sec.? On the other hand, you can manually set shutter speed and aperture, and the app gives you the corresponding ISO value.

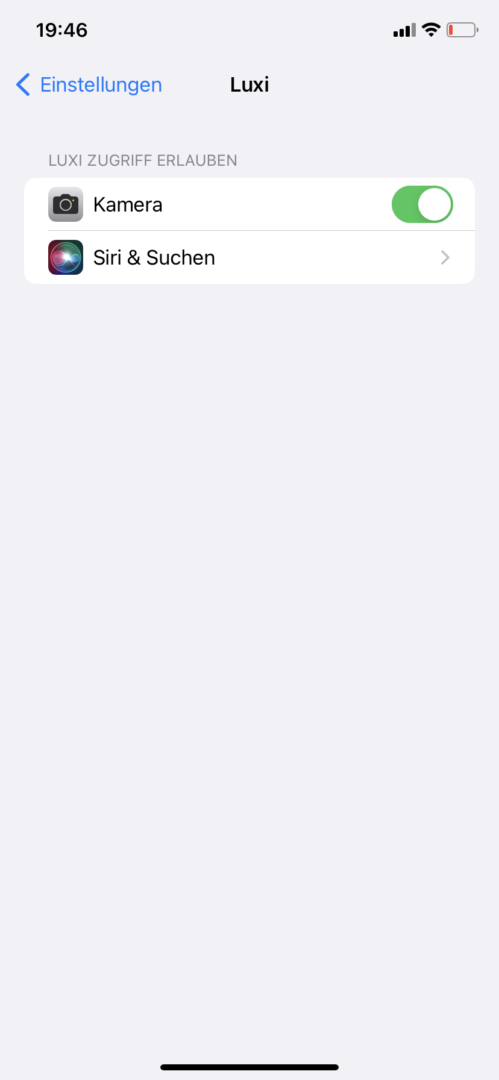
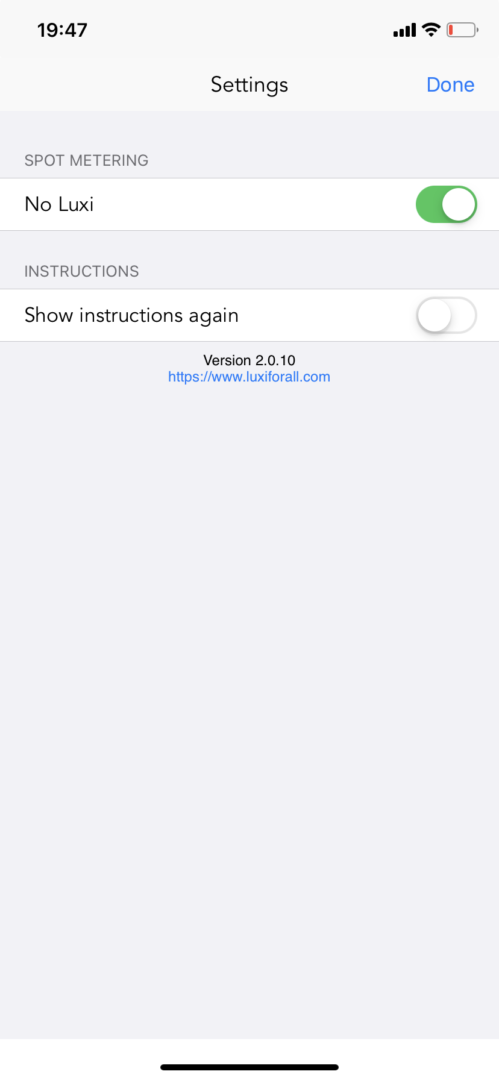
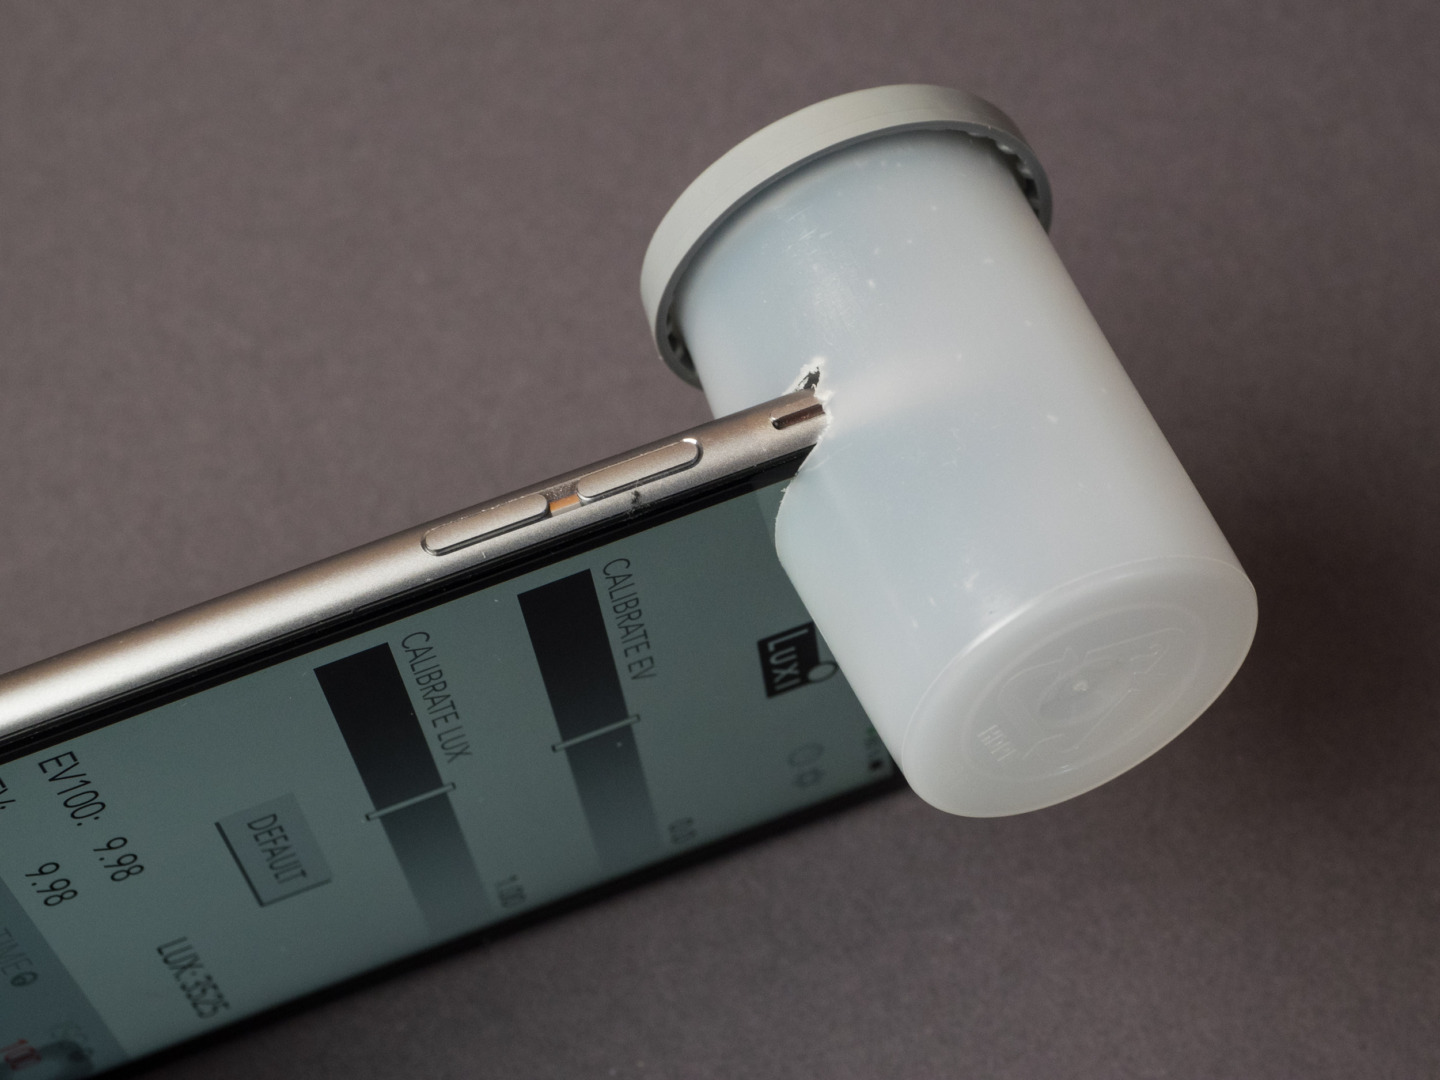
In the settings area, you can turn off the “No Luxi” option. Luxi is the name of the separately sold diffusor cap, so the setting means you use the app with the original or another suitable diffusor cap. If your iPhone is lying flat you will see a screen with calibration sliders; if you hold it upright it sometimes displays what the front camera sees through the diffusor. This might be a bit disturbing initially, but I think this feature is meant to let you check if the diffusor is attached correctly. You will get used to it. Calibration itself is easy with the help of a grey card and a reference meter or any camera with good TTL metering.
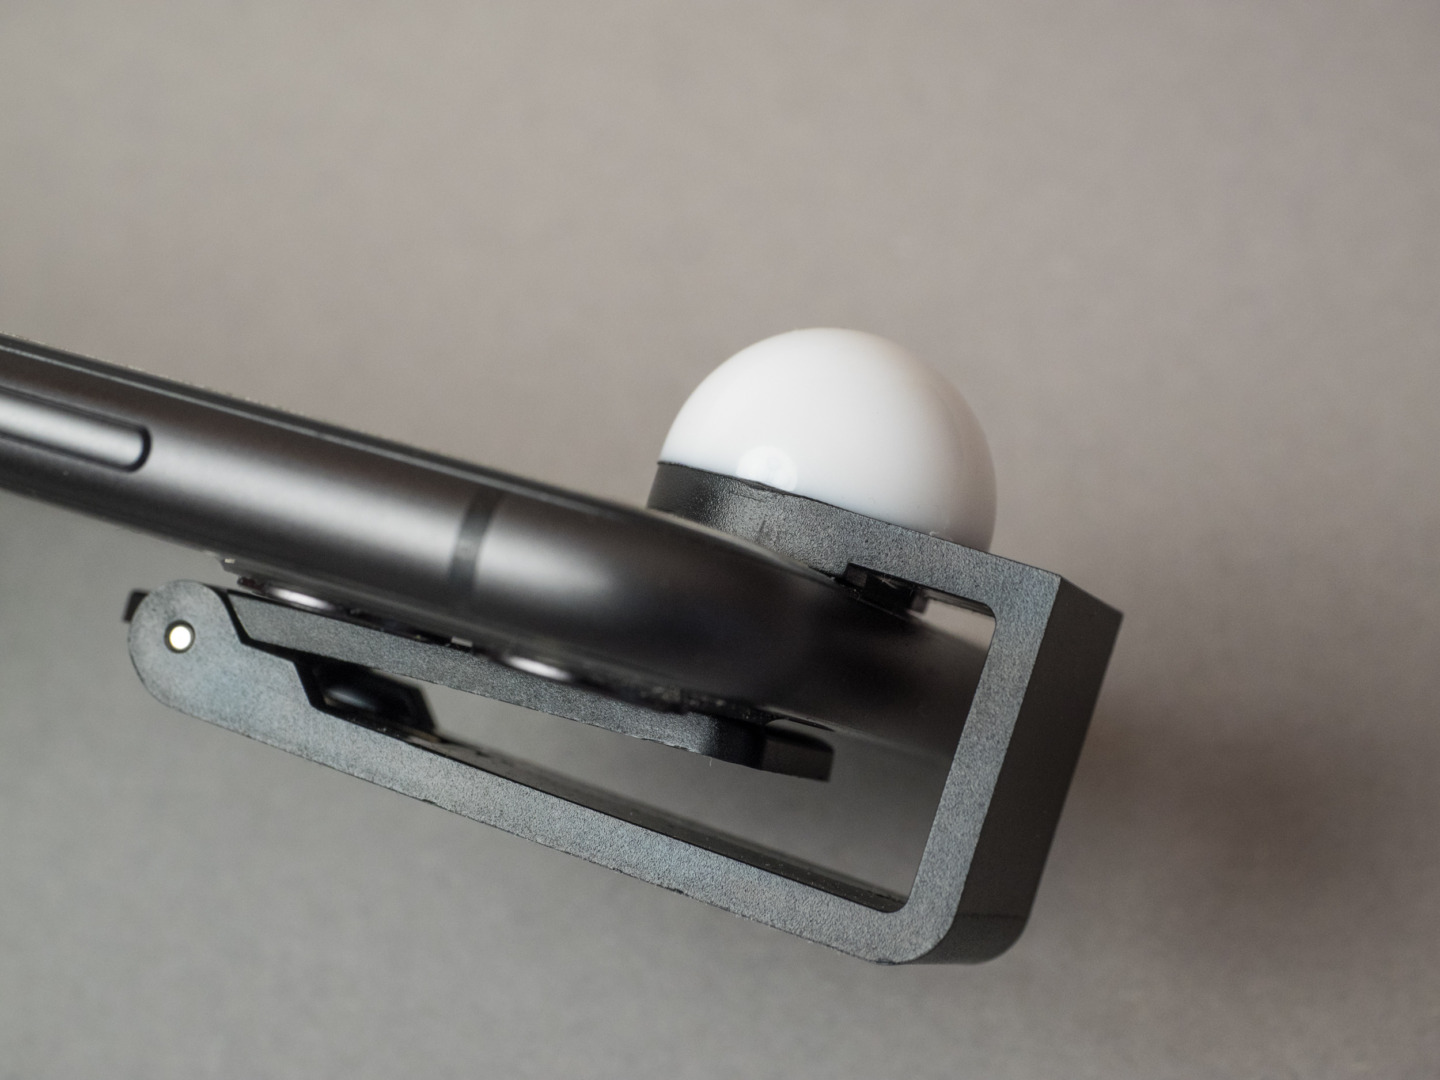
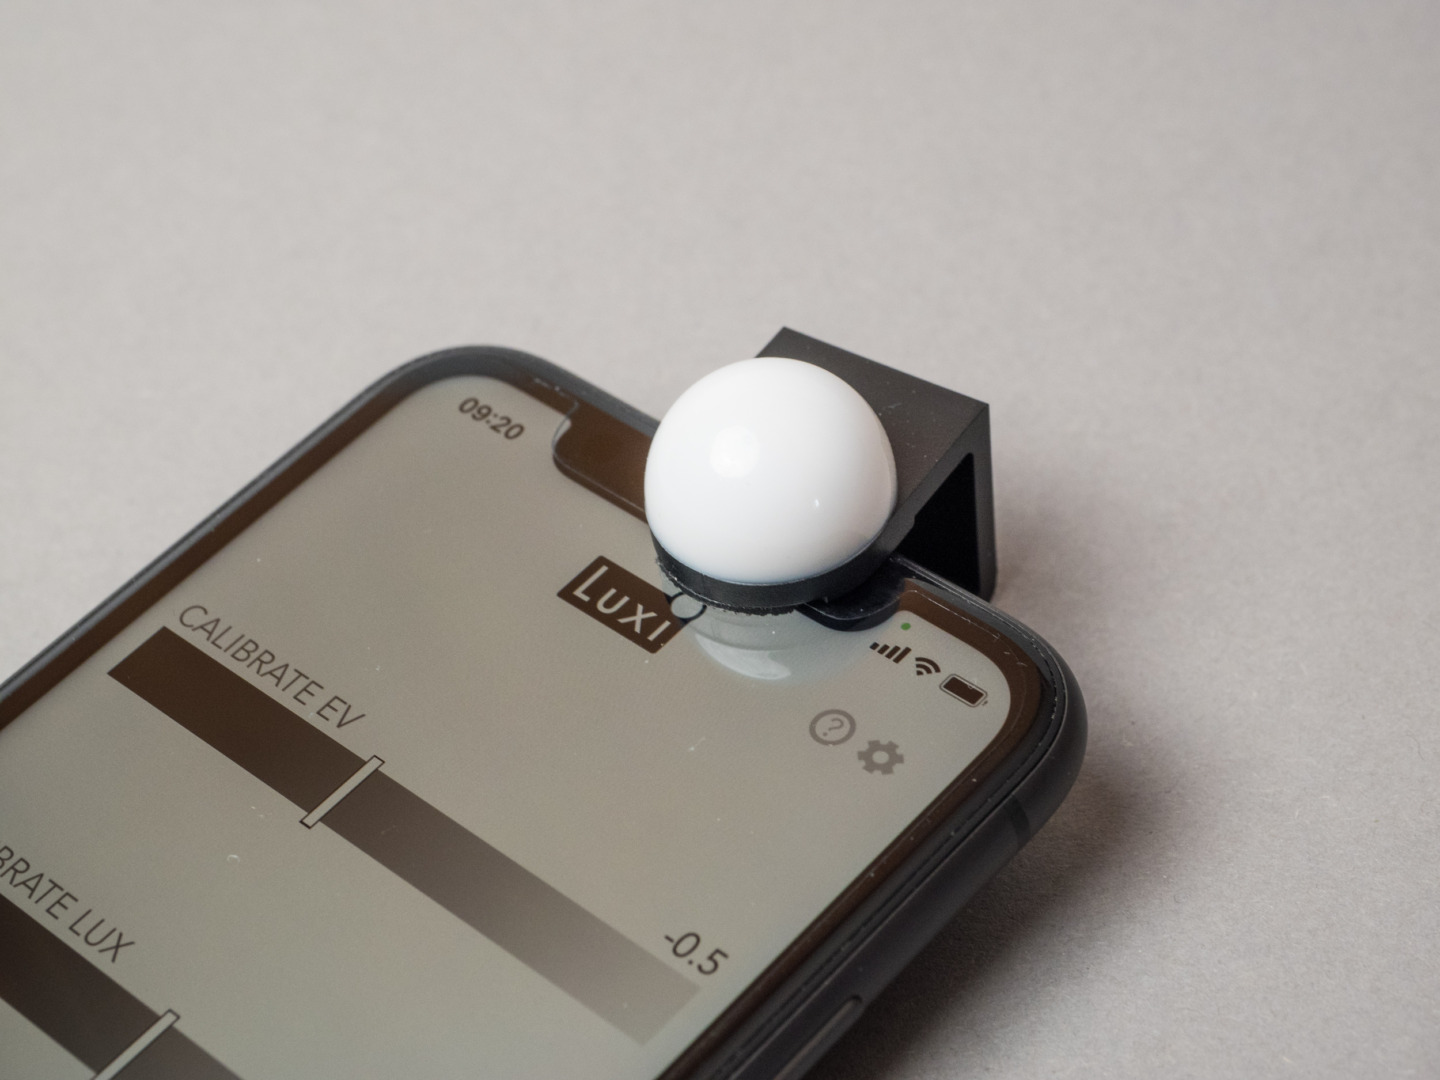
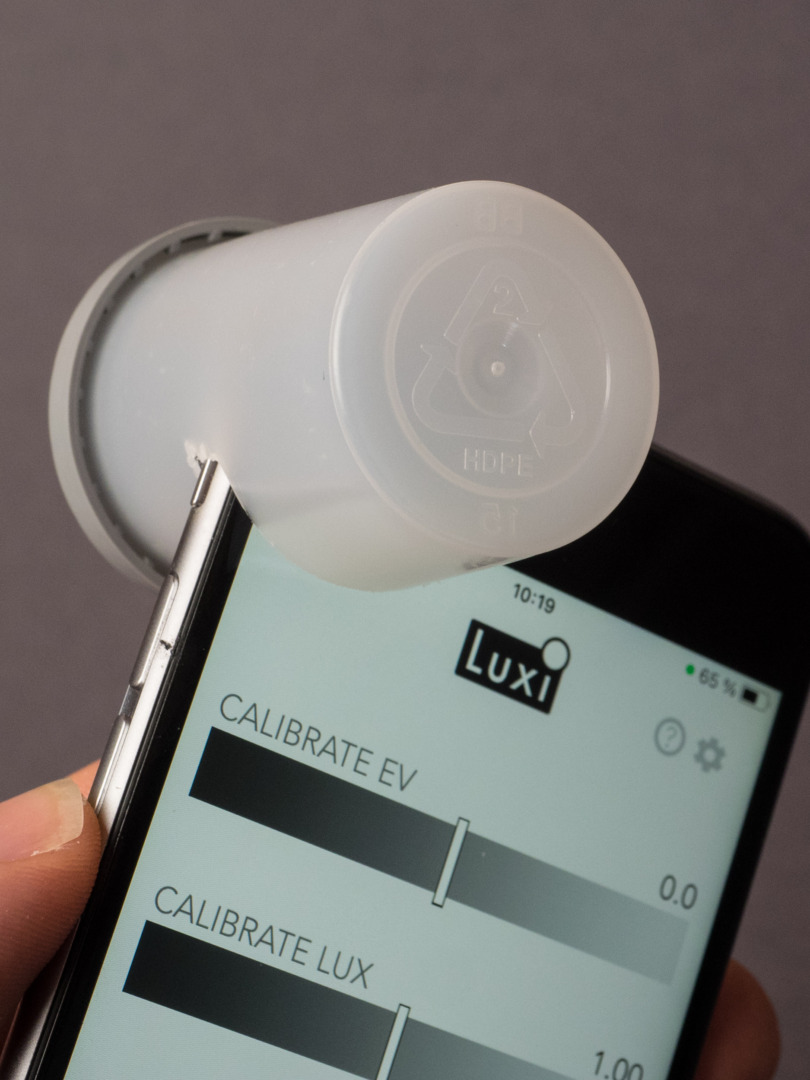
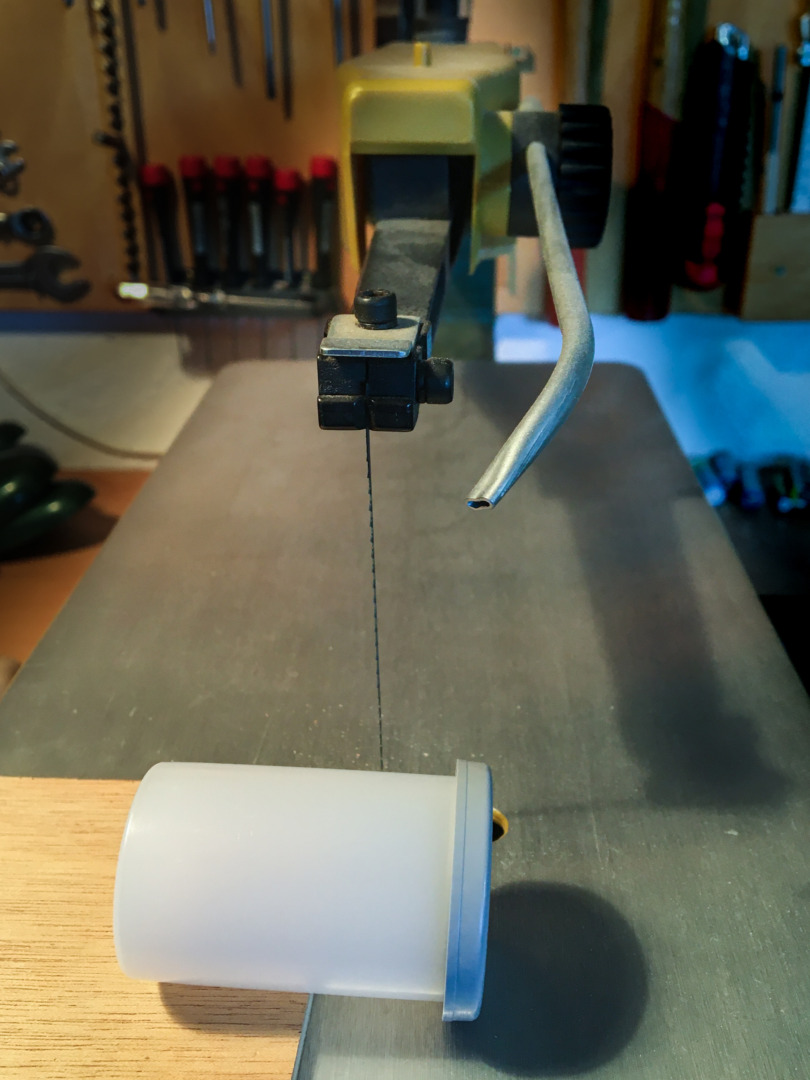
The diffusor itself is a plastic device consisting of the opaque half-dome itself and a simple mechanism to clip it to any smartphone. It is held in place by a spring clip (you might have to remove the protective cover of your phone). All this is not really exciting, but it works. I think other solutions might do the same jobs especially because you can adjust the app depending on the diffusor you are using. I made an attempt with a DIY solution based on an old opaque film container (Kodak). It seemed to function decently.
The original Luxi diffusor seems to be hard to get at the moment. It was once a Kickstarter crowdfunded project (back in 2013, according to this source) but the makers say they are out of stock. Luxiforall.com appears to be a non-profit project and I do not know for sure if it is still active. Their latest manual speaks of the iPhone 4 and iPhone 5. Be it as it is, I managed to get a brand new diffusor from the German online retailer Enjoyyourcamera for €23, and as of writing, they seem to have some more available.
All in all, the Luxi app is an interesting solution with the additional diffusor cap. It gives you surprisingly exact readings of the light from almost all directions (in fact, the half-dome is not smaller than the ones on most hand-held meters). I tested it with an iPhone 6S and an iPhone 11 and worked very well with both smartphones. But be prepared to invest some time in calibration work. iPhone cameras have become much better since the Luxi project was launched, but they are still not made for this kind of light measuring. You can get the Luxi here in the app store, and you will find more information about the project on this site.
A small digression: How accurate are external meters?
Some photographers have not had particularly good experiences with external light meters. Perhaps that’s why you keep reading of doubts about how accurate light metering with such devices actually is. To put it in a nutshell: With a correctly calibrated light meter, you get at least as accurate results as with the most modern algorithms that are programmed into current cameras. What’s more, the results are much more transparent in how they are obtained and much easier to reproduce.
The most frequent reason for faulty measurements is undoubtedly user error. If you don’t work with an exposure meter permanently, you have to rethink the way it is correctly used every time. The risk of a measuring error is particularly high when measuring the object, which is not carried out through the lens and is usually done by taking a rough aim (here, smartphone apps have an advantage!). Spot exposure meters with an optical viewfinder are a great help here: you can see exactly what you are measuring.
I have tested the light meters and the light metering apps presented here on a small test set-up I built myself, which does by no means claims to be scientific. I used a test shot with the Leica M10 as a reference, which I repeated until I had a result that I considered perfect. Subsequently, I noticed that the measuring results differed somewhat between the individual models, but they were surprisingly consistent within one device – with changing lighting conditions, the measuring results were changed relatively.
Conclusion: Exposure meters are usually very accurate, but each one is a little different. That alone is a good reason not to work with many several devices in parallel, but to commit to one model and practise until you have developed a secure feeling for it (just as you do with the exposure metering and management within a camera).
Which one is the right meter for me then?
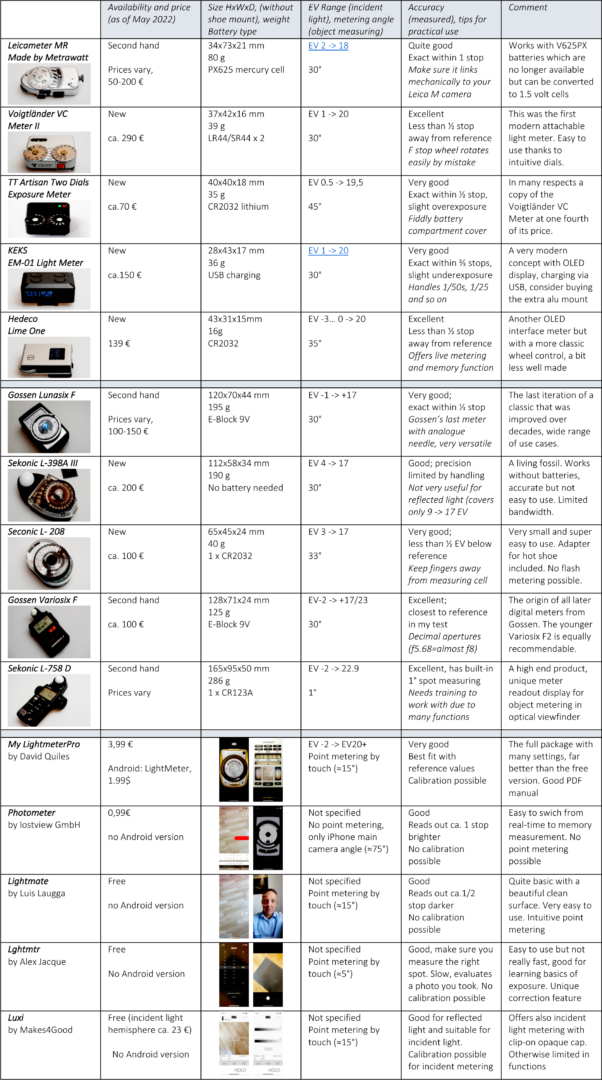
This synopsis might help you to find the light meter that fits best your needs. Apart from the question of how much you are able or willing to invest, your use cases should be the most important points to consider. If you go for a separate light meter, I encourage you to keep open the option of also applying incident light measuring. If not now, it may be useful at a later stage. So, a hand-held meter could have advantages over an attachable one.
A good light meter might serve you for many years or probably even decades, in any case longer than a digital camera. This makes the investment sensible. Both a sophisticated hand-held light meter and the simplest app will help you to understand the exposure triangle with shutter speed, aperture and ISO value even better – as I found out, even if you are an experienced photographer.
In any event, I have firmly resolved to use the light meter more often again. Especially a vintage light meter with a nice needle readout increases the fun when working with an old or even very old camera. And also for digital work, these little helpers can be more useful than you might think, especially in studio situations. But I will also keep the one or the other light metering app on my phone.
That’s it for our series. I wish you every success, always decent exposure, and as the German-speaking photographers greet each other: “Gut Licht!”
What do you think? Do you like light metering apps? Is a smartphone app a viable alternative to an attachable or hand-held meter? Did you occur precision or reliability issues? Do you prefer a clean looking app or something more playful? Were you ever tempted to take the images with your smartphone right away as you already had it in your hand, instead of using your old and slow film camera? Do you have a favourite or a special light meter app suggestion for Macfilos readers?
Decent exposure: The Macfilos mini-series about light measuring solutions
Part 1: Why light meters are useful or necessary and which camera-attachable light meters are recommendable (with reviews of Leicameter MR, Voigtländer VC Meter II, KEKS EM-01, Hedeco Lime One and TTArtisan Two Dials exposure meter. You can read this article in german here on Messsucherwelt.
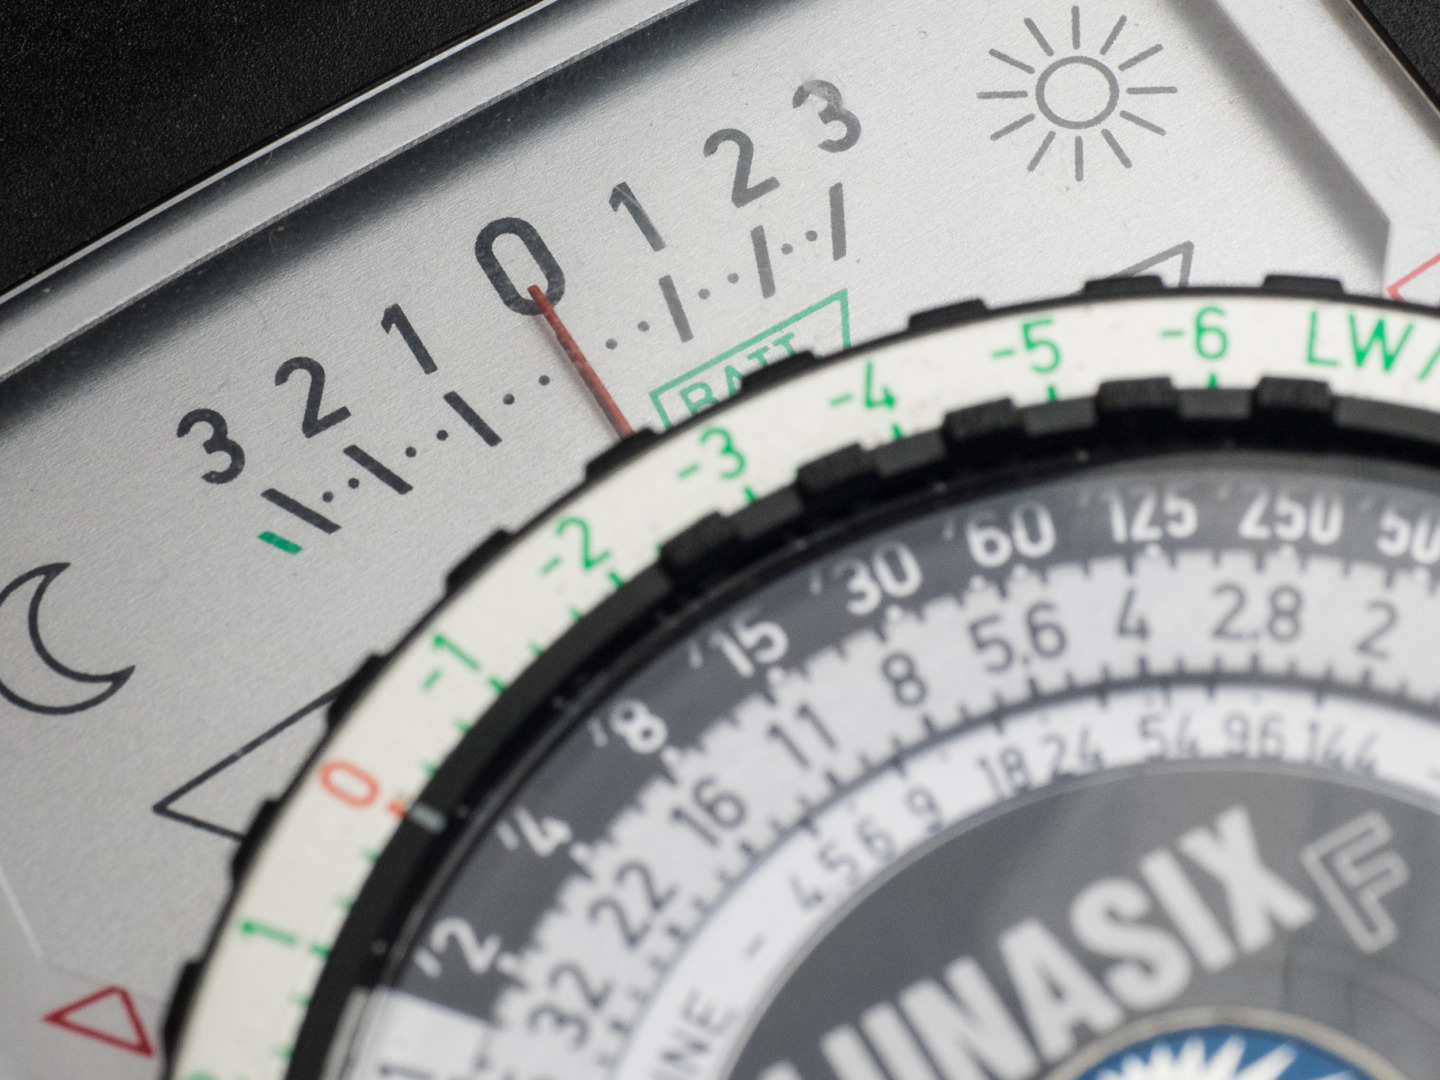
Part 2: Why incident light metering is better and what other advantages hand-held light meters have (with a review of five hand-held light meters: Gossen’s Lunasix F and Variosix 3 and Sekonic’s Twinmate L-208, Studio Deluxe L-398A, and L-758D (if you prefer this article in German, find it here on Messsucherwelt).
Part 3: How you can work with a light meter app for your smartphone and which chances and risks you have to know (with reviews of MyLightmeterPro, Lightmate, Lghtmtr, Luxi and Photometer – that’s this article). Plus: The complete overview of all 15 tested solutions (again, there is a German version on Messsucherwelt).
Make a donation to help with our running costs
Did you know that Macfilos is run by five photography enthusiasts based in the UK, USA and Europe? We cover all the substantial costs of running the site, and we do not carry advertising because it spoils readers’ enjoyment. Any amount, however small, will be appreciated, and we will write to acknowledge your generosity.
Thanks a lot. This series were VERY helpful. I started analogue photography again after an almost 15 years pause. I friend gifted me a WeimarLux, I thought you’d include it in your evaluation… I’m using the lighmeter pro app, which has more than I asked for. Thanks again for the great review.
A section with apps for the more numerous android platform would be in order.
Hi Antti, I’m sorry not to be able to help you with that as I have no Android device. But you are right, this platform is more popular, maybe even among serious photographers. Perhaps another author will take on the task one day. JP
Thank you, Joerg-Peter Rau, for this comprehensive overview of light metering apps for iOS! Your article is a valuable resource for photographers who want to make the most of their iPhone as a light meter for film photography.
The variety of apps you’ve covered, from Photometer to MyLightmeterPro, offers something for every photographer’s needs and preferences. It’s impressive to see how smartphones have evolved to become versatile tools, and using them for light metering is a clever adaptation.
The convenience of always having a smartphone with us makes these apps a practical choice, especially for those of us who may occasionally forget our dedicated light meters. Your insights into the advantages and limitations of each app are particularly helpful in making an informed choice.
I appreciate the effort you put into providing this overview, and it will undoubtedly help many photographers in their quest for accurate exposure. Keep up the excellent work!
Thanks, you’re welcome. I hope it encourages the one or the other to give a second lease of life to a film-loading camera. Or it may help newcomers to understand the laws of exposure – an indispensable skill for anyone who want so be a serious photographer. JP
Having downloaded my Lightmeter Pro I solved the incandescent light issue with two pieces of Scotch Magic tape, one piece reversed, so as not to smear the phone lens, and another to hold it in place.
Worked great (used the same trick on compact cameras with no EV adjustment available, or dampen their flashes a tiny bit)!
No idea if Scotch Magic still is available, my roll is about 25 years old!
For years, I had a camera with a very unreliable exposure meter (An Edixa Reflex, do you remember those?! Probably not). So I bought a Gossen, top-of-the-line, which eventually died in Lake Placid! Just fell to pieces, after years of very little use, as my next cameras, two Minox 35s, had very reliable exposure metering (A mode only).
So one built-in pleases me a lot, as does all the other things my iphone contains, but I rarely use it for photography, or as a phone!
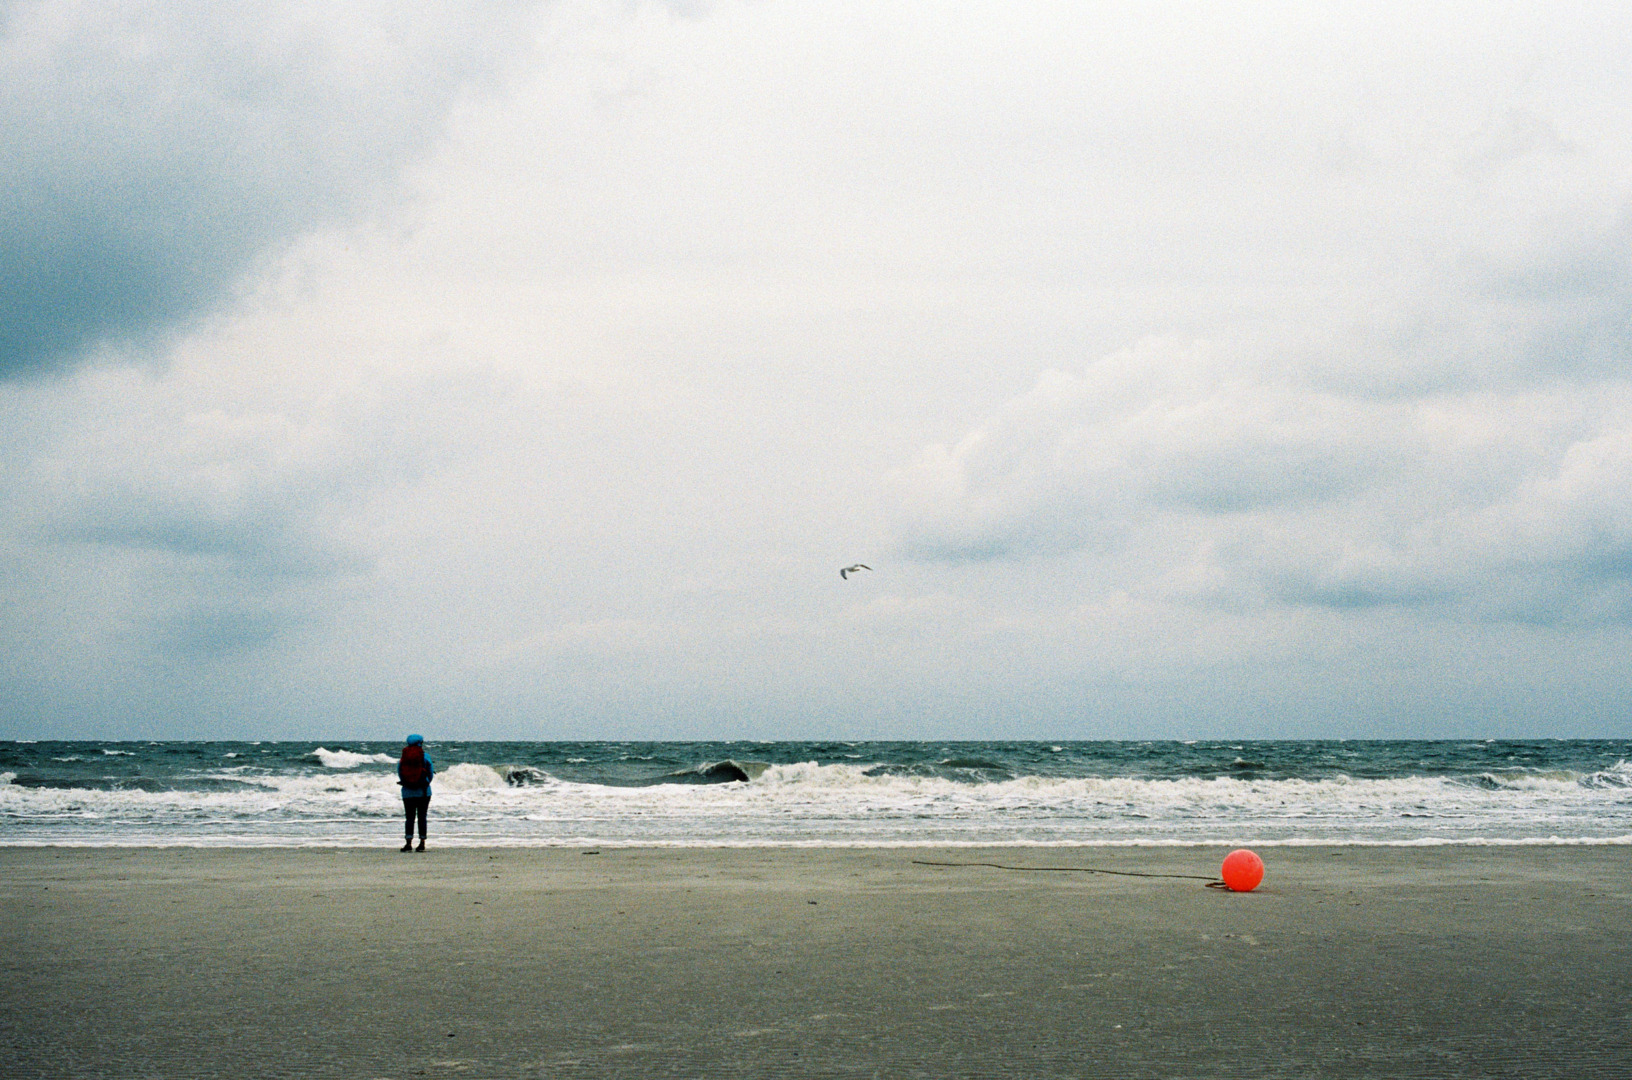
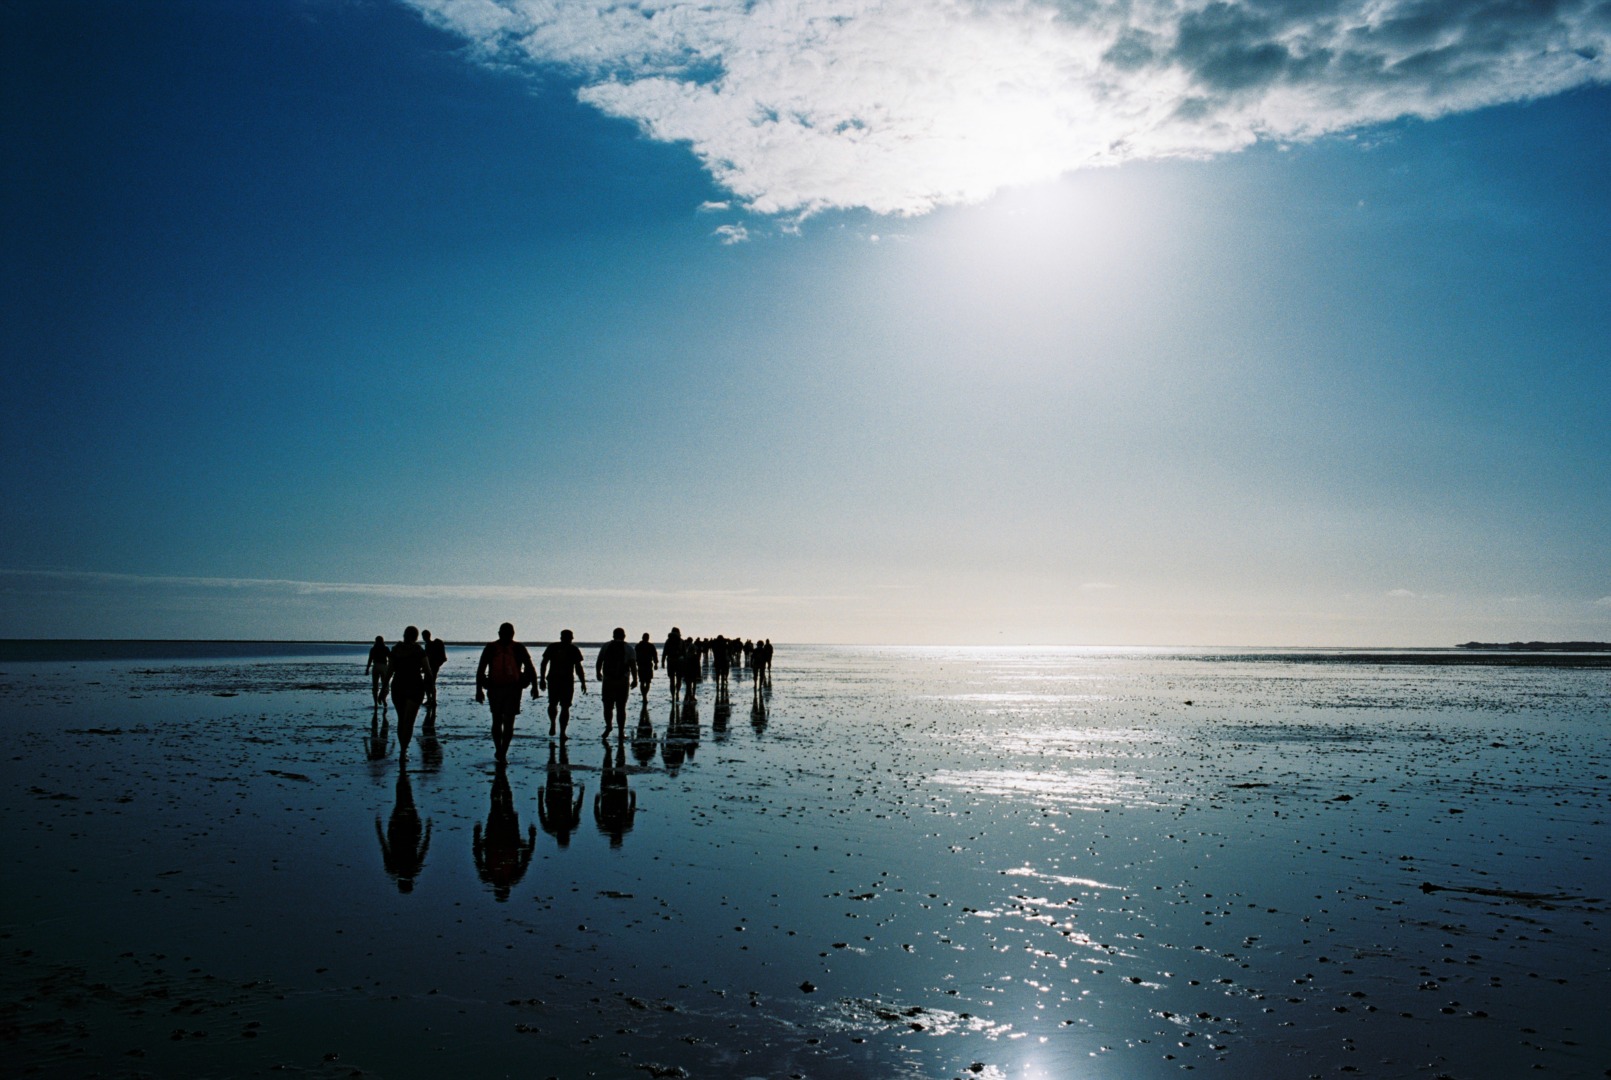
That last image is beautiful, strong, wonderfully exposed, with a depth looking into the scene.
Remembering previous images of yours on Macfilos, it is evident that you do like shooting into the light. To my eye this is one of your best.
And if you caught it on film after using a heritage light meter then more power to you.
Thank you for showing it.
Great series, Joerg-Peter. I have used most of the illustrated types, but the important point is not what meter you use, but how you use it. It is actually the same with built-in meters, where many people to struggle how to make the best use of them. Modern matrix meters are probably the most popular these days where the camera does all the thinking. Today, with digital post processing, most people are able (or are they?) to compensate for ‘exposure mistakes’. In the old days such compensation generally required considerable darkroom skills which involved much more time and learning to implement. Spot metering was very popular in the era of colour slides, but I hear much less discussion about it these days. The other issue is also knowing your exposed material, whether it is negative or positive film or colour or black and white or a digital sensor, whether it is colour or monochrome.
One final thought is that many of the most admired historical photographs were made without the use of an exposure meter of any kind.
Great work, Joerg-Peter.
William
Thanks, William,
you know how much I appreciate your feedback. Indeed, skilled photographers were and still are able to expose their films without using a meter. And, quite right, just fiddling around with such a device is completely useless. But I do think that a good light meter can be an excellent teacher, and alone for this reason they have their justification to this day.
Technology can be a great help but it is not guarantee for good results. It it were so, there were literally no bad digital images (considering the fact that you have so much control over the process and can to in-situ result checking at any time). For this reason alone it is advisable not to change gear too often.
There were times when Kodak Tri-X, exposed with a standard yellow filter and processed in D76 was almost an extension to my eyes, so familiar I was with it. Working with different material (fo example because colour slides were needed) was a real challenge back then.
Probably we are well advised to become a bit more frugal again. It will do no harm to our images. The sales departments will not love to hear such thoughts but keeping things simple can really help to get focussed.
Jörg-Peter
Thank you for the excellent article by the way, especially the “which meter is right for me?” part which is very helpful and time-saving indeed!
Glad to hear, Stephen, that you found the articles helpful. I can fully understand that you find more soul in a real light meter as opposed to a smartphone app. However, I took on a pragmatic view on it, just the way Mike describes it. JP
I think there’s something a bit sad about how we are trying to use apps to turn our smartphones into a bicycle instead of just using a bicycle. It’s probably just me :). While a phone is a handy device I don’t feel compelled to do everything with it.
The question should be…
“Were you ever tempted to take the images with your smartphone right away as you already had it in hand, instead of using your old and slow film camera?..and…if so, were you happy with the resulting images?
For myself, If I was completely happy using my smartphone to take images, then I probably wouldn’t have bought a SL2s last year ( which I am happy with ) My smartphone is usually thrown into my bag somewhere. I usually have to dig it out.I might be old and slow but I know what I like.
I’ll also say that it’s just as easy to have a compact camera in hand with built-in light meter, as it is a smartphone.Probably has a better grip too.
My iPhone is my constant companion and it replaces dozens of older dedicated devices — calculator, scheduler, project manager, typewriter, accounting machine, television, book, even a camera on occasion. The one think I seldom need it for is to make telephone calls. So in reality the term “smartphone” is now an archaism and a misnomer. Adding in the ability to act as a light meter is just one of the thousands of tricks performed by the modern “smartphone”. I rather like the German name for the device “das Handy”. It sounds English but isn’t. And it is pronounced Hendy to my ears. What it is, though, is a more accurate description of the device. It is indeed a handy. Perhaps one day it will return to its English roots and we can all have a handy in our pockets.
Stephen, you are absolutly right in my opinion. But then on the other hand I once was out on a dogwalk on a wonderfull foggy day. I brought my F3 with me and a role of HP5. Unfortunately I had forgotten to check the batteries … thus I was limited to a mechanical 1/80 sec which the F3 can realise without batteries and had no metering. Because I didn‘t want to guess exposure I installed in the middle of nowhere an app on my iPhone. And what shall I say? I got away with some nice and correctly exposed black and white images of that day. So even if IIike my Lunasix better, which I bought in the early 90s I think now that these apps can save one‘s day.