

Taking pictures of celestial objects is a specialised, and in many ways, challenging corner of the photography world. But, the rewards for all those cold dark nights spent staring up at the heavens, are spectacular images of the most remarkable sights to be found in nature. This is an account of how my exploration of astrophotography began, and where that journey has led me so far.
Film and early DSLR
I’ve always loved astronomy. I experienced the same epiphany as countless other youngsters, becoming hooked when I first pointed my cheap beginner telescope at Saturn and saw its magisterial rings. Later, when a young adult with a career and money of my own, I purchased a “real” telescope: a 10-inch Schmidt-Cassegrain.
In those early days, astronomy for me was all about the enjoyment of looking through a telescope at the countless wonders in the night sky.
Since I was also a photographer, albeit of earth-bound subjects, I eventually turned my attention to capturing images of the objects I was seeing through my telescope. Back then, as with all photography, everything was done with film. Early CCD (charge-coupled device) sensors were primitive, very expensive, and mostly out of reach of the everyday consumer.
The process of imaging the night sky was also much more manual and difficult. It was more art than science, requiring a great deal of patience and technique.
Due to the difficulty of using colour film for long exposures of very faint objects, I was mostly limited to black and white photography. Though, at least I could develop the film and make prints in a home darkroom.

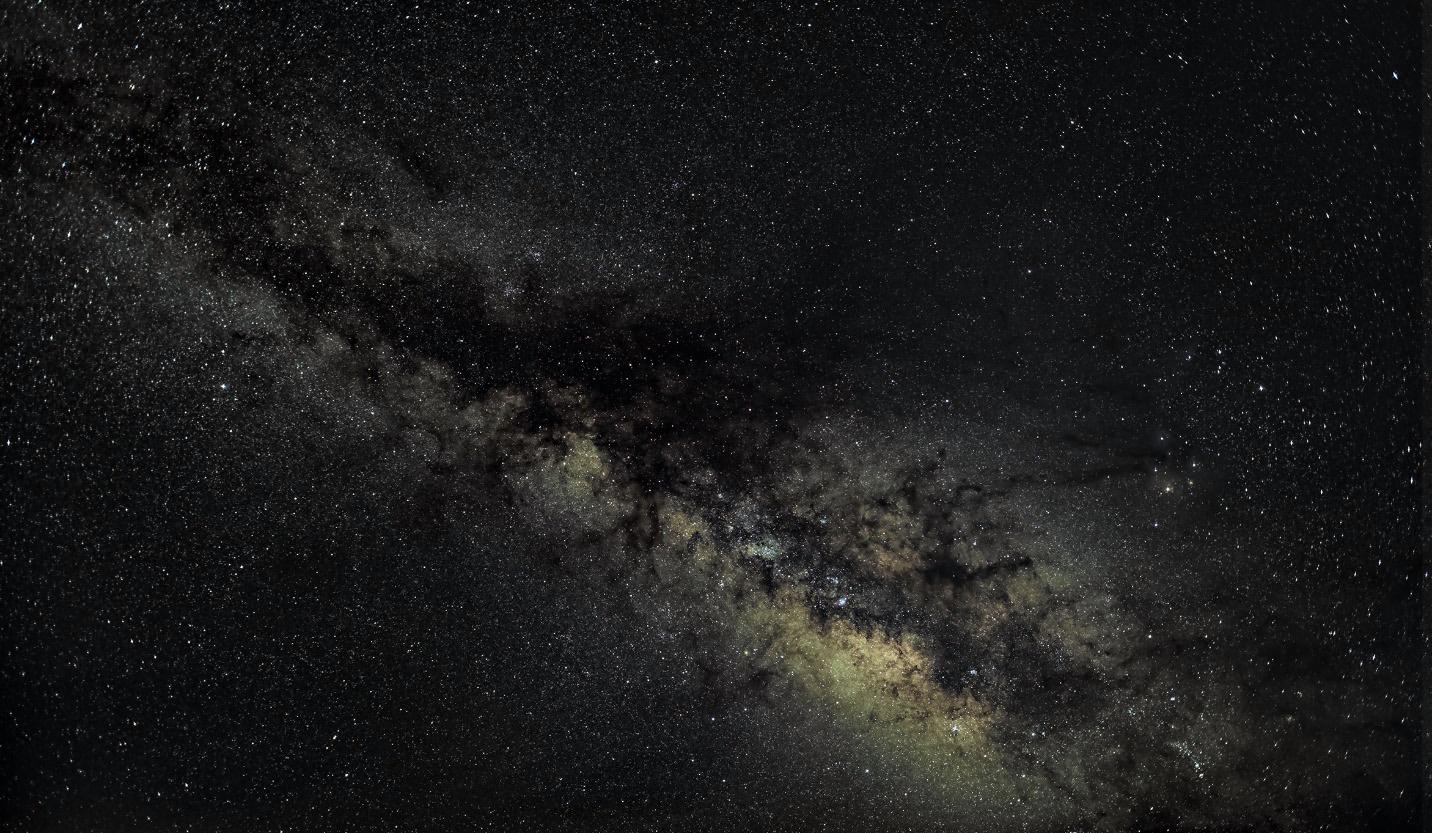
Occasionally, I would take pictures of less frequently visible objects, such as comets. Or, now and again, I would shoot a Milky Way picture if seeing conditions were exceptional. The simplest approach to producing images was “piggybacking”. This entailed mounting a film camera to track along with the telescope, capturing longer, relatively wide-field, exposures.
Although I later bought a first-generation Canon DSLR, boasting a whopping 6.3 megapixel sensor, I did not incorporate it into my astrophotography. I loved being free of film, but used it primarily for general daytime photography and holidays.
Modern DSLR
A couple of years ago, I decided to “up my game” and get back into astrophotography. So, I purchased a Canon full-frame DSLR with some good lenses and a tracking mount. This enabled the camera to track the motion of the stars across the sky for longer exposures.
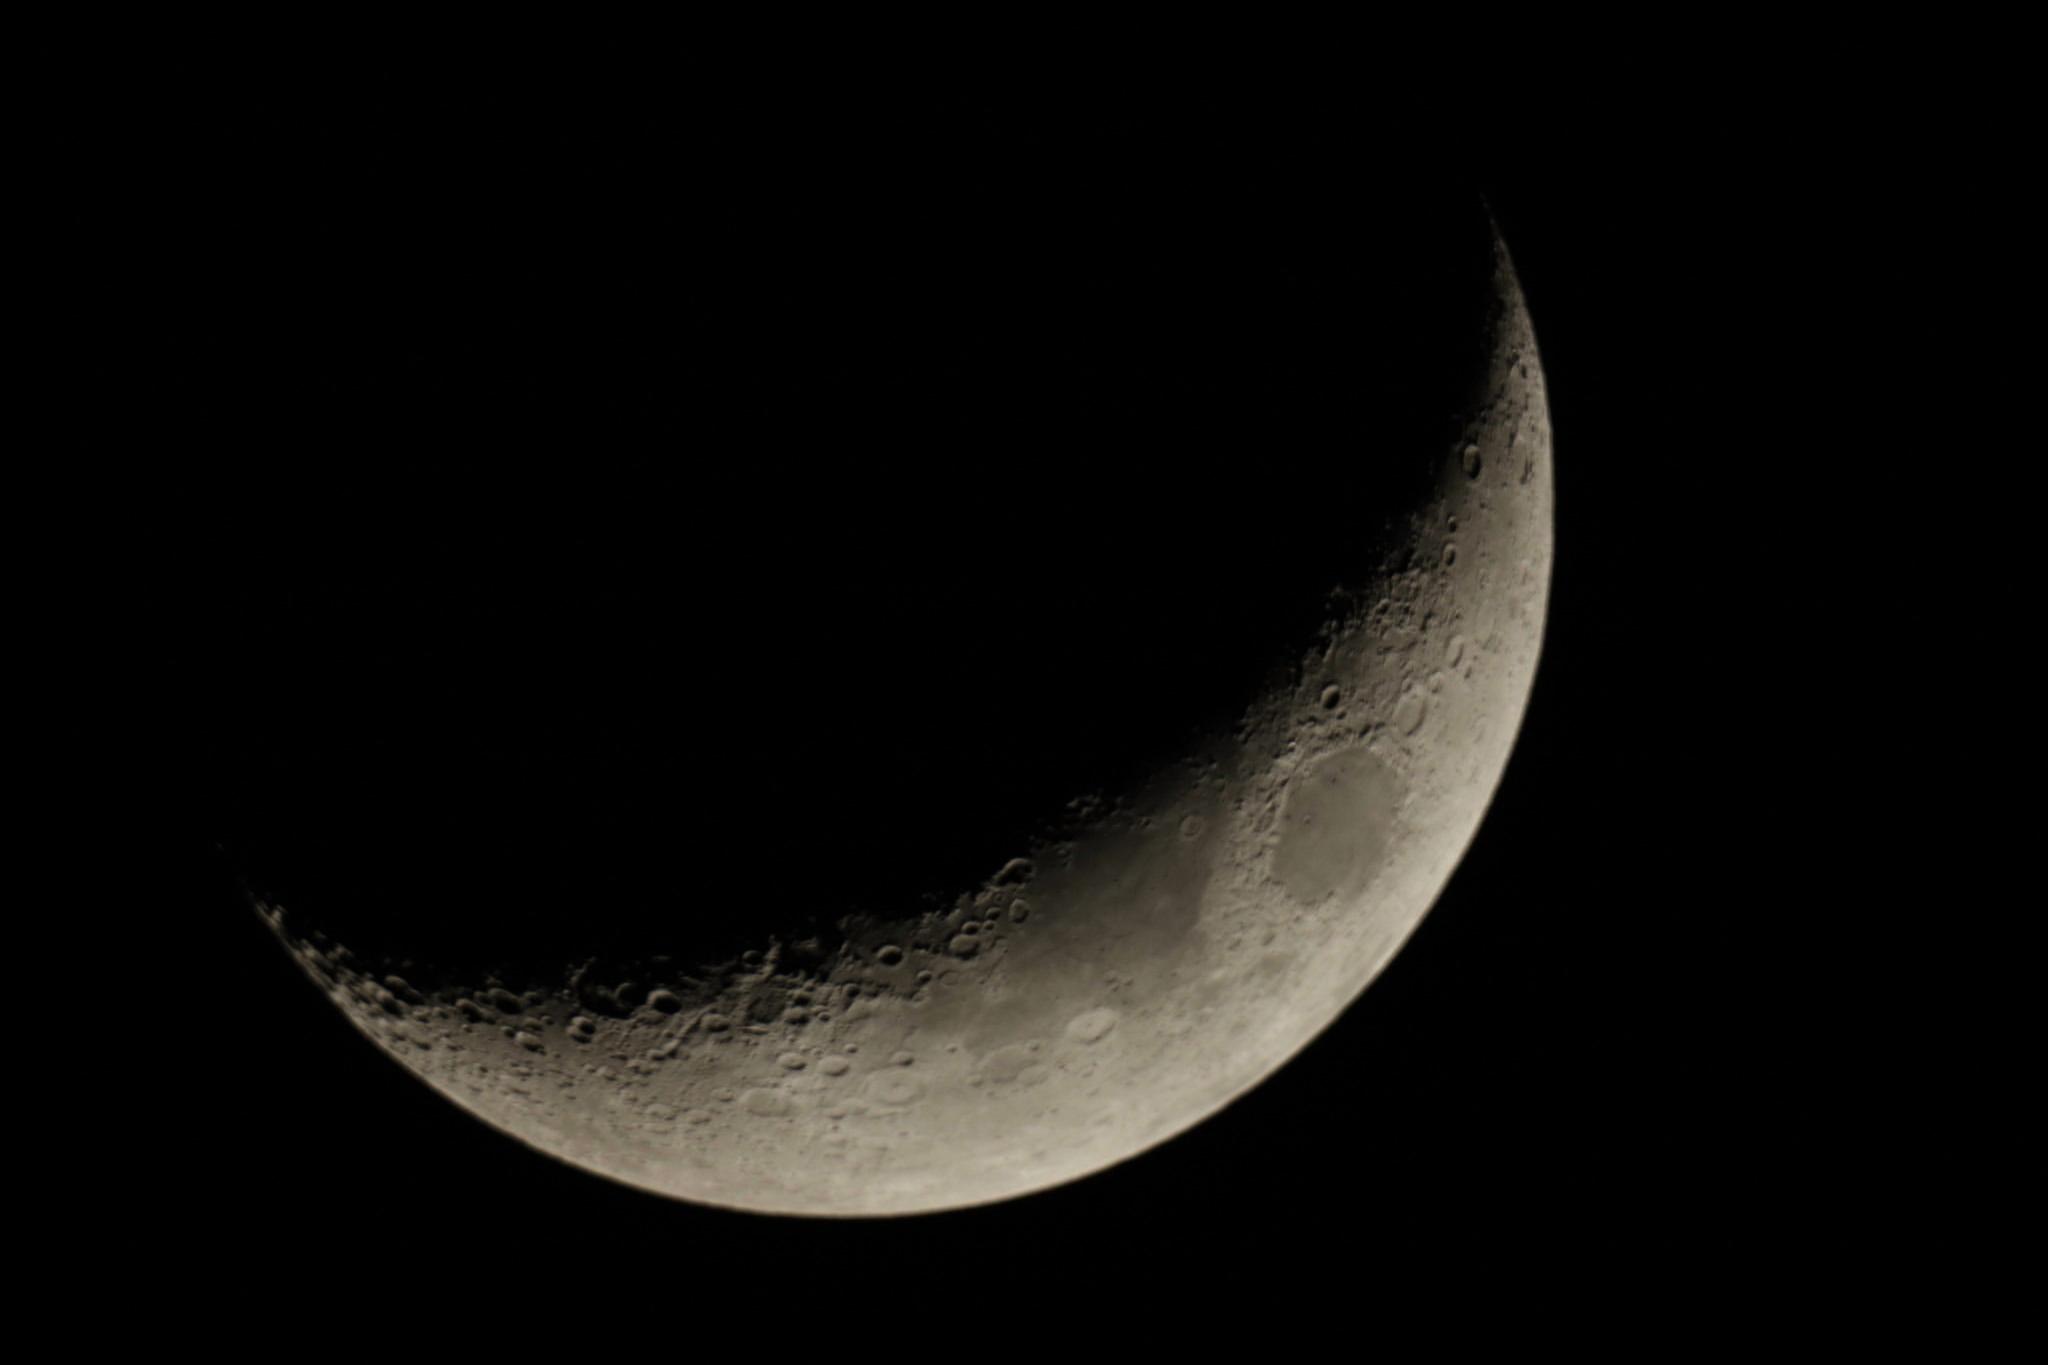
I also resurrected my old telescope, so I could take pictures through it. It took some experimentation with ISO settings, aperture, and exposure time. But I was astonished with the quality of the results.
I was new to a lot of the specifics of using a DSLR like this. But, my background knowledge served me well, making the learning curve much less steep. It was a whole new world of flexibility with digital processing, but I was still more of a “dabbler” than serious about it.
Nevertheless, using the tracking mount, I captured images through both the telescope, and a wide-angle lens on my camera.
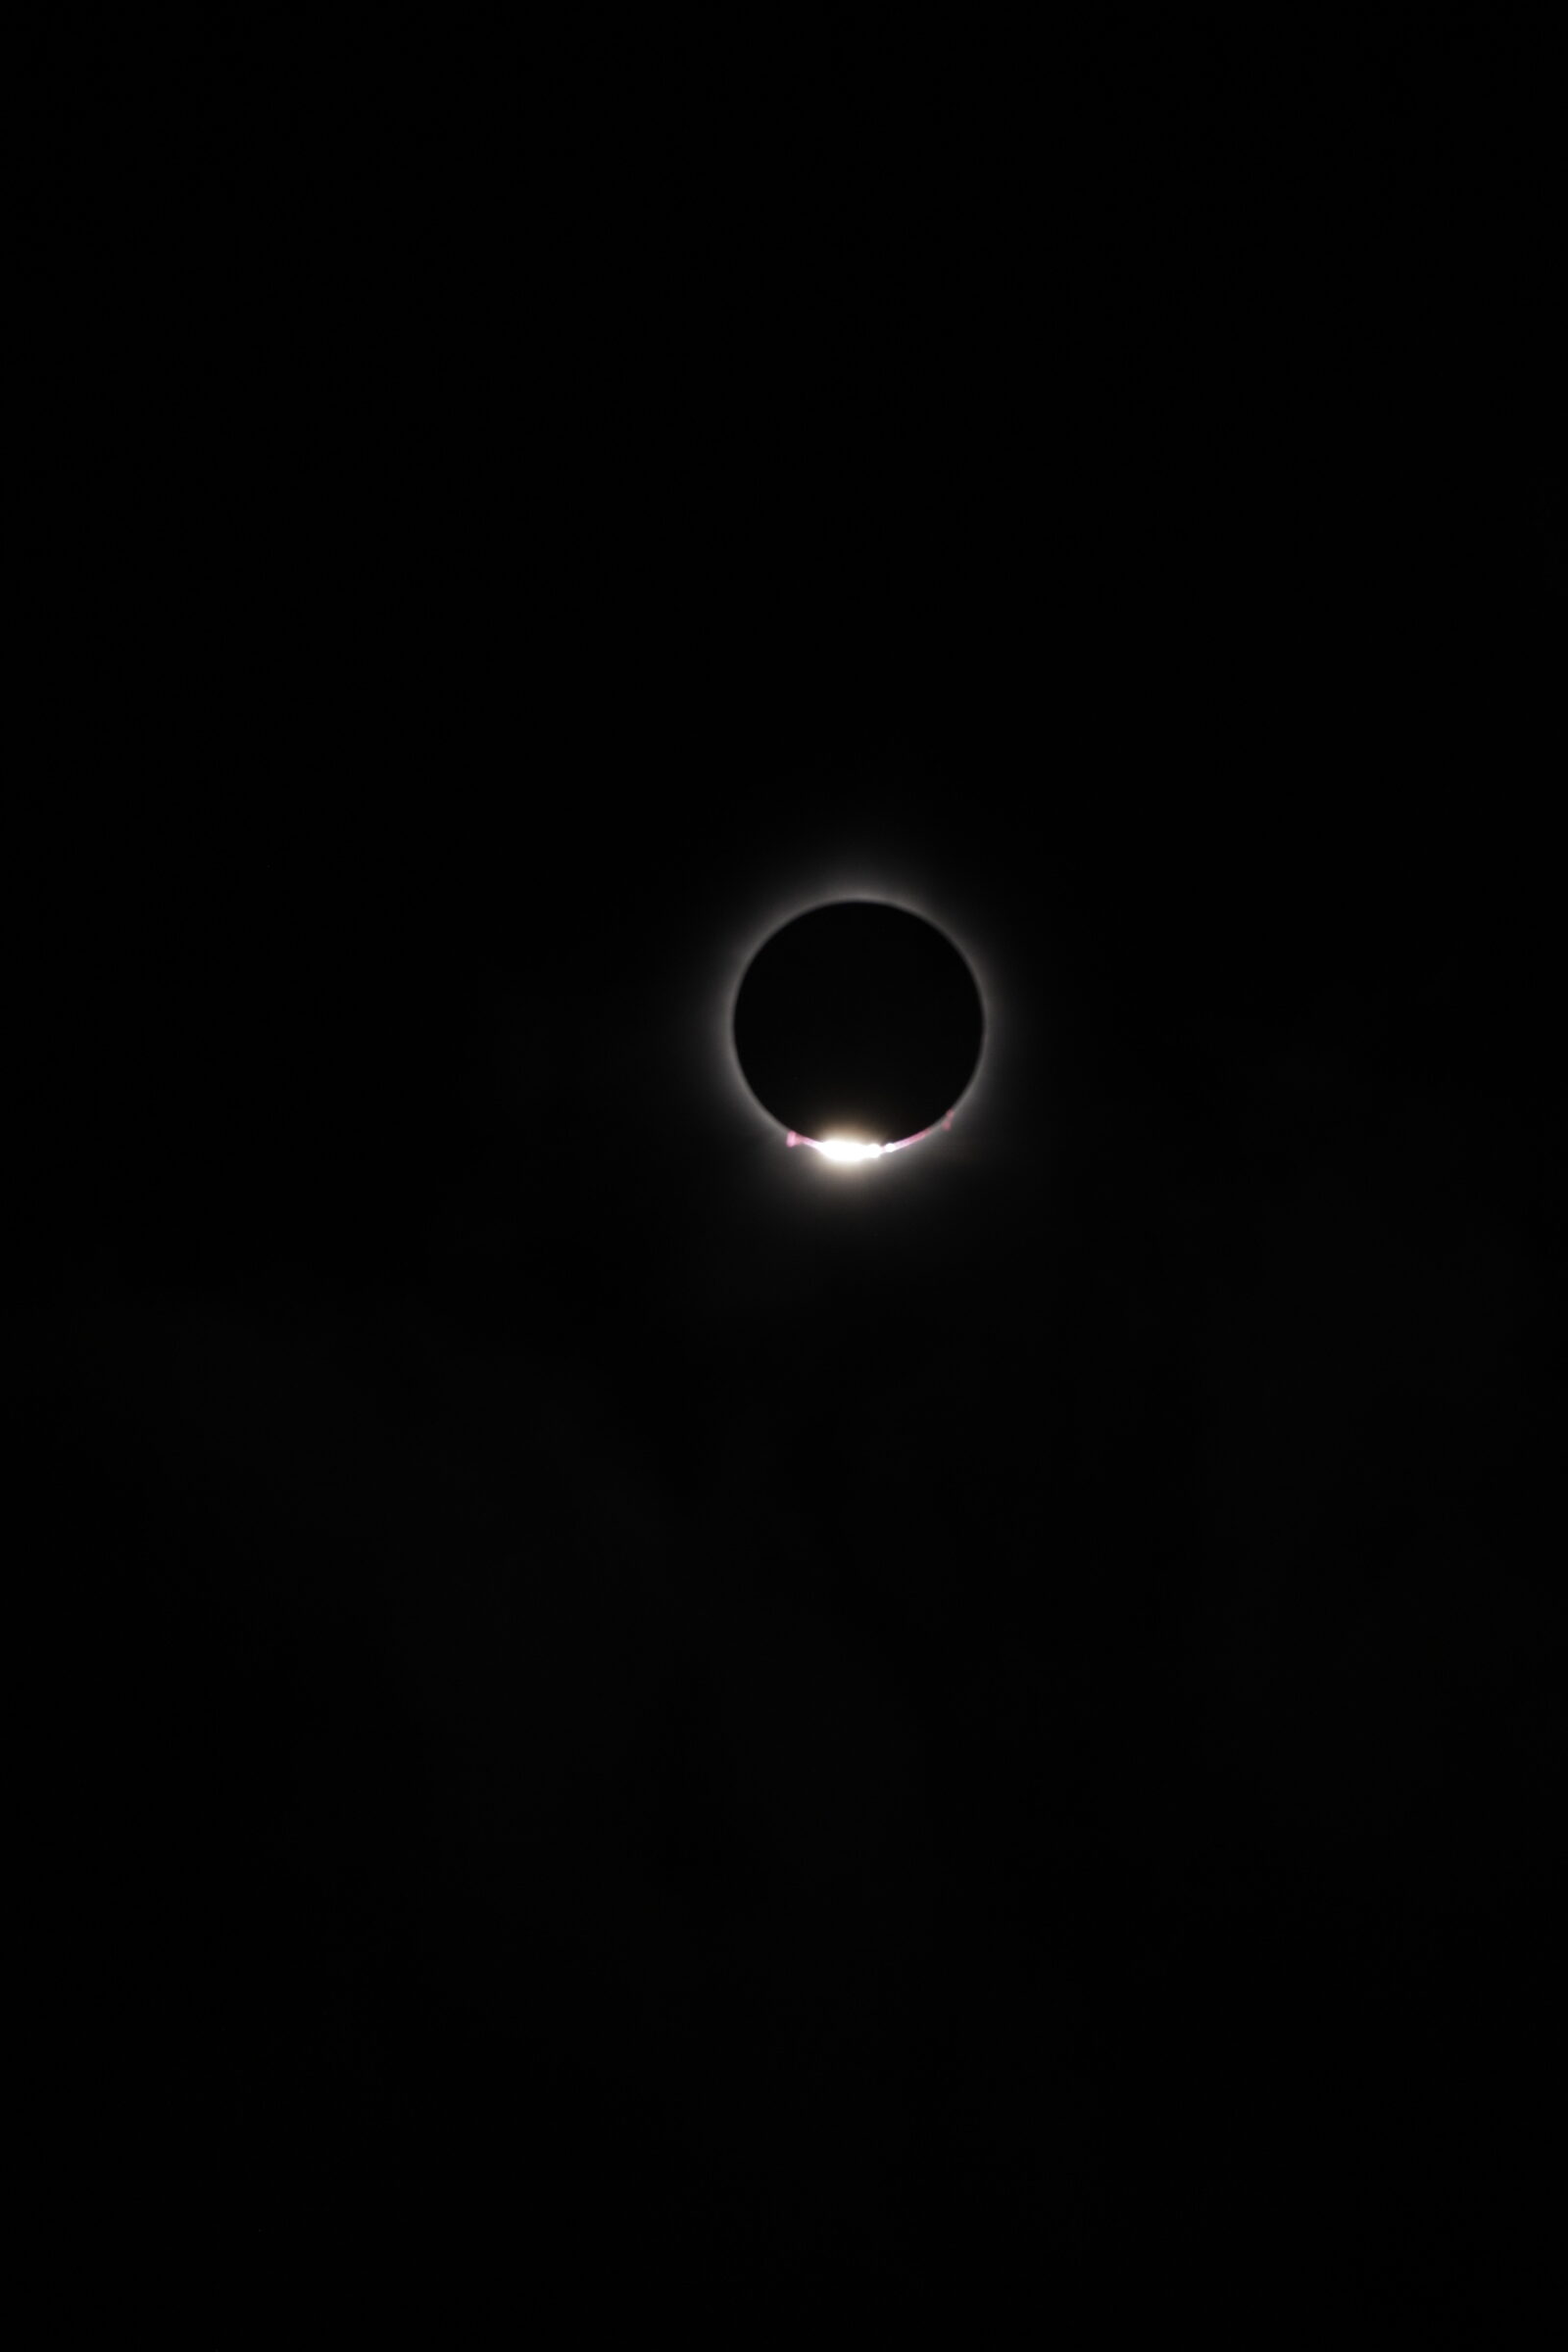
Total solar eclipse of 2024
One of my few genuine bucket-list items had been to see a total solar eclipse. Accordingly, I attended a big eclipse gathering in Texas, during April 2024. I had never before taken part in such an event. I was surrounded by serious amateur and professional astronomers and photographers, along with lots and lots of vendors.
It was a three-day star-observing party, with presentations, culminating with the day of the eclipse. I took some really nice eclipse pictures with the DSLR and a tracking mount.
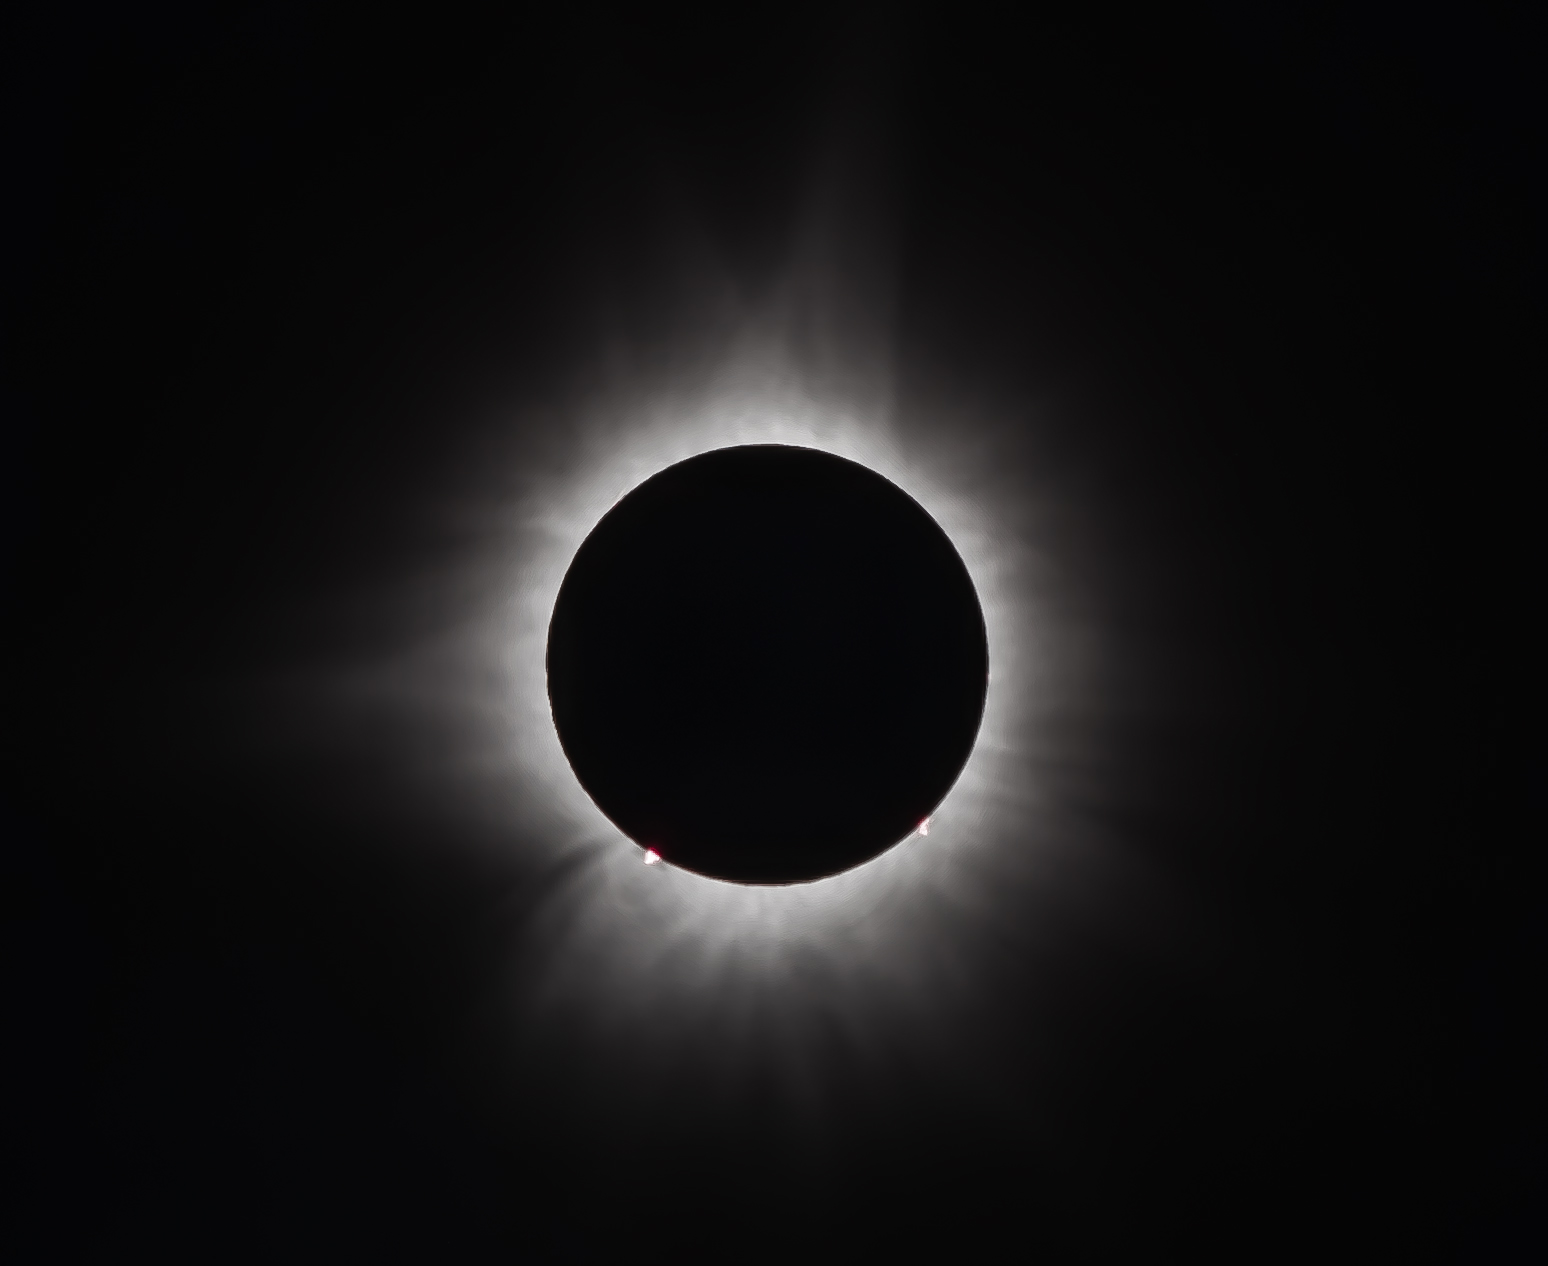
The knowledge and equipment on display there, together with the remarkable results people achieved, was astonishing. This was all it took to really light the fire in me to pursue astrophotography more seriously.
Within a month or two, I had a whole new astrophotography rig. This included a new telescope, computerised mount, dedicated cooled astro-camera, multiple filters, and so forth. It was daunting in some ways to learn how to use it all. But the knowledge and experience I had accumulated over the years with film and several iterations of DSLR technology made it a lot less arduous.
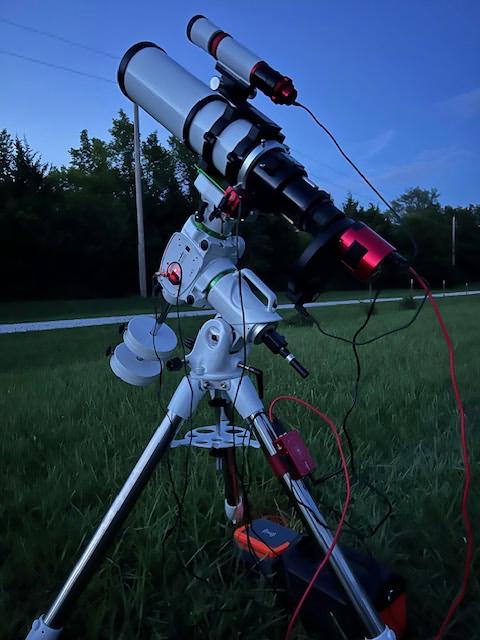
Moving to dedicated astrophotography equipment
Modern dedicated astro-cameras differ in many ways from DSLR or Mirrorless devices. They are computer controlled and generally don’t store any images locally, uploading each image to a computer as soon as it is taken. Higher-end models even have a system to cool the CMOS sensor to reduce noise. The sensors have exceptional efficiency and dynamic range.
With a few exceptions, consumer digital cameras are intended primarily for daytime photography. For example, they have a built-in infrared filter. However, this interferes with imaging of important wavelengths present in many types of celestial objects. Some enthusiasts modify their camera to remove this filter, but this impacts the daylight performance. Astro-cameras do not have this limitation.
In addition, astro-cameras are available in colour or monochrome versions. The colour versions resemble DSLR/mirrorless cameras in having a matrix of RGB filters.
A monochrome camera requires external filters and multiple separate exposures. So, the resulting colour information is created from separate images in post-processing. Monochrome cameras produce superior images because all pixels are used for each colour. A colour camera uses a portion of the pixels for each colour, resulting in a significantly lower overall resolution.

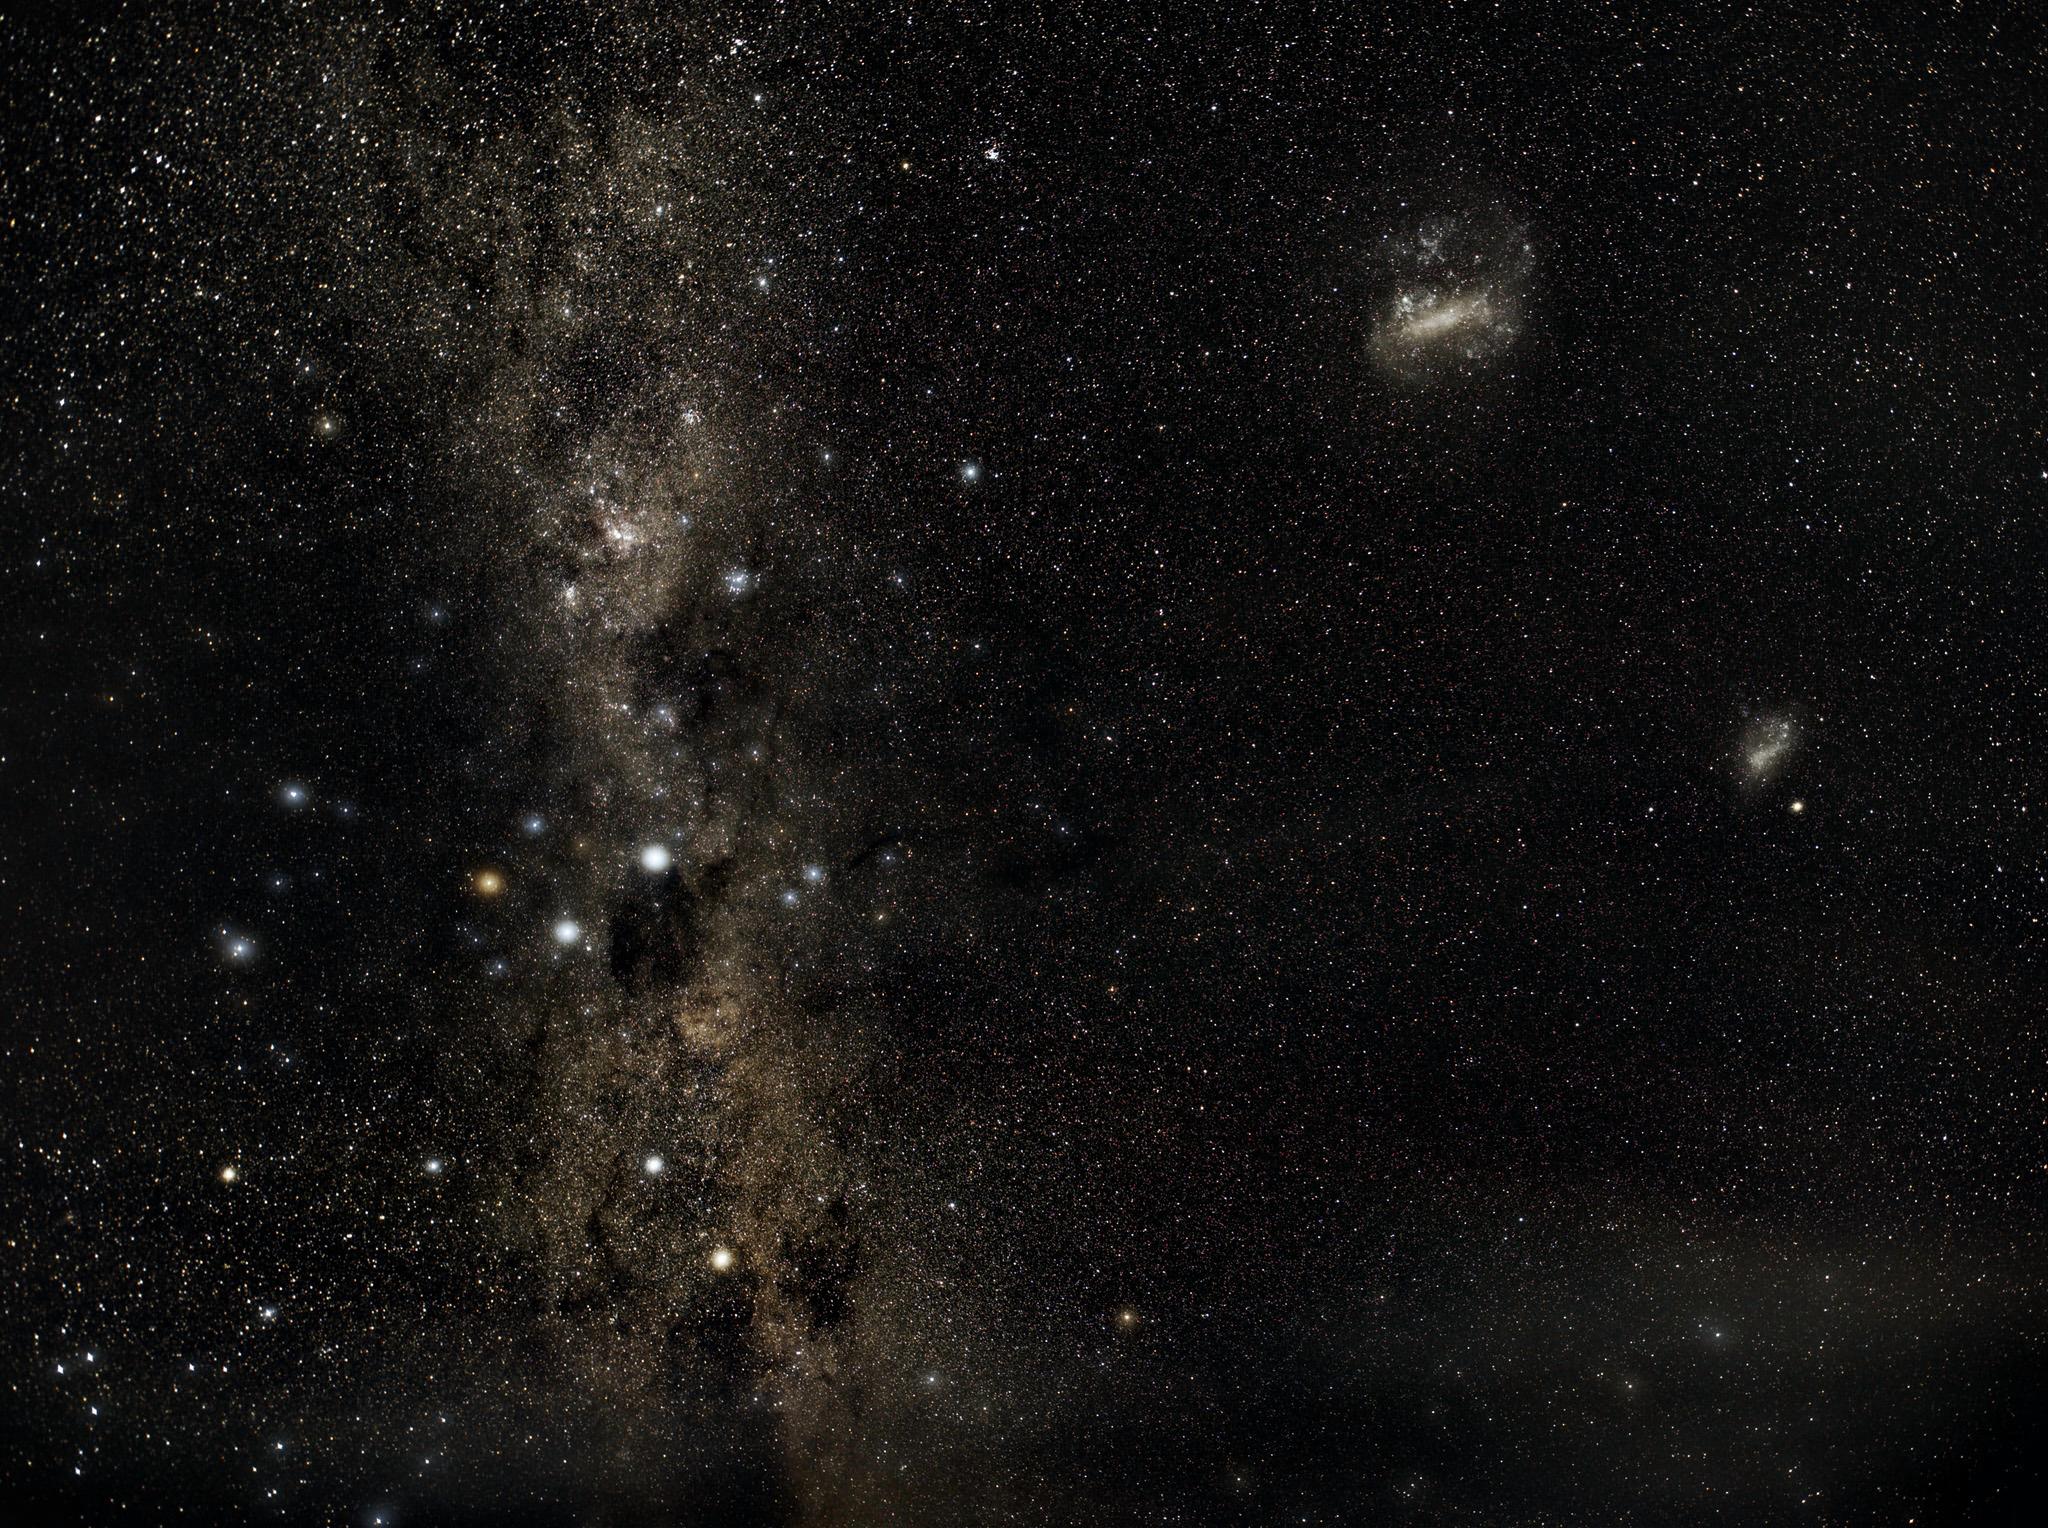
Recent trip to Patagonia – REALLY dark skies
I recently had the pleasure of travelling to Patagonia (southern Chile) and managed to get some Milky Way shots with my DSLR. It was a tough hiking trip, so just lugging around the DSLR with a relatively heavy wide-angle lens was a feat in itself (no room for tracking or tripods).
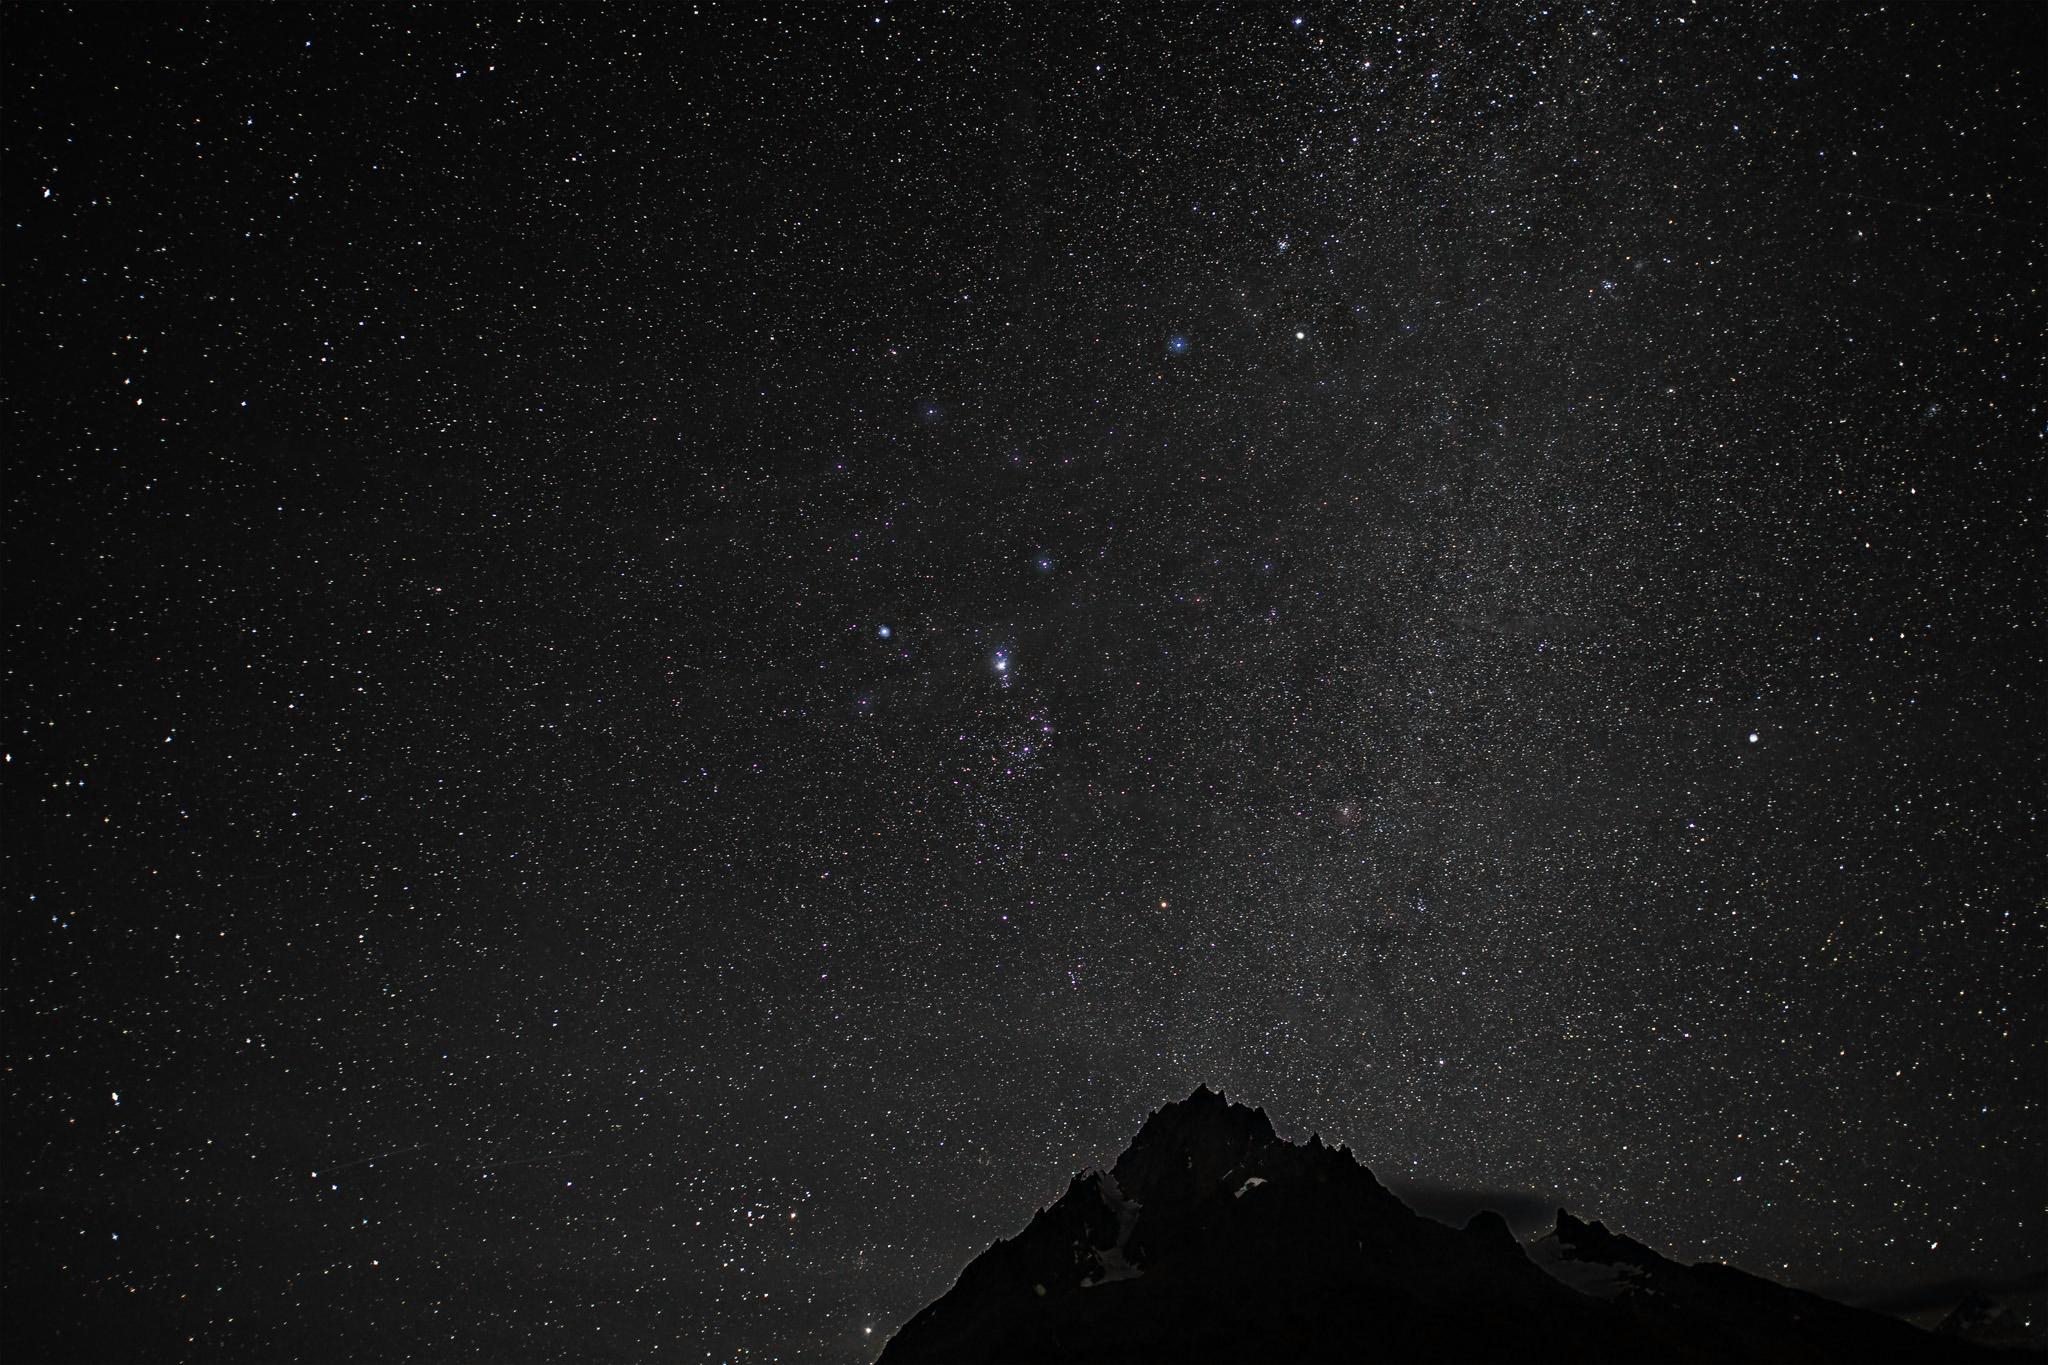
Because of the latitude and time of year, there were only a couple of hours of true darkness at night. I had my camera propped against rocks and wedged in bushes to get the right orientation!
A massive treat for me was to see the Magellanic Clouds for the first time. These are smaller satellite galaxies that orbit our own Milky Way Galaxy, visible only from the Southern Hemisphere.
I had long hoped to make it to a part of the world where I could see them. I was thrilled that they were close enough to the main portion of the southern Milky Way to appear in the same image.
Closing thoughts
It has been most surprising to me that it’s in post-processing, together with use of various astrophotography tools, that the magic happens, producing stunning final images. The imaging itself, regardless of camera, simply amounts to “data collection” for use in the post-processing phase.
Much of the imaging can even be automated. It’s in post-processing that the true art comes into play. Why so? The post-processing phase of astrophotography is so important because of the enormous range in brightness characteristic of these images.
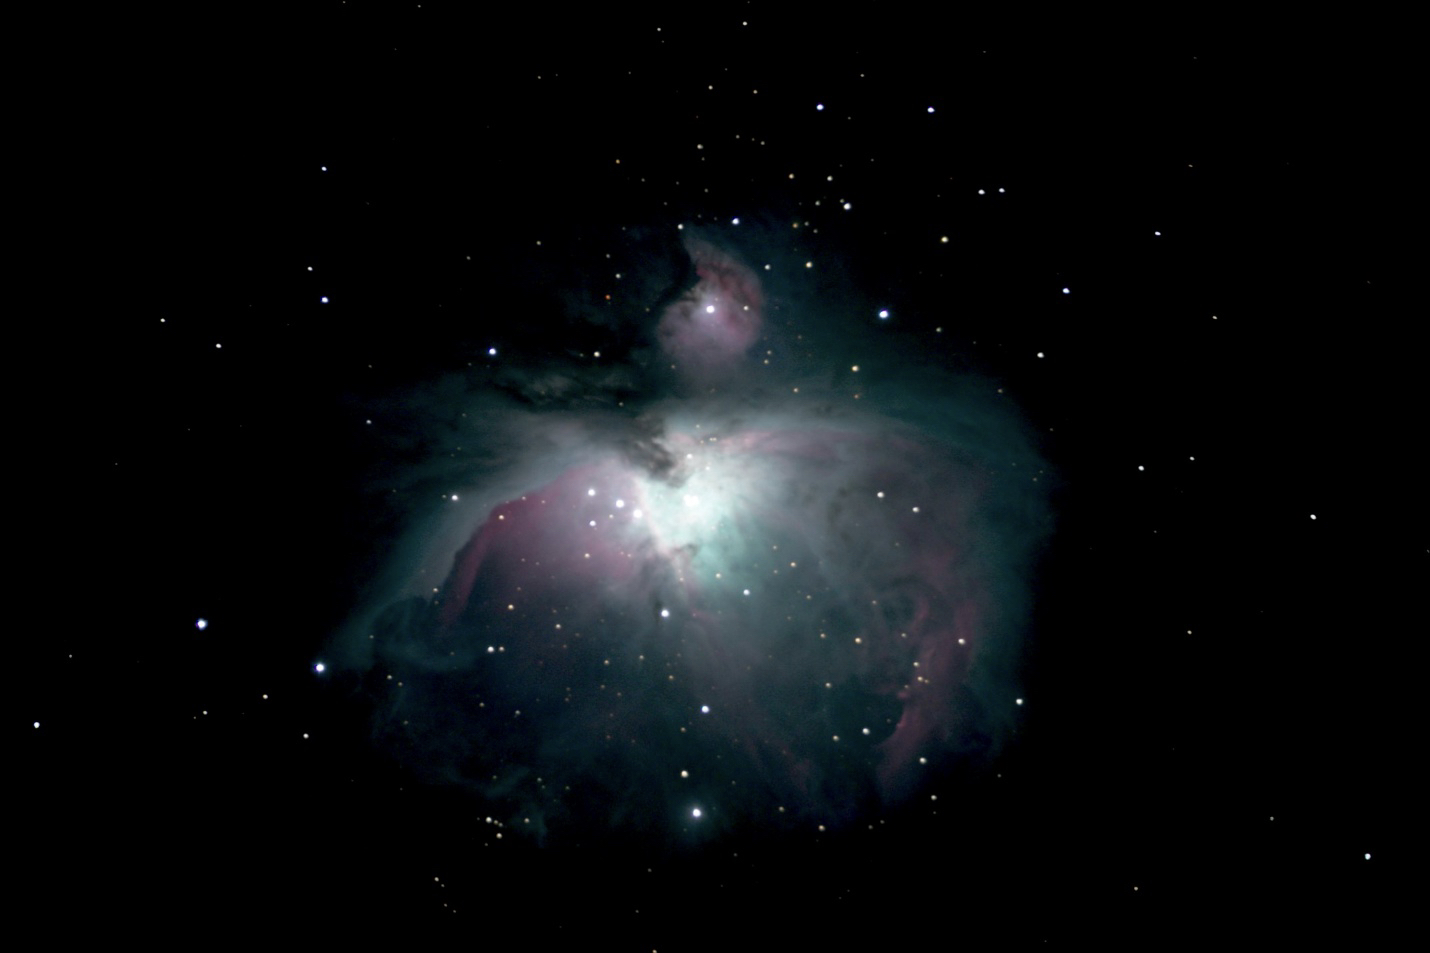
For some faint or highly intricate “deep sky” objects, such as the Orion and Horsehead nebulae illustrated above, hundreds of images, taken through numerous filters, are combined. Sometimes, imaging across multiple nights is even required to gather sufficient data.
The image processing flexibility and power available today would have been inconceivable when I began my astrophotography journey, many years ago. In fact, many hold the view that amateurs like me can produce images that only large professional observatories were capable of generating as recently as 30 years ago.
I tend to agree with that sentiment.
Make a donation to help with our running costs
Did you know that Macfilos is run by five photography enthusiasts based in the UK, USA and Europe? We cover all the substantial costs of running the site, and we do not carry advertising because it spoils readers’ enjoyment. Any amount, however small, will be appreciated, and we will write to acknowledge your generosity.
Excellent introductory article for astrophotography photography Brian which will likely whet some Macfilos enthusiasts’ appetites to commence experimenting. Regarding solar eclipse photography – both full and partial solar eclipses – it’s worth mentioning that to avoid damaging a camera lens, the camera sensor, and your eyes, any solar photography should not be attempted without using proprietary solar filters on the camera lens, e.g. a solar filter made using BAADER AstroSolar Safety Film which blocks dangerous and invisible UV and IR wavelengths. Similarly, direct naked eye solar viewing should never be attempted without using proprietary and guaranteed solar viewing glasses which can be purchased for a few $$. Without special eye protection the Sun’s invisible UV wavelengths can cause instant blindness – and the Sun’s IR wavelengths can cause cataracts. A partial solar eclipse occurs in parts of the N. Hemisphere on 29 March 2025. Google same to find out if visible from your location. And follow YouTube video instructions for the safest ways to photograph the event, e.g., consider accessing the PhotopillS solar eclipse video.
EDIT: Some astrophotographers advocate and suggest using telescope ‘eyepiece projection’ for solar imaging whereby the telescope’s eyepiece projects the Sun’s image onto a translucent screen – the resultant projection screen image being safely? photographed by a regular camera and lens – and without any solar filter on the ‘scope objective. I witnessed an astronomer using this method during the 2015 solar eclipse. The scope’s multi-element eyepiece concentrated the sunlight to a pinpoint and the resultant heat generated was sufficient to ‘fuse’ two eyepiece elements together. The expensive eyepiece was ruined. Eyepiece projection thus not recommended unless a solar filter is used on the ‘scope objective. Please do not underestimate the power and dangers of sunlight when focused through optical lenses.
Wowza. Lovely story and stunning images. And a great example of a quality descent into serious gear acquisition syndrome. Good work.