

I don’t suppose the Leica TL2 is the first camera you’d think of pairing with a telephoto lens. Why would anyone attach that slim, svelte, silver body to the hulking black barrel of a 100-400mm zoom? Well, I did exactly that. It’s the sort of move you make if, like me, you’re obsessed with taking a certain kind of sunset photo.
During the winter, at a beach near where I live, you can watch the sun set over the ocean. In fact, on a clear evening, you can watch it descend all the way to the horizon. It’s a magnificent, highly photogenic sight, which makes for an especially cool photograph if you can include a second subject in the frame.
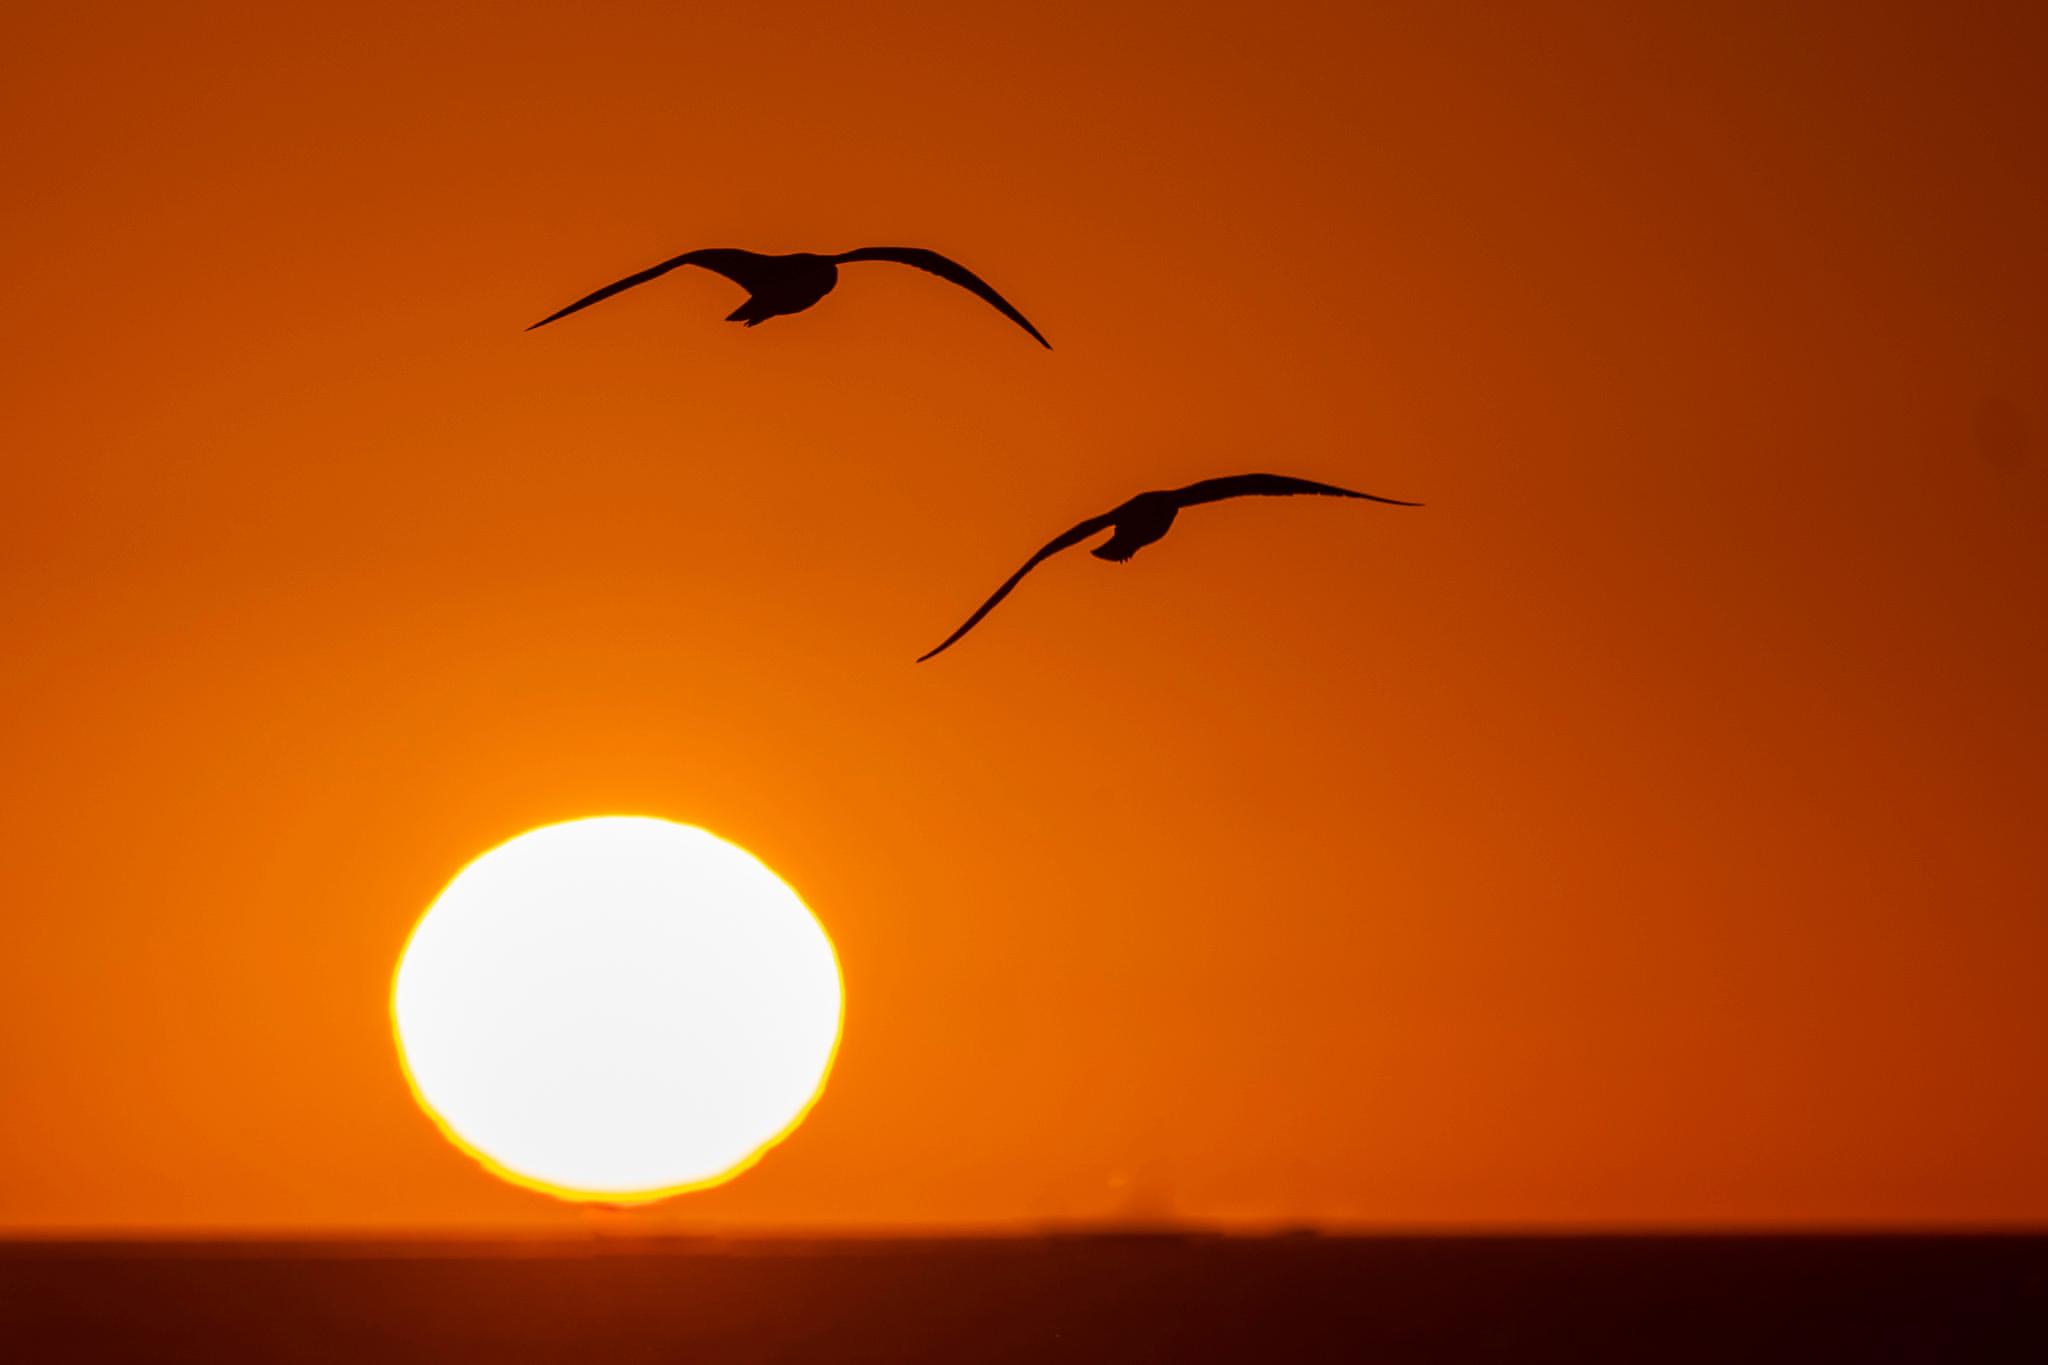
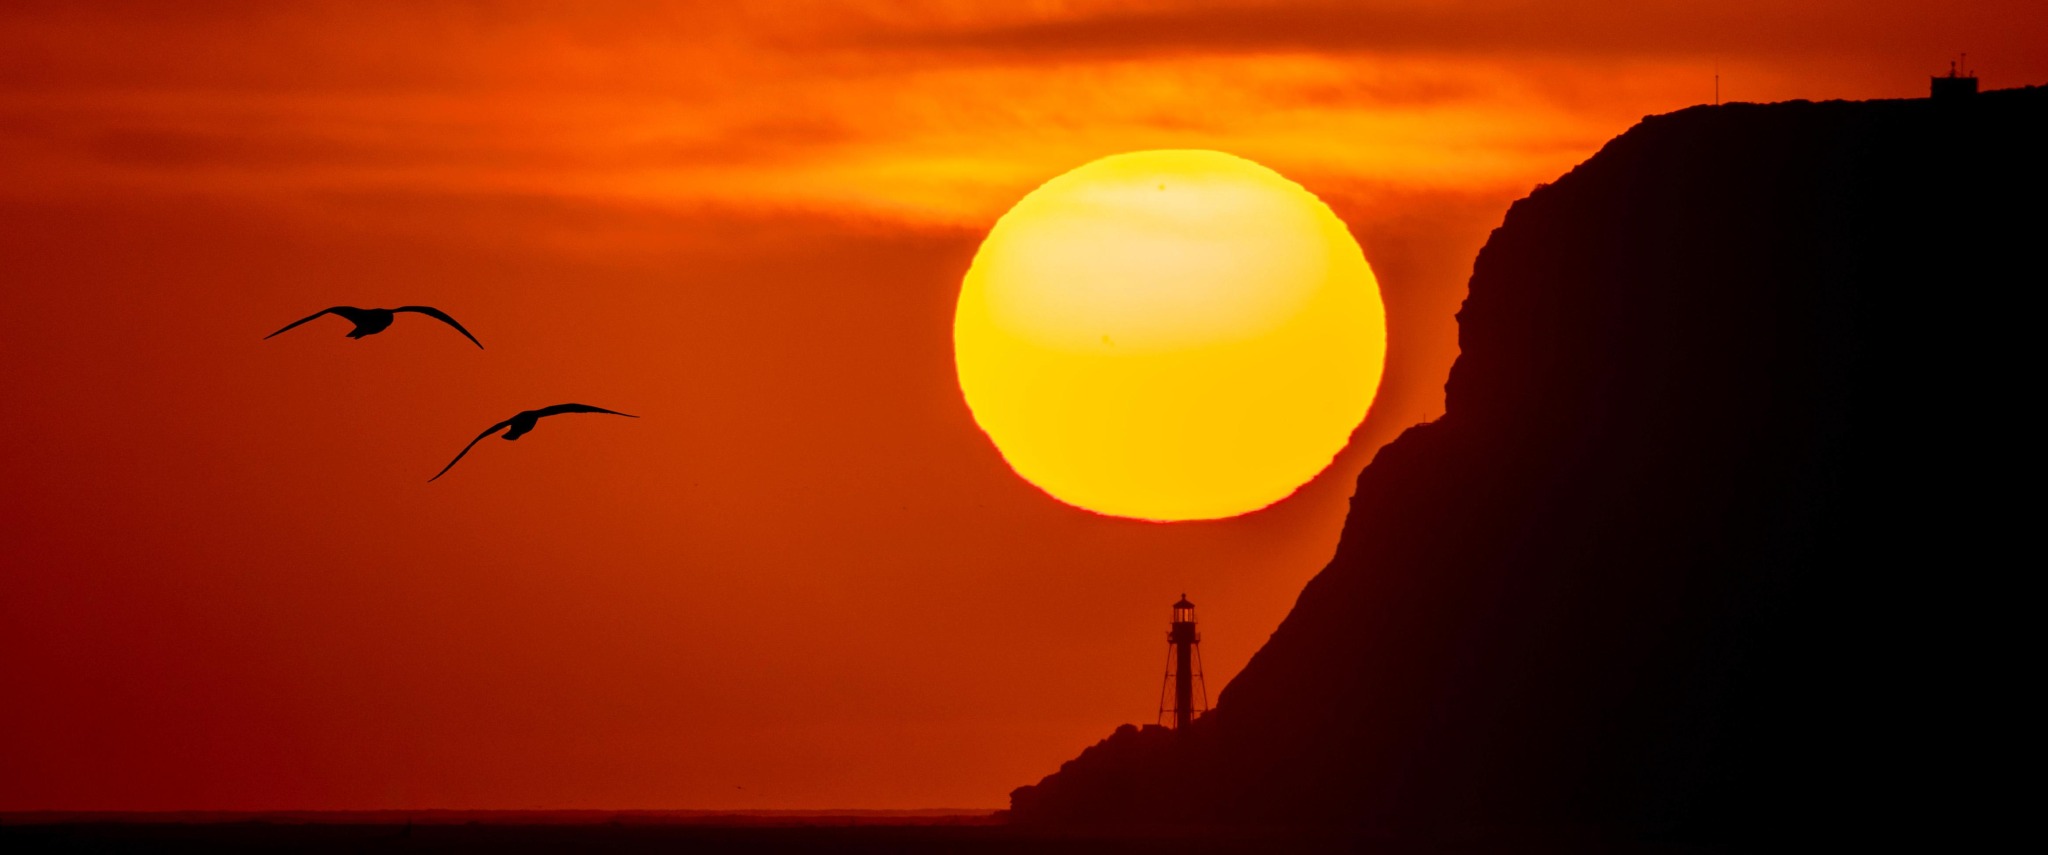
I was once fortunate enough to press the shutter-release just as a few gulls flew past.
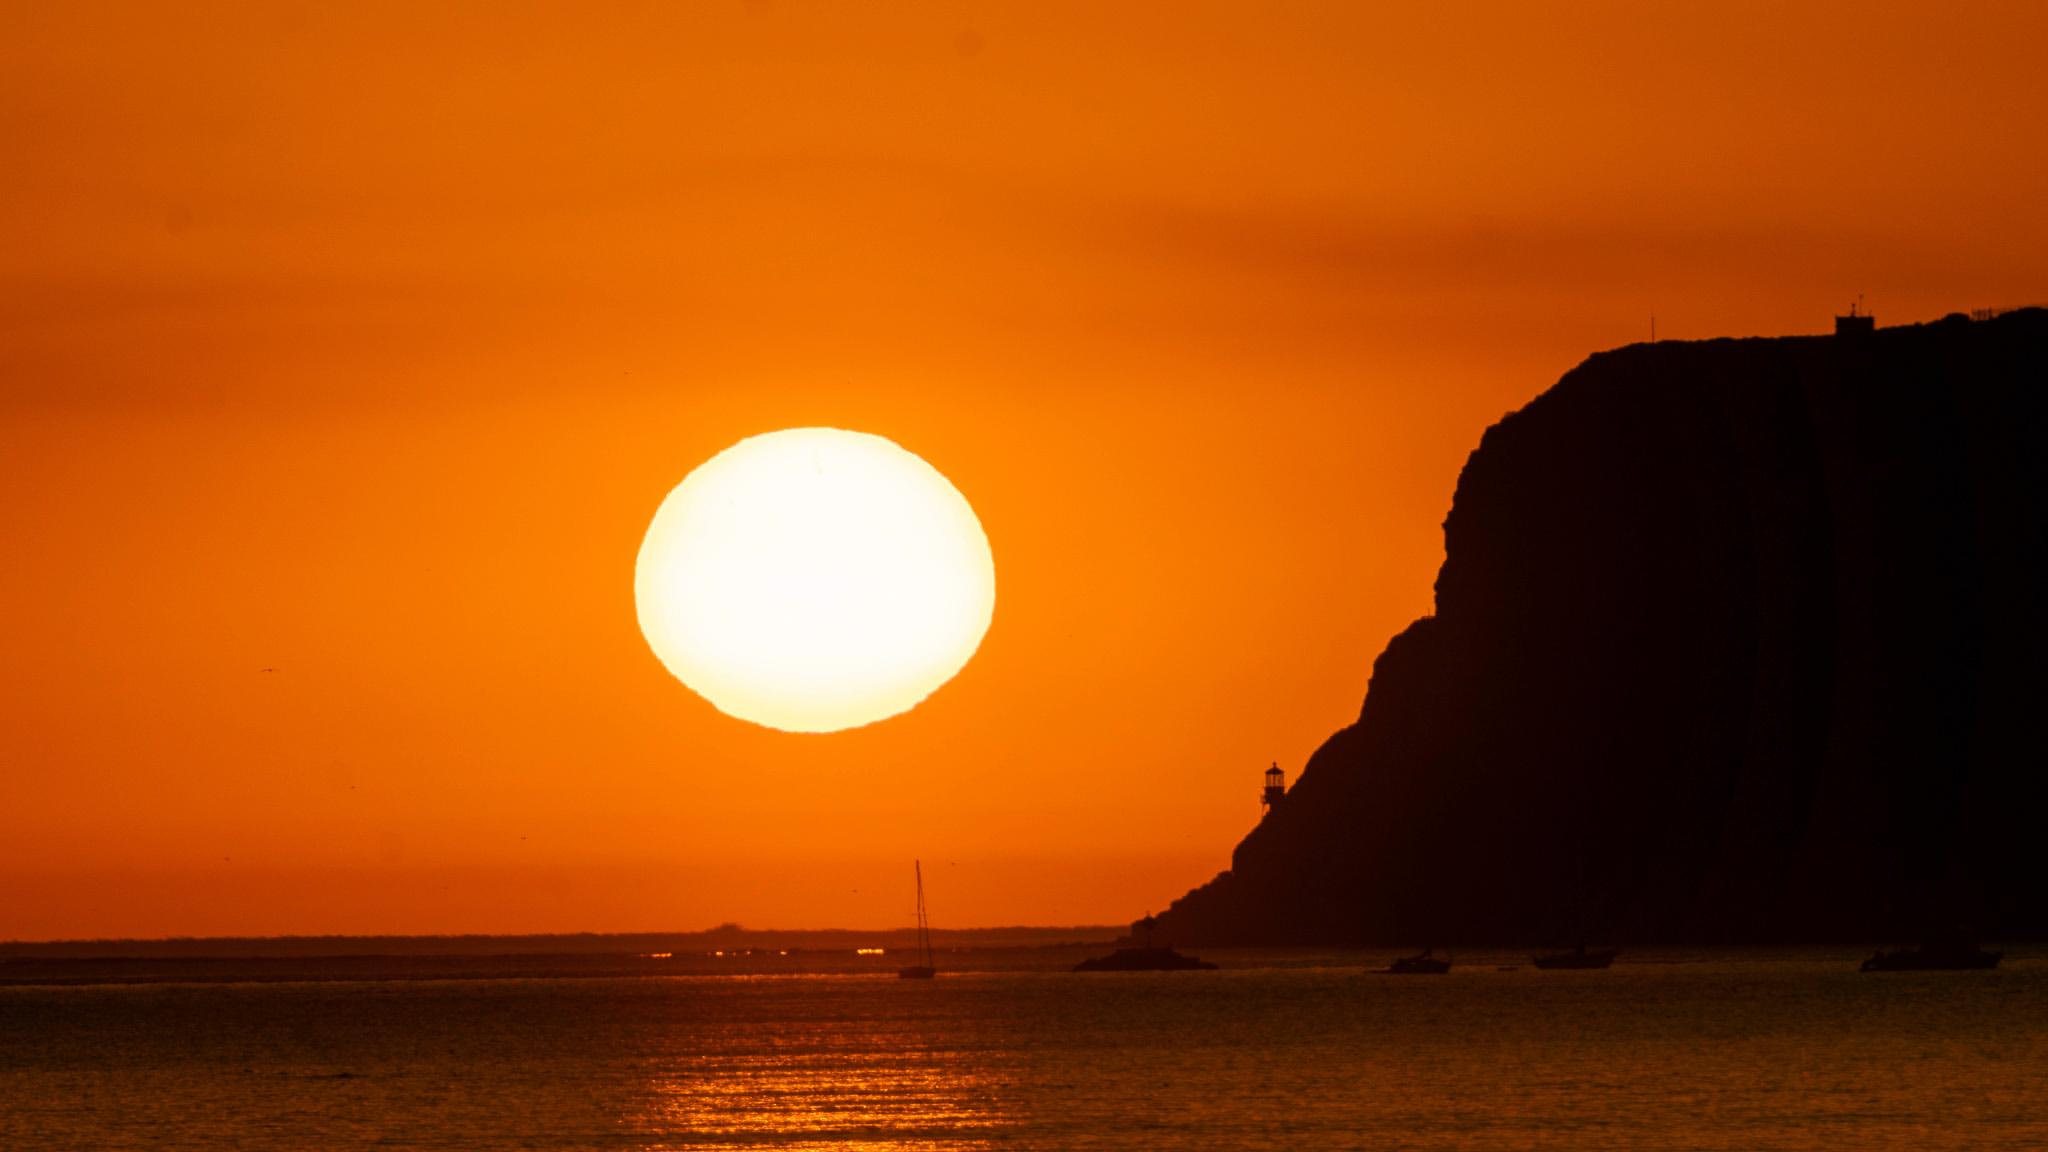
Sunset and lighthouse
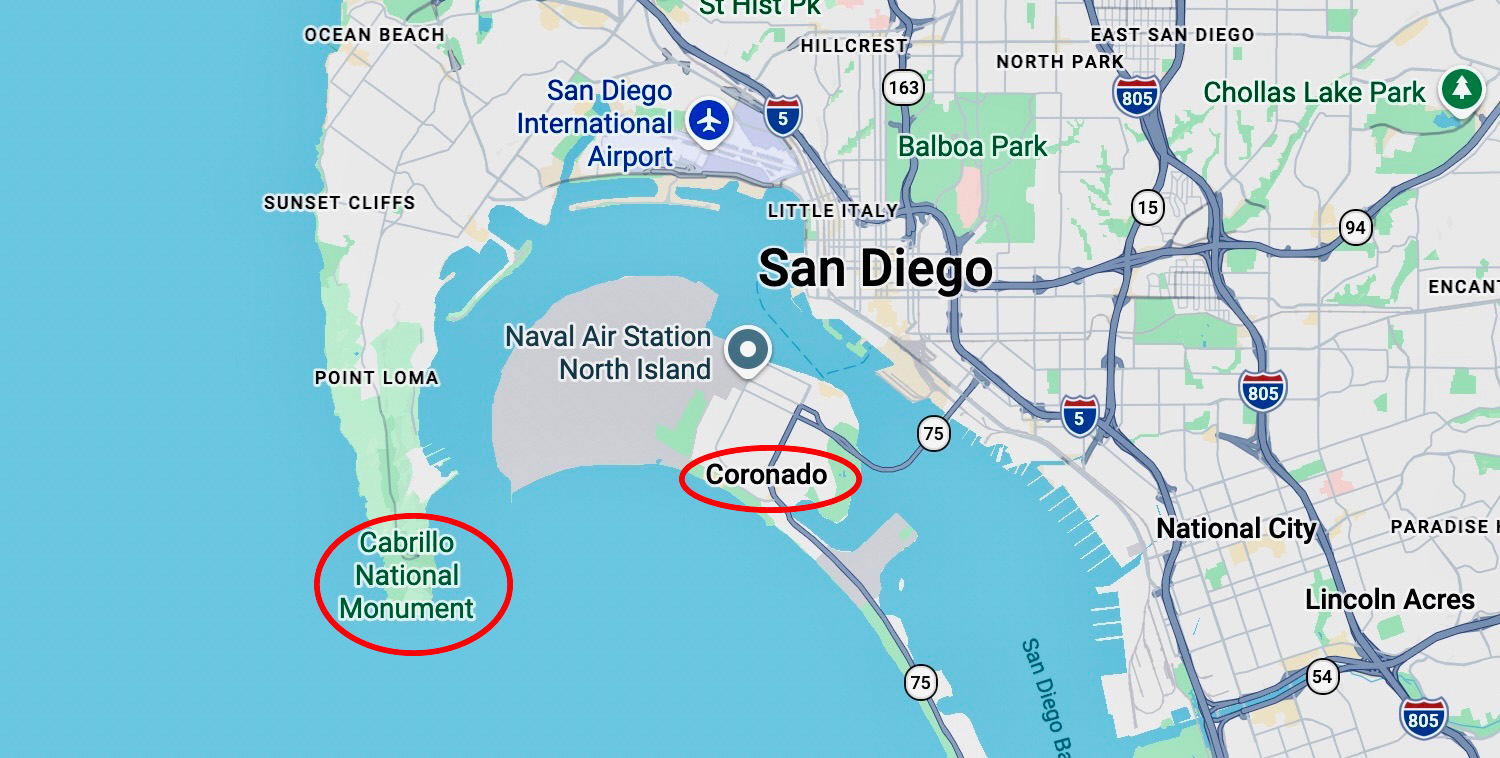
After the Winter Solstice, the sun begins a slow pilgrimage northwards. Eventually, it no longer sets over the ocean, but over a headland — Point Loma.
For a week or so along its journey, it sets near the edge of the headland, where a small lighthouse at the tip of the Point Loma Peninsula is just visible from my beach vantage point. So, I had the bright idea of using a telephoto lens to capture both sun and lighthouse in a single frame. Timed correctly, while shooting at the right angle, a gigantic sun should sit next to the silhouetted lighthouse.
I own a Sigma 100-400mm f/5.6-6.3 L-Mount telephoto zoom, which I have written about previously. It produces superb, sharp images. The lens can be fitted with a tripod collar incorporating an ARCA-Swiss plate, ensuring the heavy lens and camera combination are well-balanced when perched atop the tripod. Unfortunately, the plate did not fit the rail on my old tripod.
However, the new, Sirui, carbon-fibre tripod I received as a Christmas gift had exactly the cognate ARCA-Swiss rail I needed. Hey presto, the lens mounted and balanced perfectly.
So, with telephoto lens and tripod sorted, I began to plan my killer sunset shot.
I can see for miles and miles…
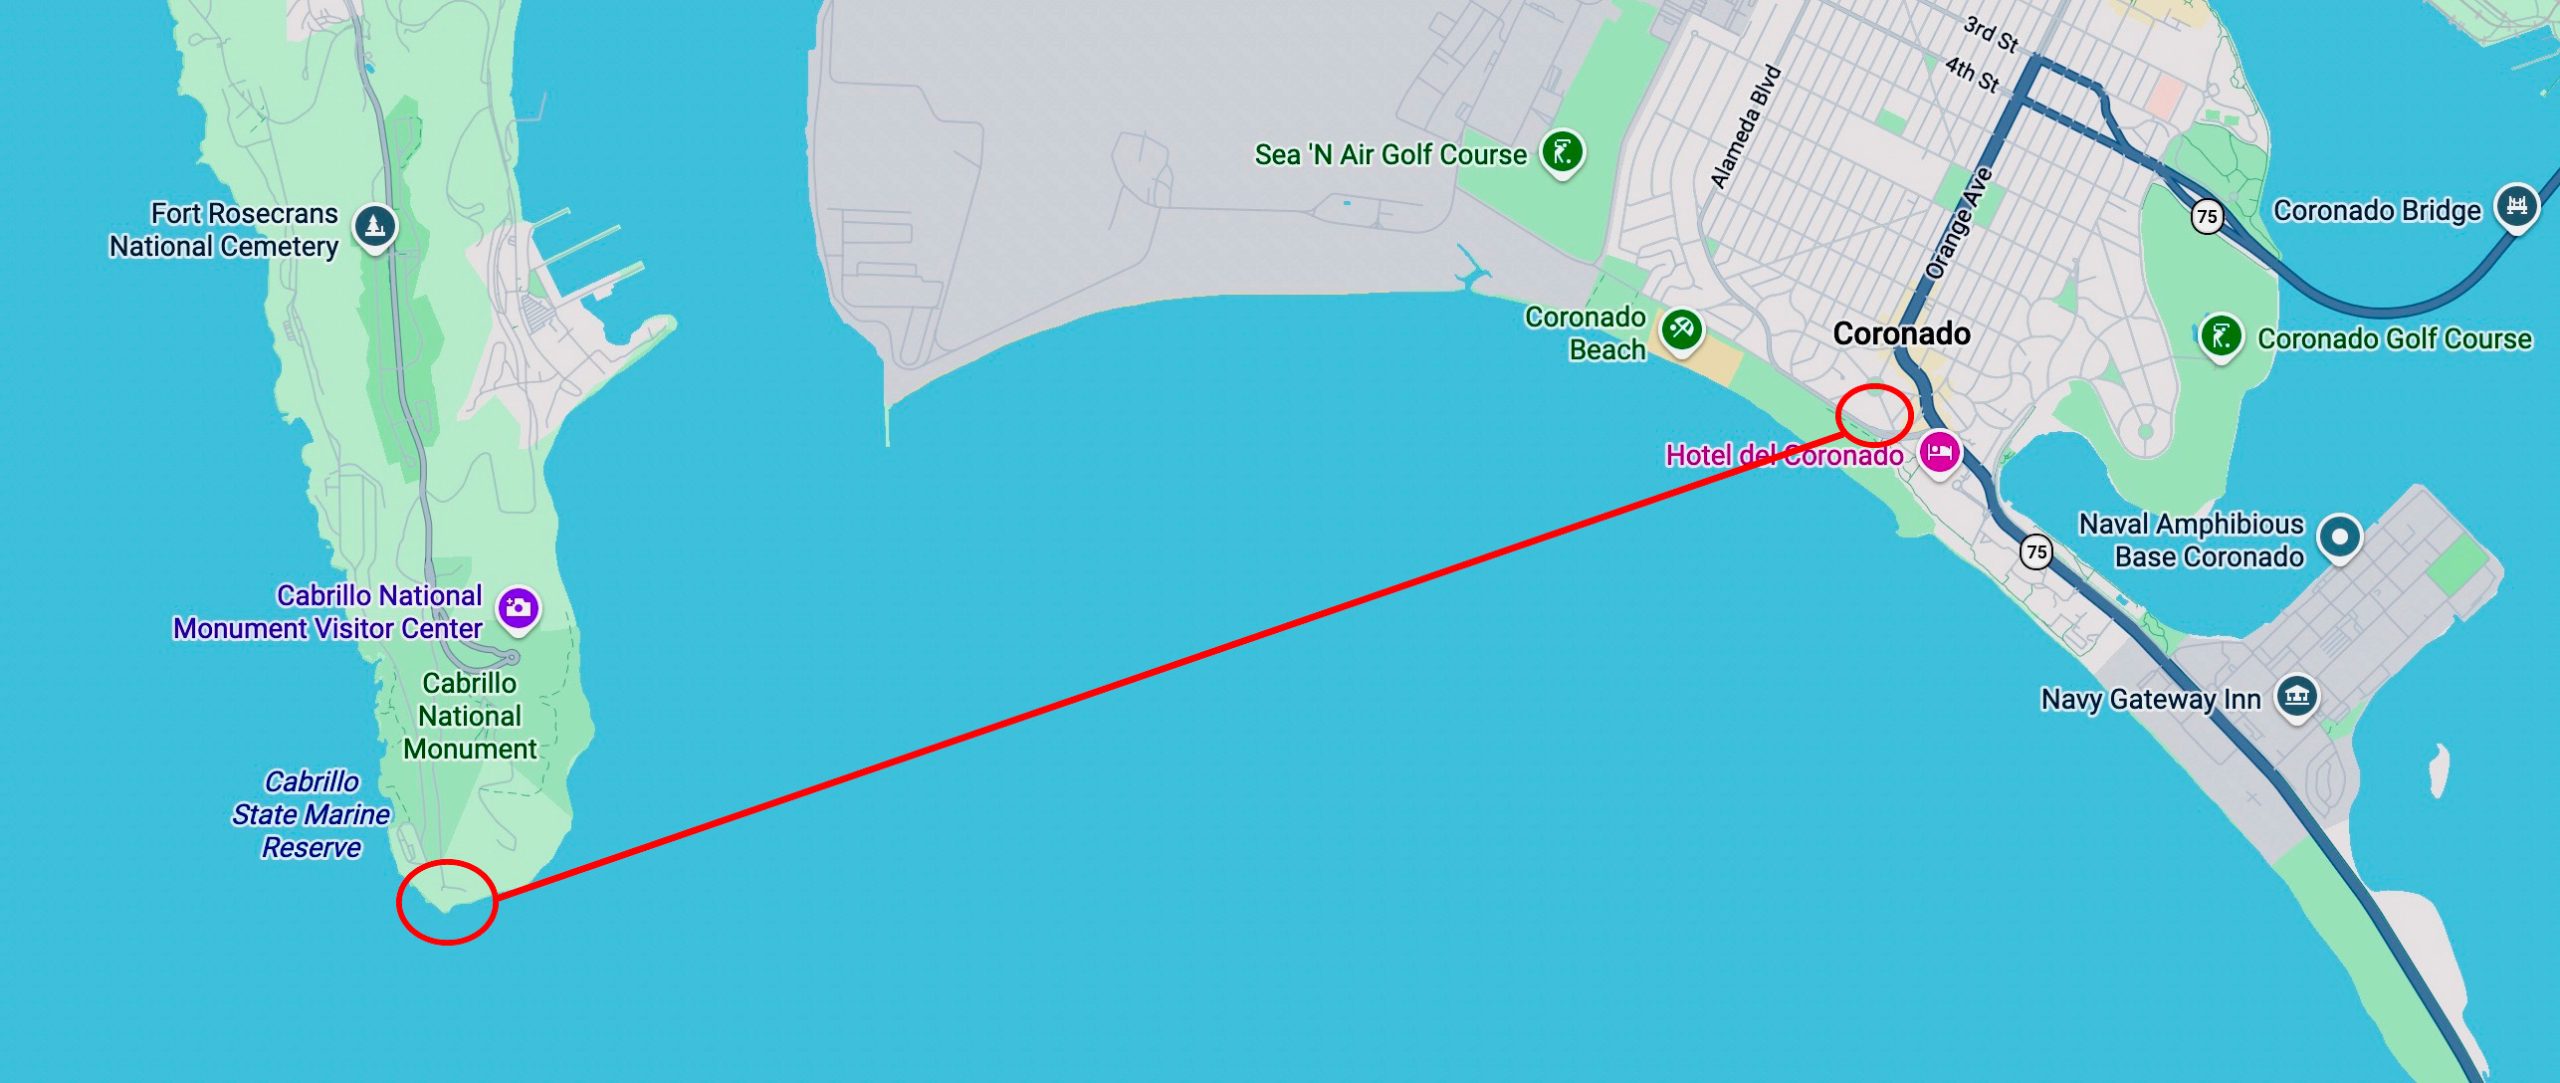
As the crow flies, the lighthouse in question is some four miles from my vantage point on the beach. I therefore required as much magnification as possible to ensure it would appear large enough in the frame.
Here is where the Leica TL2 fits into the picture. It’s the only camera I have which possesses an APS-C sensor. With its 1.5x crop factor, I could turn my 100-400mm zoom into a 150-600mm zoom. With some additional digital zooming, I was hoping that might just be enough.
As you can see from the map, I would be looking approximately west-south-west. The sun would traverse the sky at around ninety-degrees perpendicular to my line of sight, appearing to increase in size, and reduce in brightness, as it approached the lighthouse.
The challenge now became juggling three factors: timing, angle, and weather.
Angle of dangle
For my first attempt at the killer shot, I guessed where best to stand so that I would see the sun hit the horizon close to the lighthouse. This was based on a previous few days of casual observation.
I guessed wrongly! I was too far south, and as the sun dropped towards the horizon, it was too far to the left of the lighthouse, which was largely hidden in a fog bank. Even a less-extreme 300mm zoom left too big a gap between them.
This was going to be trickier than I thought.
Overcompensation
For my next attempt, I played safe, positioning myself much further north. I was confident that viewing from this location, the sun would set close to the headland. Although I captured a few good shots, only the tip of the lighthouse was visible above the sloping edge of the headland.
In one of the shots (not shown), a few out-of-focus gulls sneaked into the picture as they flew through the frame. I tried to replace them with sharp silhouettes using the generative fill feature in Photoshop, but so far, have been unsuccessful. Must try harder…
Throughout this project, I had used manual focus on the Leica TL2 to ensure a sharp image of the lighthouse. The left-hand function wheel on the camera can be assigned to provide a 3x or 6x magnification as an aid to focusing.
Get off of my cloud…
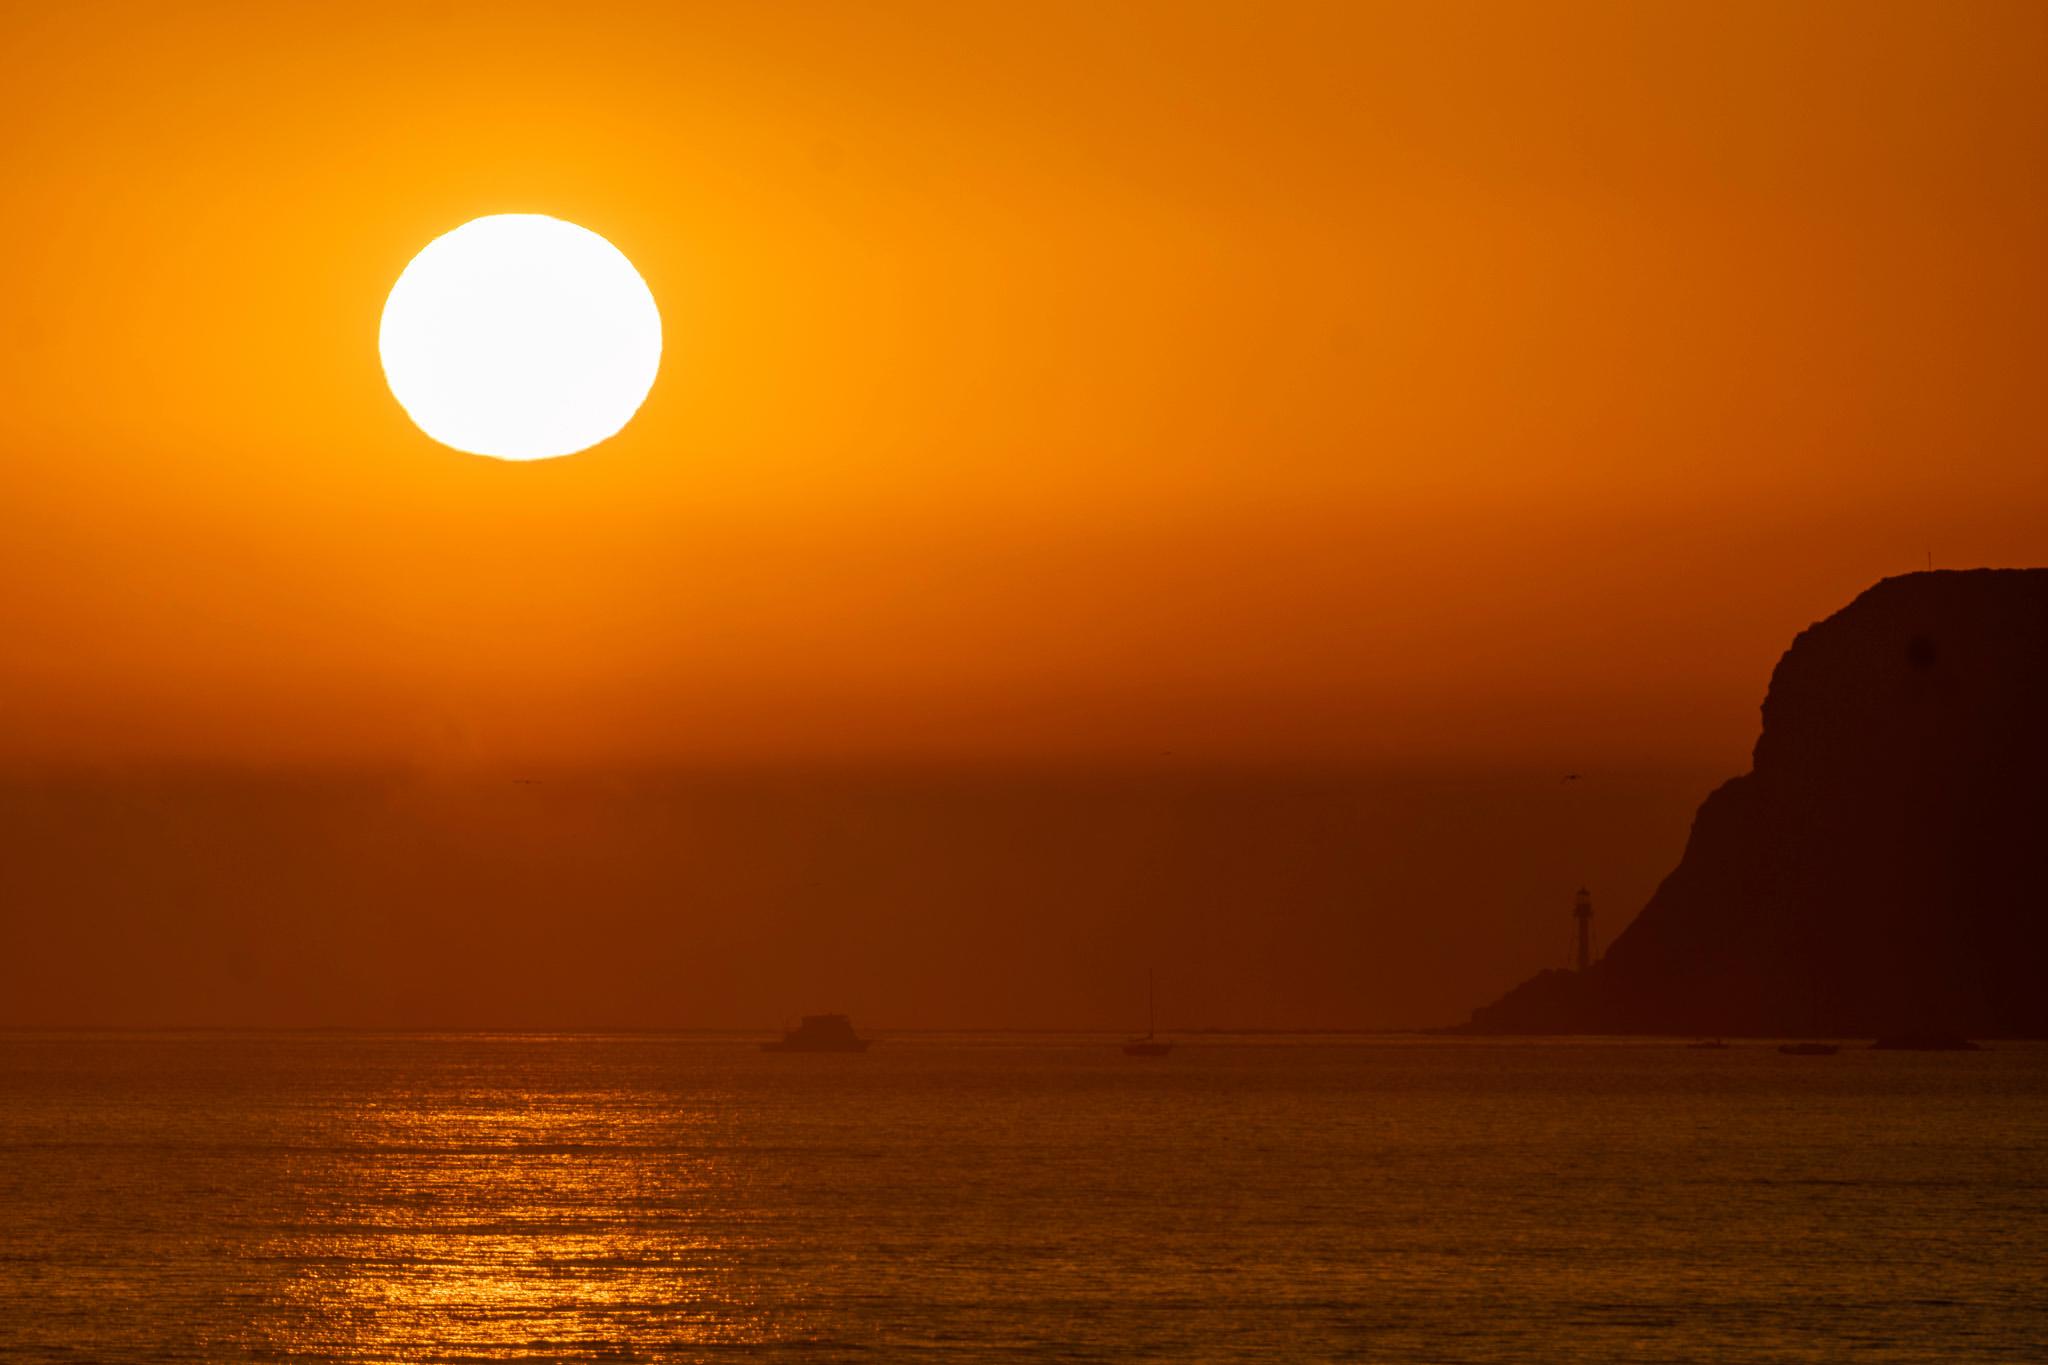
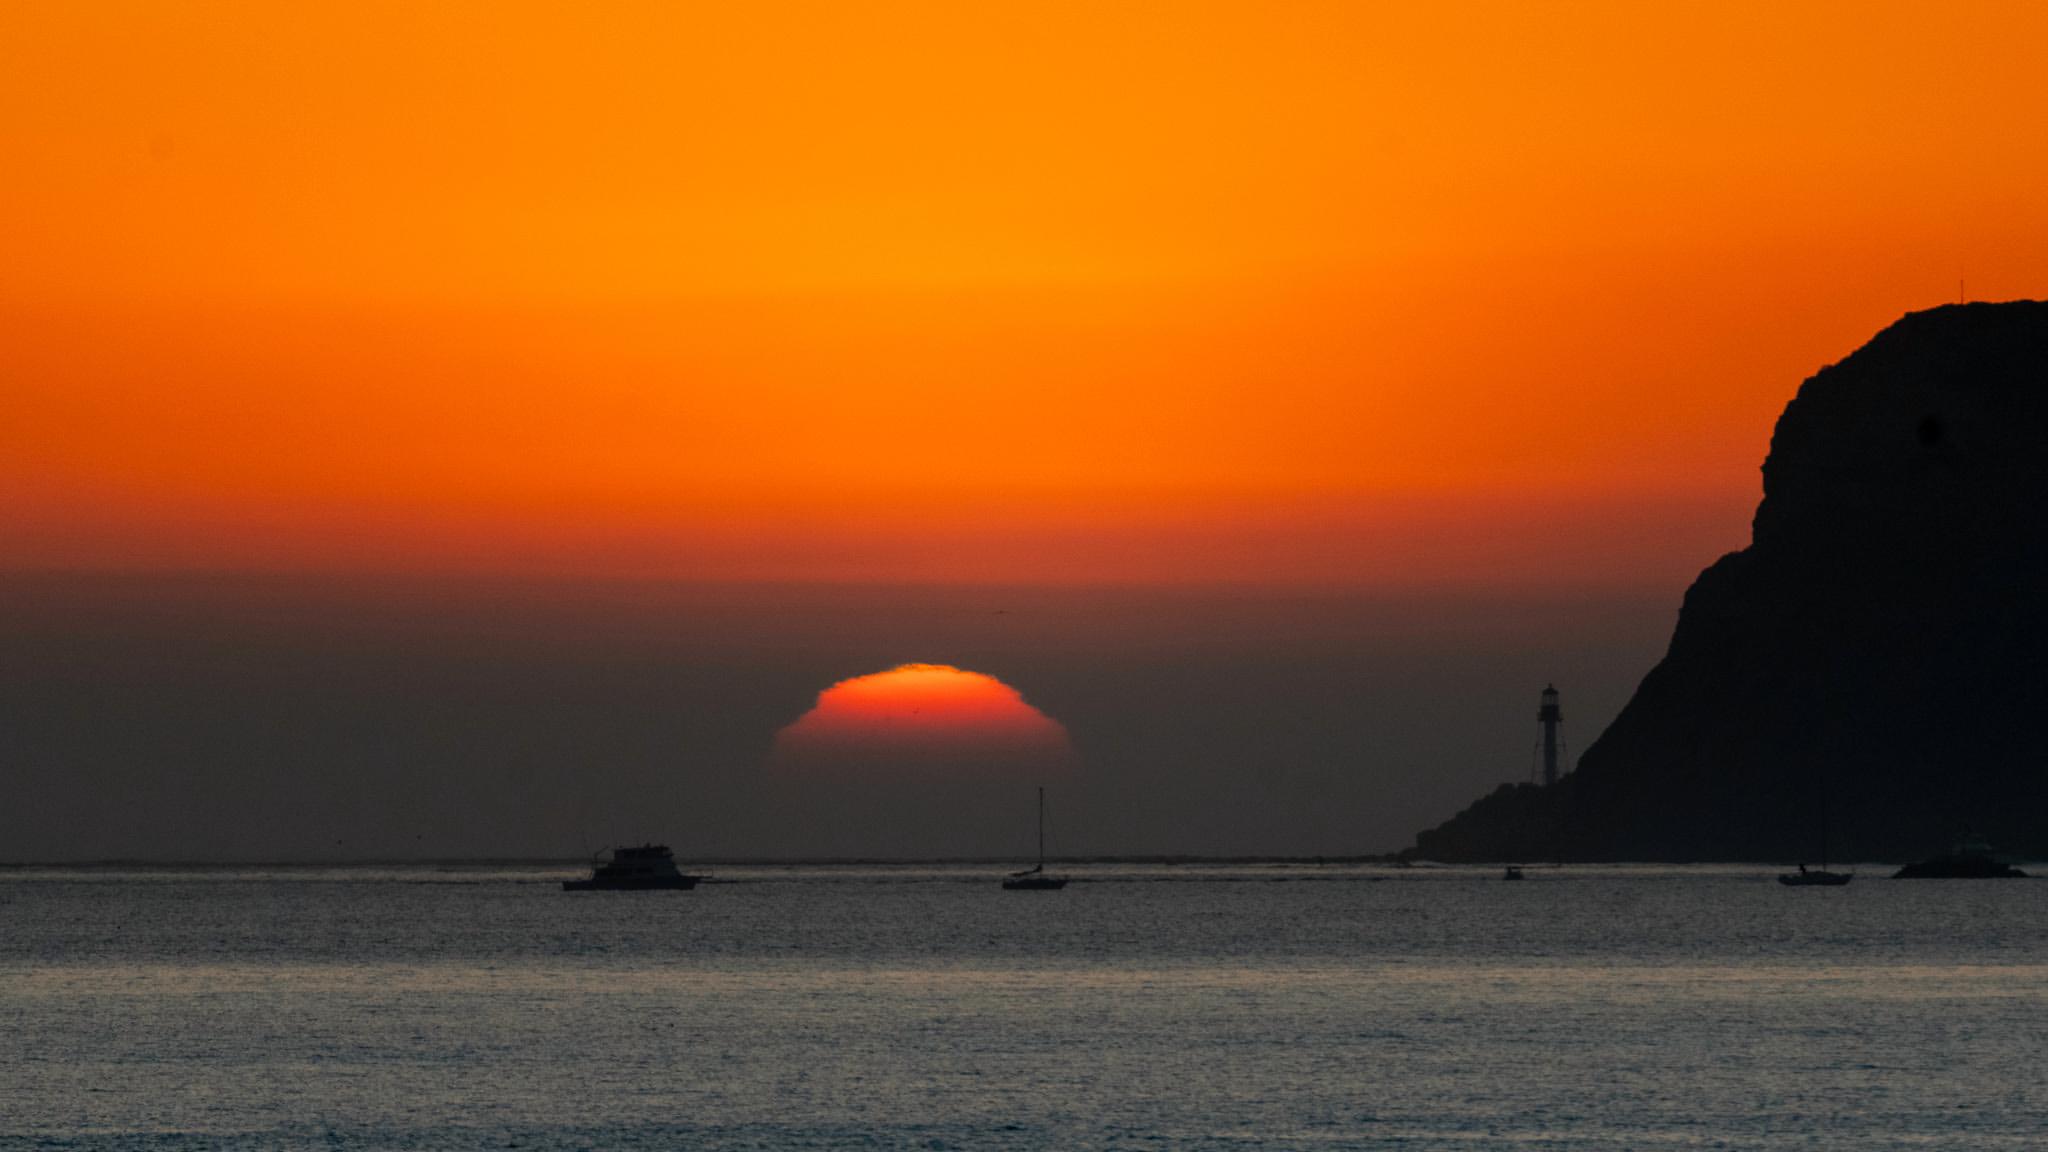
Attempt number three was thwarted by a bank of low cloud. A sliver of sun did briefly poke through the fog, yielding a somewhat tropical, tangerine-coloured scene. Not what I was after, though.
Several subsequent cloudy days blocked further attempts, even though I knew the sun, although obscured, would be steadily marching northwards. Frustration.
At my fourth attempt, I was optimistic that trial and error had led me to the optimal location for a great shot. However, the sun would need to descend through a wide bank of cloud before appearing near the horizon. And so it did.
Here comes the sun…
I took multiple shots, using a two-second timer on the shutter release to minimise camera shake. In one of these, I captured the sun as a perfectly round ball, just above the lighthouse and to the left of the headland. Score!
I cropped the photo by around 50% in both horizontal and vertical dimensions to produce the final image.
I felt enormous satisfaction when I saw the image on the camera’s rear screen, and then enlarged in Lightroom. The lighthouse is by no means the most attractive example of the species, comprising essentially a concrete pole surrounded by scaffolding. But, it is in focus. In a high-resolution JPEG, I can even make out the struts crisscrossing the scaffolding and the framework of its lamp chamber.
Keep on running…
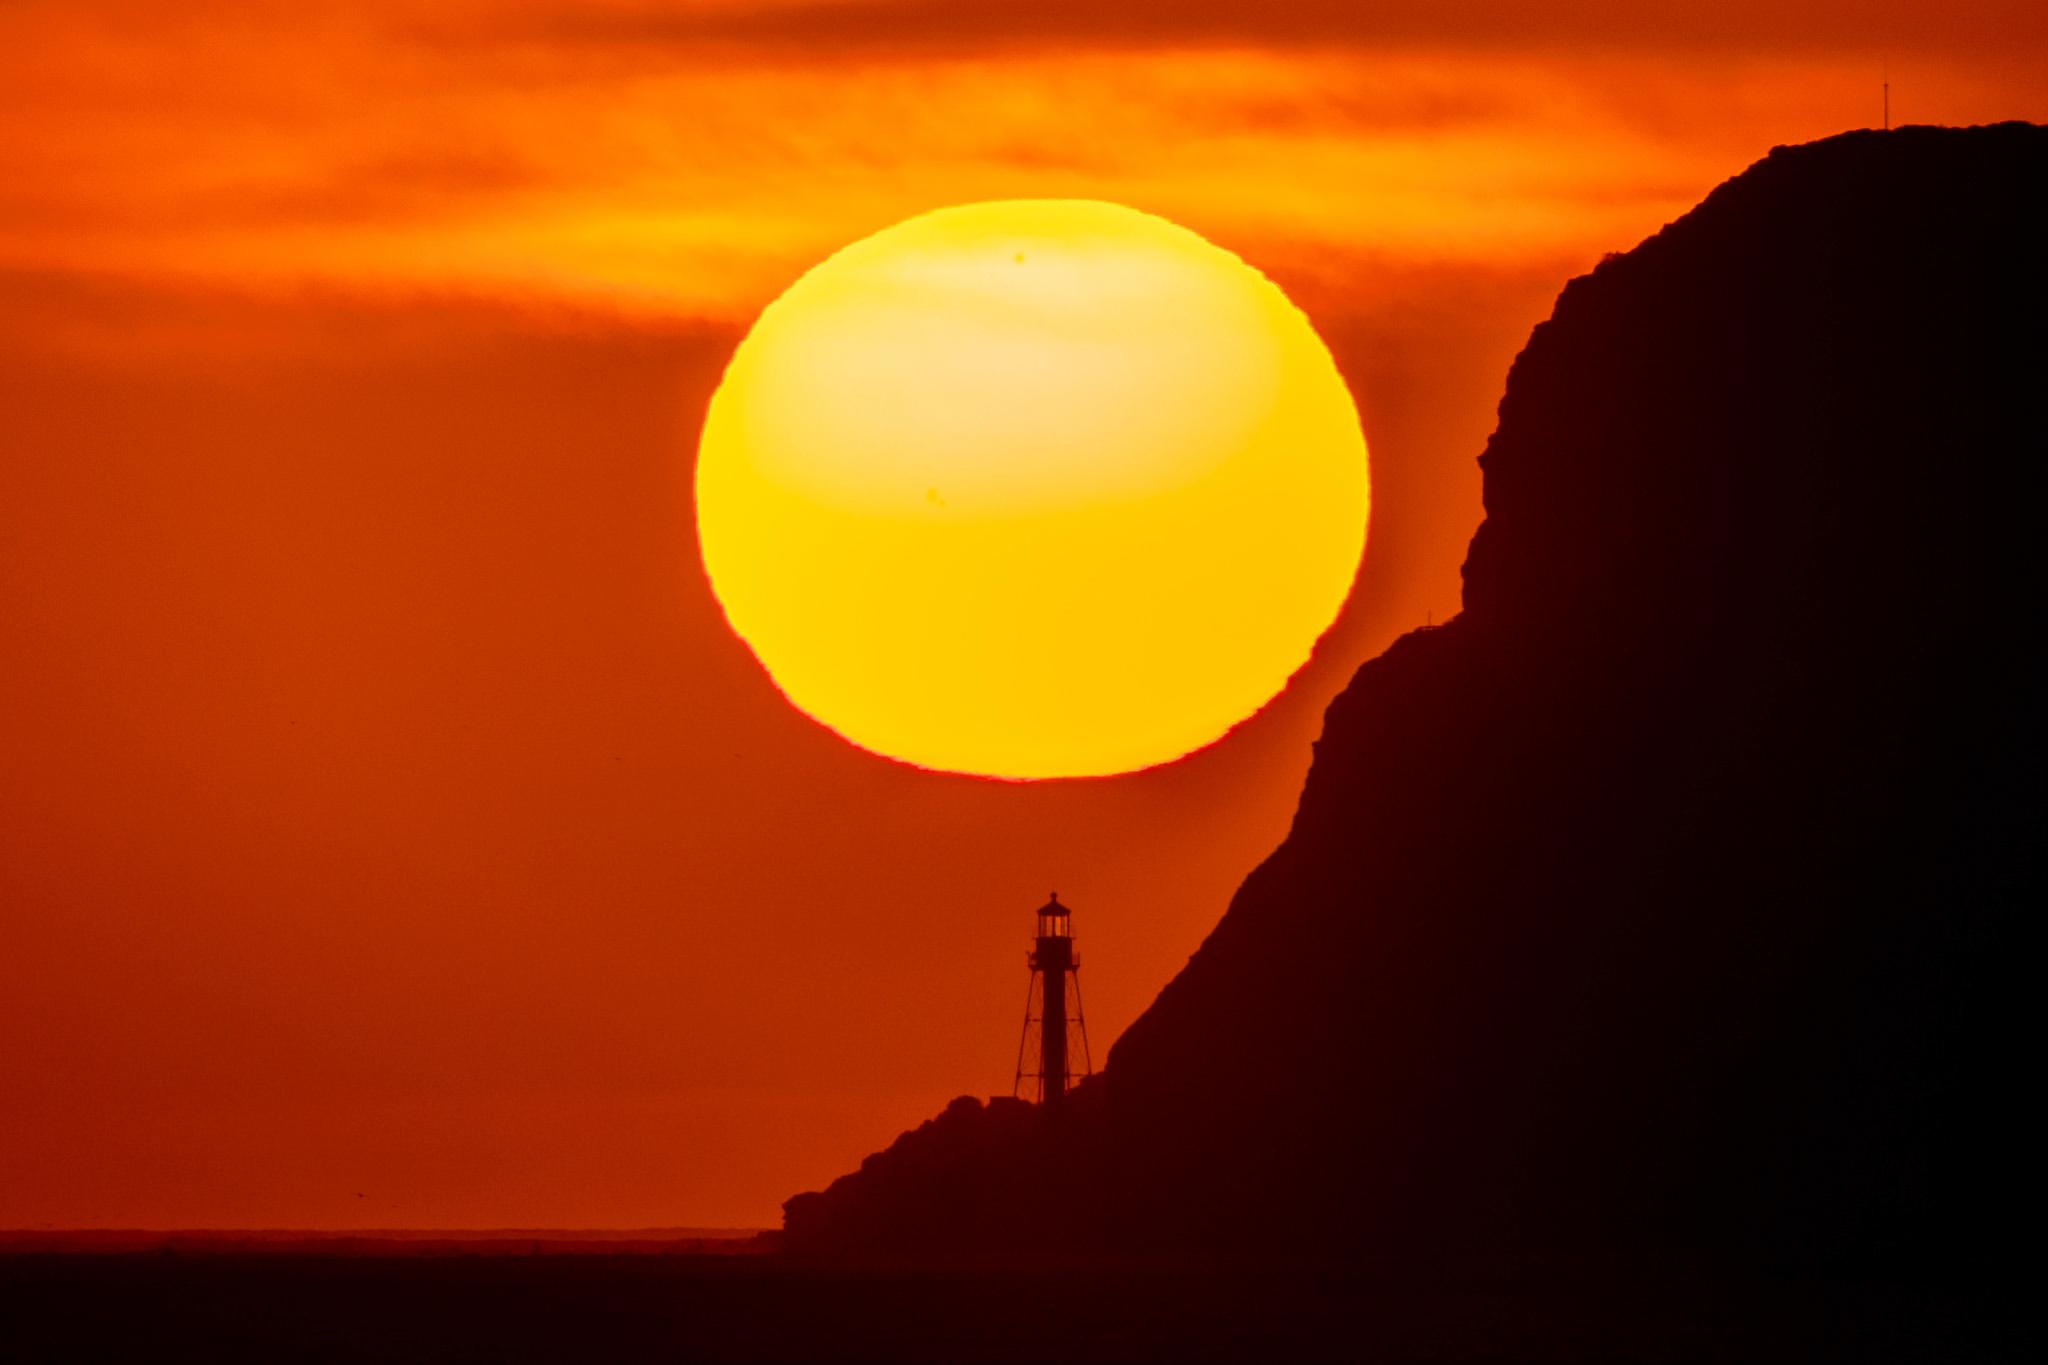
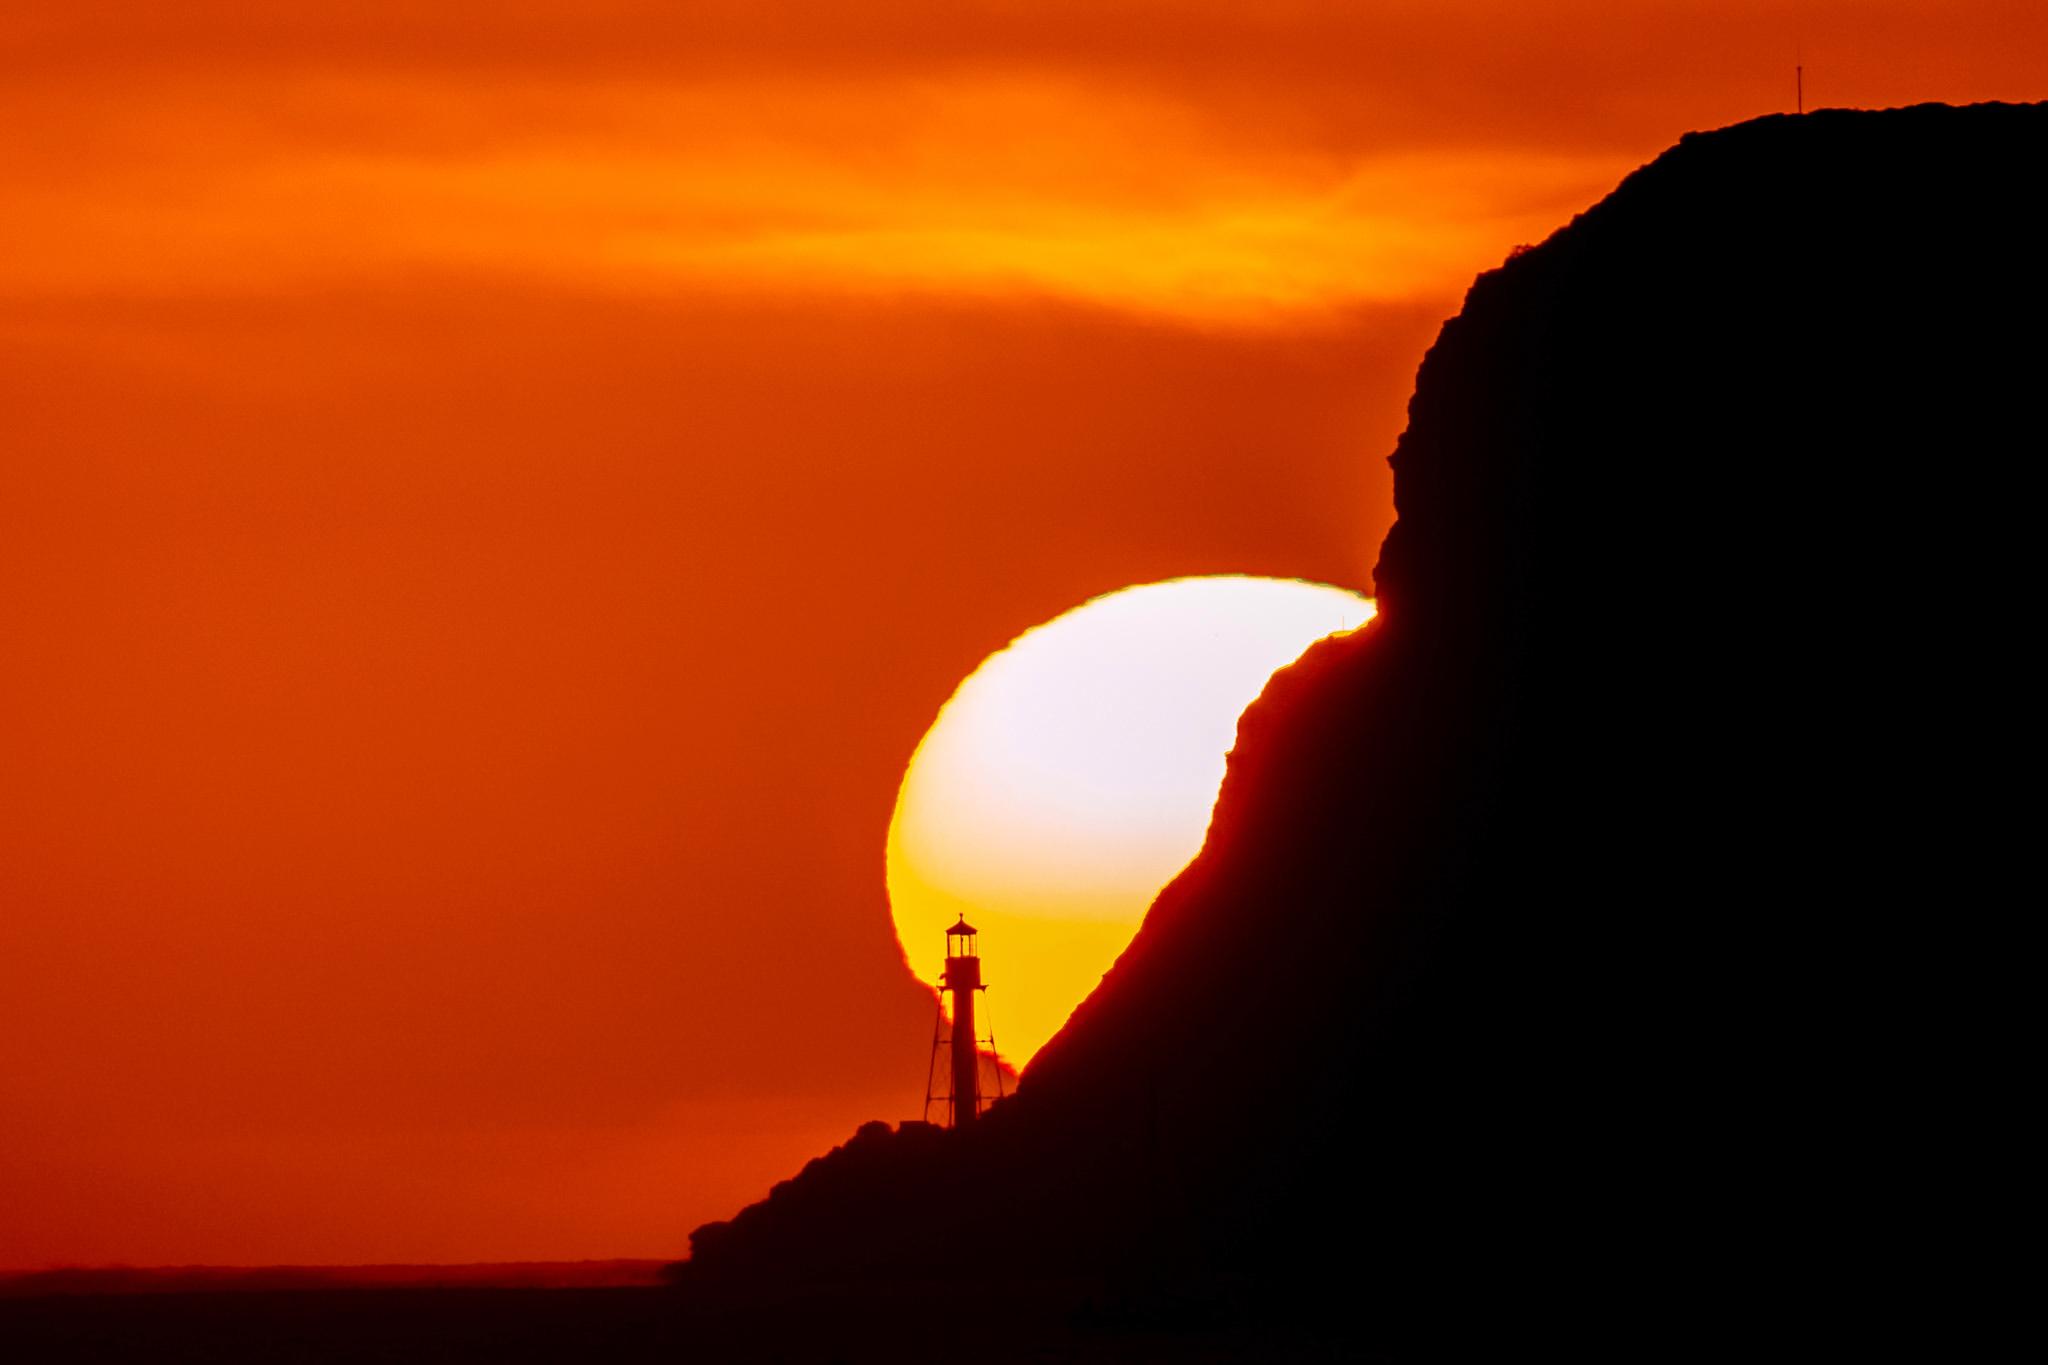
In another shot, taken a few minutes later, the sun has begun to pass behind the headland, just grazing the top of the lighthouse. I would love to capture a shot with the sun directly behind the lighthouse. I suspect, though, that diffraction around the edge of the silhouette might lead to a fuzzy result.
You might be reading this while surrounded by Winter gloom, with absolutely no prospect of seeing the sun set over the ocean. Those of us based in Southern California are fortunate to live in a place with plentiful blue skies and bright sunshine, and where shots like this are possible in mid-February.
Just one more thing
I would like to share one, final composite image. I created this by re-cropping the sunset and lighthouse image above to the 2.4:1 XPan aspect ratio, then inserting the seagulls from an earlier image, using Photoshop. If you prefer one over the other, let me know in the comments below.
This was my first attempt at blending two images to create a composite. Now that I know how to do it, I shall be on the look out for other opportunities to use this newfound skill.
This has been a fun project, and a novel way to deploy my Leica TL2 and new tripod. However, the window of opportunity has now closed. So, any further attempts will now have to wait until Autumn, when the sunset reappears from behind the Point Loma headland.
When it does, I will be on the beach, waiting…
Caution
As highlighted in the comments below, pointing a camera equipped with a telephoto lens directly at the sun can damage both the user’s eyesight and the camera’s sensor, so photographers should take steps to avoid this risk, such as using filters and not looking directly into the camera’s electronic viewfinder.
| More about sunsets | More about the Leica TL2 |
| Other examples of silhouette photography | Articles by the author |
Make a donation to help with our running costs
Did you know that Macfilos is run by five photography enthusiasts based in the UK, USA and Europe? We cover all the substantial costs of running the site, and we do not carry advertising because it spoils readers’ enjoyment. Any amount, however small, will be appreciated, and we will write to acknowledge your generosity.
Keith
Thank you for posting an engaging article with a simple theme. You must have had a sense of satisfaction of finally getting the shot you wanted. For me the image “sunset and lighthouse” is indeed the outright winner and would do well, in my view, as a large acrylic print. Do you have a suitable wall?
Adding seagulls, again in my view, just detracts from the simplicity of the composition.
Just out of interest I tasked PIXLR to create an AI image of “a golden sunset over the sea with a lighthouse in the foreground”. Of the four images created, a couple were quite convincing. So what does that mean for all of us here at Macfilos? The answer perhaps is, “not a lot”.
Chris
Hi Chris, many thanks for your comment. I have not printed many of my photographs for display at my home, but I am indeed tempted to print this sunset shot. You are not the only person to indicate a preference for the minimalist, rather than merged image.
I am not surprised that it is possible to generate an aesthetically appealing sunset scene using an AI-based image generator. As we know, though, the fun is in tracking down potential compositions in the real world and then capturing them photographically! All the best, Keith
Photographing the Sun with a telephoto zoom lens at the longer / longest focal lengths, especially when using a cropped sensor mirrorless camera on a tripod, (without the ‘protective mirror’ of a DSLR) even at sunset or sunrise when the Sun is low in the sky, is not a recommended practise. Using ‘live view’, especially with a telephoto lens, will focus the Sun’s UV and IR energy onto the camera’s sensor filter glass – more so if the camera / lens combination is tripod mounted between exposures – and especially if the Sun is magnified by the longest zoom setting. Never underestimate the energy of the Sun – and never observe the live view image through the camera’s EVF. The UV/IR wavelength components of sunlight when viewed by the naked eye through glass lens optics can result in irreparable eye damage, i.e., blindness. Some of you might think the foregoing advice is being too cautious because you’ve photographed sunsets many times and with no ill-effects. Perhaps you’ve been lucky or maybe were not using a long telephoto lens on a crop sensor mirrorless camera at its maximum focal length? I’ve just looked at some damaged sensor glass photos illustrated on DP Review. I have witnessed a tripod mounted telescope’s ‘ocular’ (the eyepiece), MELTING after being left in front of the Sun for a few minutes. If you want to photograph sunsets using a telephoto lens, please consider use of a solar filter on the front of the lens. A solar filter can be a DIY project using e.g. a BAADER Astro Solar Safety Film. Google or AI, camera lens use of same and note the film must not be tensioned – it’s a ‘floppy’ filter.
Hi Dunk, thanks for pointing out the risks associated with taking telephoto shots of the sun — both to camera sensor and eyesight. I will add a cautionary message to the article, highlighting these risks. All the best, Keith
Thank you Keith
The Sun’s IR and UV wavelengths are invisible to the naked eye
The point about sensor damage is well made. But I’m struggling to understand the physics behind the recommendation not to look through the EVF of a mirrorless camera in the circumstances described. There is no direct optical pathway between the lens and the eye through an EVF. An OVF is a different matter.
Wonderful article! A combination of techniques and amazing photos. And, for the record, my vote goes to “disappearing sun”.
Hi Kathy, and many thanks! As I mentioned, it was a fun project. It has inspired me to try some vibe coding to build a program which will tell me the future dates and times when the sun will set behind the lighthouse. No more wandering up and down the beach with my camera and tripod! Cheers, Keith
Keith, the photo planning apps Photopils or TPE (The Photographers Ephemeris) both enable you to plan alignments between set geographical points and the position of the sun, moon or Milky Way. TPE has a virtual simulator where it uses your phone camera to show the scene in front of you and you can then superimpose the trajectory of (say) the setting sun to determine more precisely where it will set and its’ diagonal tracking. I wrote an article here a few years ago on how I used it to plan a photo shoot of the Sydney Opera house at dawn only to be thwarted by an enormous cruise liner. There is a relatively modest once off fee for TPE, not sure about Photopils. It will save you a lot of coding.
Hi Tom, many thanks for these great suggestions! Before I saw your comment, I asked Claude, the Anthropic LLM, to build me a personal solar alignment calculator, which it did. I can now plug in the camera location, and target location on the horizon, and the calculator gives me three dates and times, for both the winter and autumn periods for a given year and time-zone, when everything is perfectly aligned. No coding required! Cheers, Keith