
Some people are brewing their own beer, others have a vat of pseudo-Burgundy bubbling away in the corner of the sitting room. Yet more are turning into part-time-alchemists when it comes to processing their own films. The home darkroom has regained some popularity in the last few years. Rightly so? I took the test and re-entered a scene that once was all too familiar to me. Read on to learn how it worked and what I recommend to owners of the occasional Leica M3, M6 or the like.

I never thought I would do this again. Not that I particularly disliked lab work. As a young freelancer for my local newspaper, I spent many a night in an improvised darkroom in order to process the film from the event I had just come back from. First, I submitted negatives, later I was able to afford an enlarger and could hand in prints. I thought it was better to keep the negatives than to give them to the newsroom where they were prone to get scratched or lost (the material was shipped in local express trains to the print shop until the late 1990s).
For some reason, I never parted with my lab equipment
To be honest, I never really needed these old negatives. A reception for long-time blood donors or the assembly of the theatre friends or the concert of the school choir are not historical moments whatever the auto-suggestion tried to make a young reporter believe. At least I learned both the lab techniques and efficient workflows. After I concentrated more on writing and much later came back to a fully digitalised news photography world, I knew the time of my own lab work was over. However, I kept some of my gear (developing tanks, the beautiful Fujimoto enlarger, process timer) out of nostalgia.
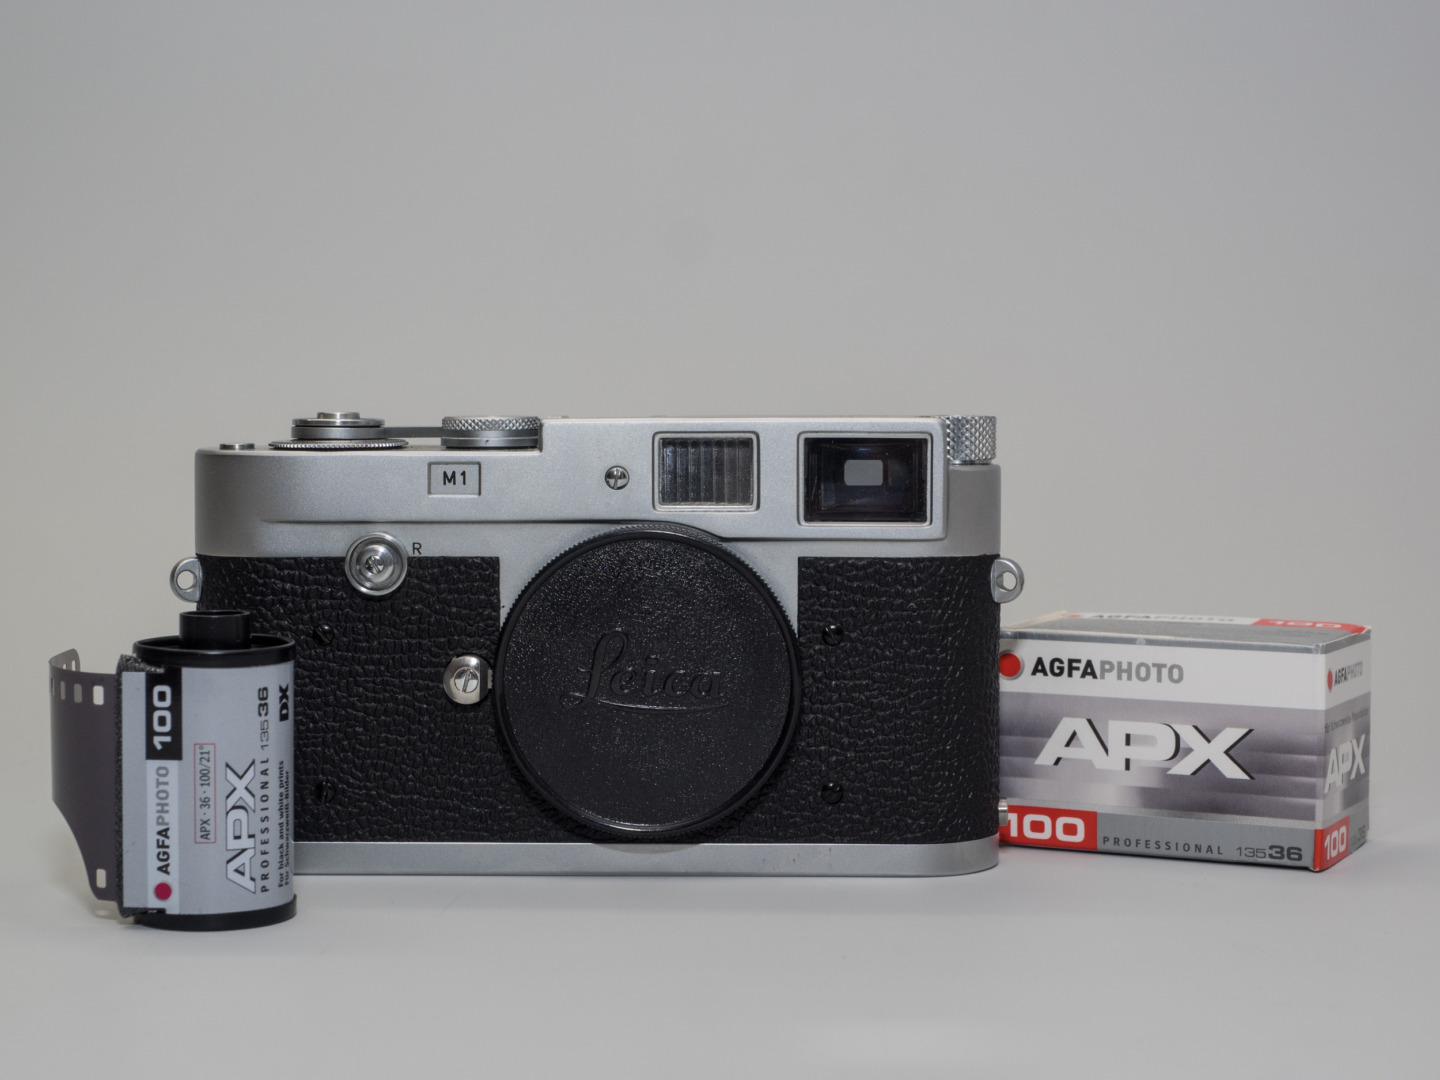
And then, all of a sudden, I found myself processing a film again. It coincided with the arrival of what appeared to be a bargain. I was offered a Leica M1 (the stripped-down variant of the M3, with no rangefinder) and wanted to check if it works. Shooting a colour negative film and having it processed took too long (I told myself). On the other hand, I was curious to go back to the roots.

I set off to (re-)learn five lessons
My wonderful dealer, Lichtblick at Konstanz, still carries all photo chemicals, and it was a rainy Saturday. So I wanted to give it a try (and hoped it would not be as disastrous as my attempt at playing the trombone again after decades). An old Jobo tank with a couple of reels was still around, and a changing bag too. A few hours later, I had become several decades younger (for a very brief moment).

1. Do not fully rewind your films
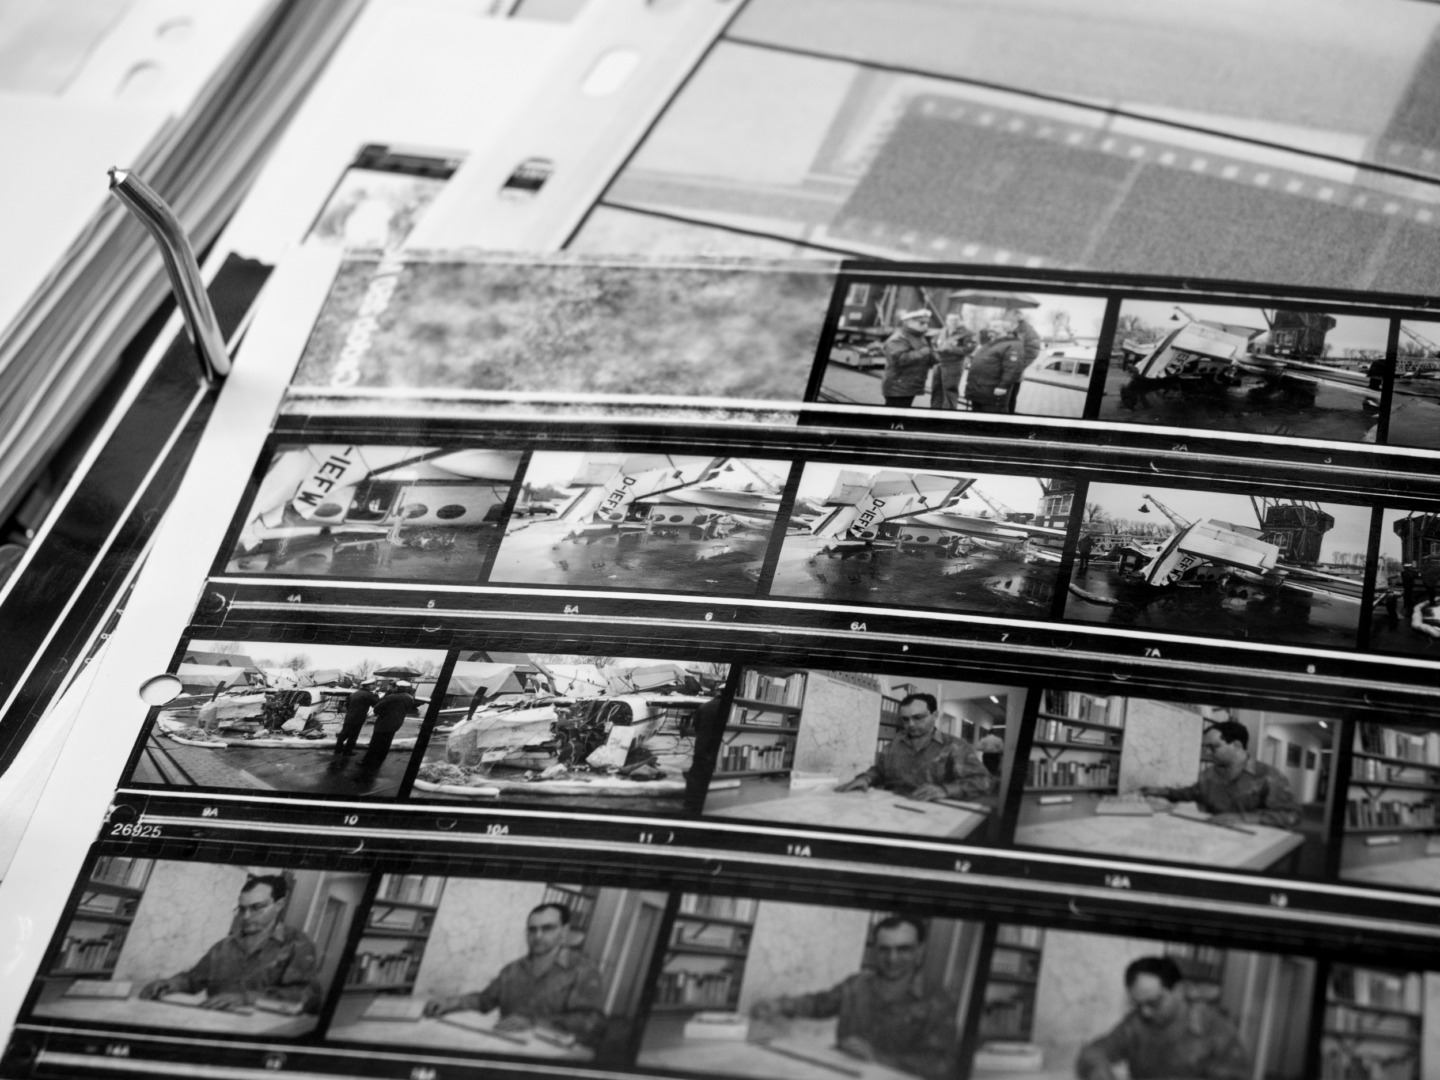
So, how did the lab experiment work? To be honest, I had my doubts at first, and I thought some training would be useful. So, I sacrificed an expired roll of film to practice winding up the film onto the reel. After a few twists, my muscle memory was as good as ever. On I went with the two rolls. Cutting around the film’s leader (instead of my fingers) was not so easy in the little changing bag, and I immediately remembered that I never wound back my black-and-white rolls into the cartridge to be able to prepare them in daylight. Lesson number one.

2. Look for a room at 20 degrees and prepare enough water
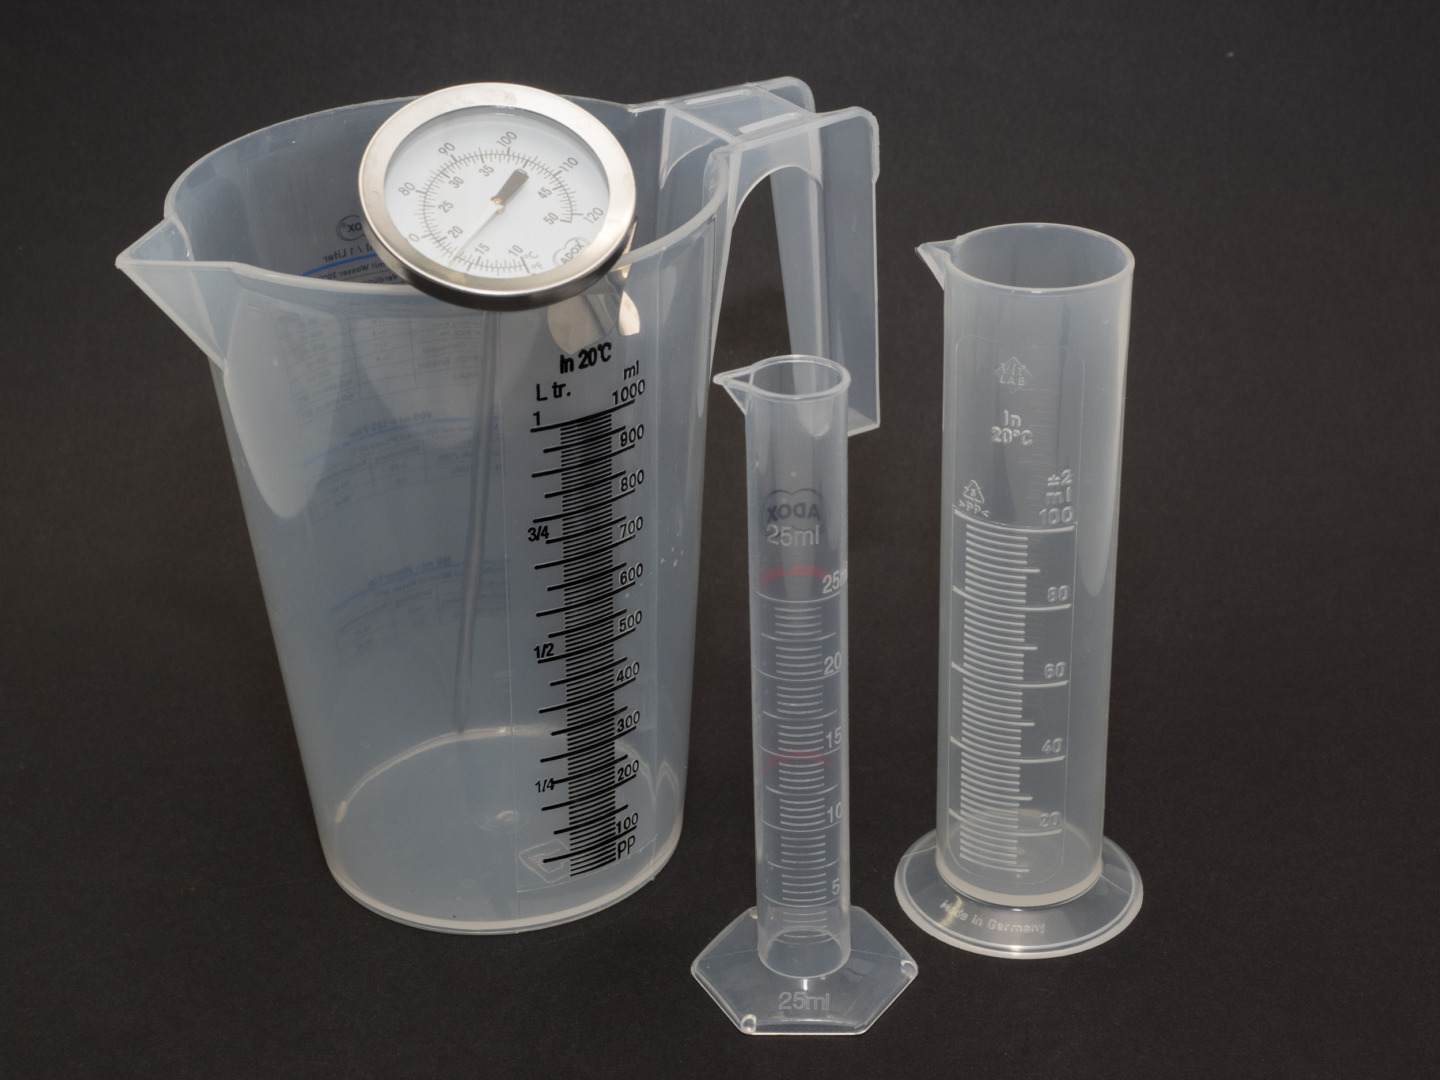
I then did the work in a cool room in the basement. So, I had some fiddling around with warm and cold water, with a not-so-precise thermometer and strange dilution calculations. In earlier days, worked in our boiler room which is automatically a warm place and always had a few bottles of water at room temperature. The whole process was easily adjusted to 20, 21 or 22 degrees. Furthermore, I developed so many films that I did not have to mix the chemicals before every use because I worked with stock developer and fixer. Next time, I collect a small number of rolls (in the fridge, and not over a too long period) and do the processing in the kitchen. Lesson number two.
3. Check what to do with used chemicals beforehand
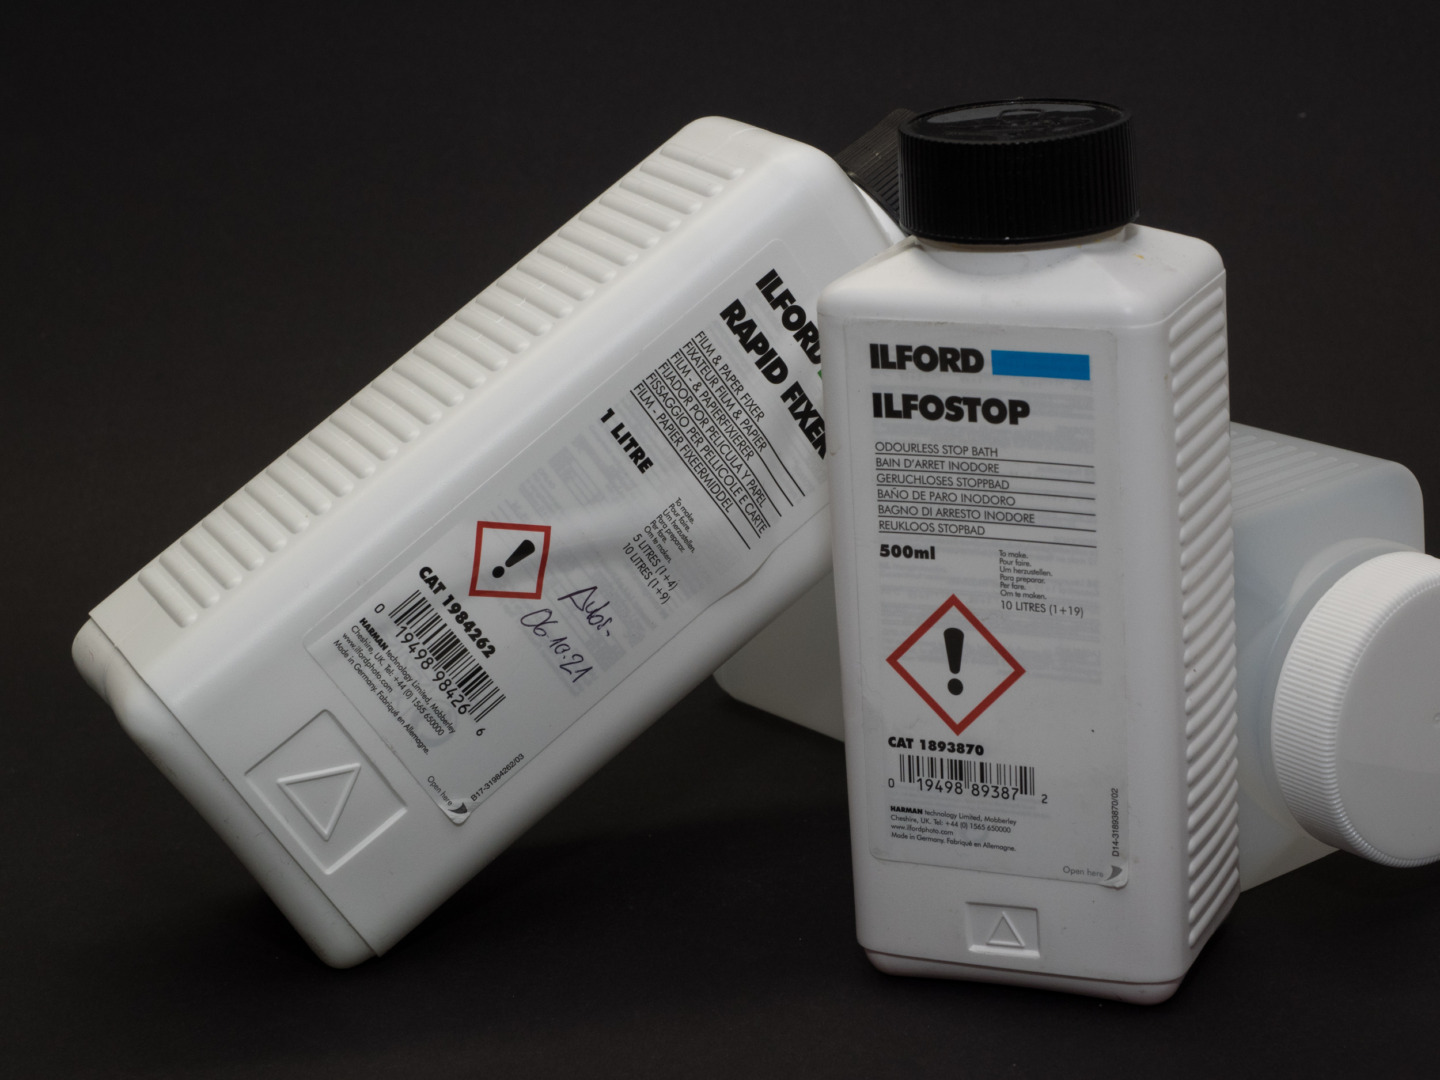
Developer, stop bath, fixer, final rinsing, all went fairly well. I bought only the smallest-available quantities of chemicals, but it was still too much. Now what to do with the used developer, with the not-yet-exhausted fixer? I had to look it up because ecological legislation (and consciousness) has considerably changed over the last 20 years. Right, you have to collect all waste and bring it to a special recycling point which is accessible only a few times per year. The lab is not really environmentally friendly, especially if you don’t process rolls regularly. Lesson number three.
4. Make sure you have a dust-free place to dry your film
Finally – drying in a dust-free environment. The bathroom is great for this, but make sure all provisions are taken before you appear there with two wet rolls in your hand that magically cling to any surface. Think of something heavy-ish to hang on the lower end and to make sure the film is properly stretched out. Then, finally, the first look at your results on a lightbox. It is a long way to get there; “just develop this one roll“ is a fiction if you are not doing this several times a week. Home processing requires time, passion and precision. It’s a lot of work. Lesson number four.

5. It’s fun!
The results? The negatives turned out good, with impressive shadows and well-structured bright areas. Fine-grain (despite my having used a cheap 400 ISO Agfa APX clone). A few water stains. A quick moment to learn to assess a negative and to imagine what a print would look like by reversing the greyscale. It has a kind of magic. Lab work is very rewarding, even after decades and in spite of all the trouble it can cause. Lesson number five.

Following these first steps back into the world of the lab, I also re-entered the real darkroom and brought back to life the enlarger, the trays, the paper in its black plastic bags, the red light and all the rest of the rather arcane paraphernalia. Compared to this workflow, developing the occasional roll is in reality fast and easy. But the positive process is another story, here it’s about film processing. Maybe, I will report on that later. Small spoiler: With the printing of your images, you will have the full work, and the full satisfaction.

My advice: Do it frequently or not at all
So, is it a good idea to process your own rolls? If you want to (re-)learn the processual nature of photography (with many, many steps from the concept to the result), a journey into the dark is highly recommended. Most of what I learned about correct exposure of negative material I learned in the darkroom by way of mistakes and problems I did not want to occur again. And I think mastering such a process is a very rewarding experience – much more rewarding than looking at your images as they are popping up in your Lightroom library. I suggest any serious photographer should work regularly with film, and (part-time) film photographers should consider processing their rolls – if they have the opportunity to do so more or less regularly. The odd two rolls a year are better given to a professional lab.

Nice innovations make lab work easier and help you get started
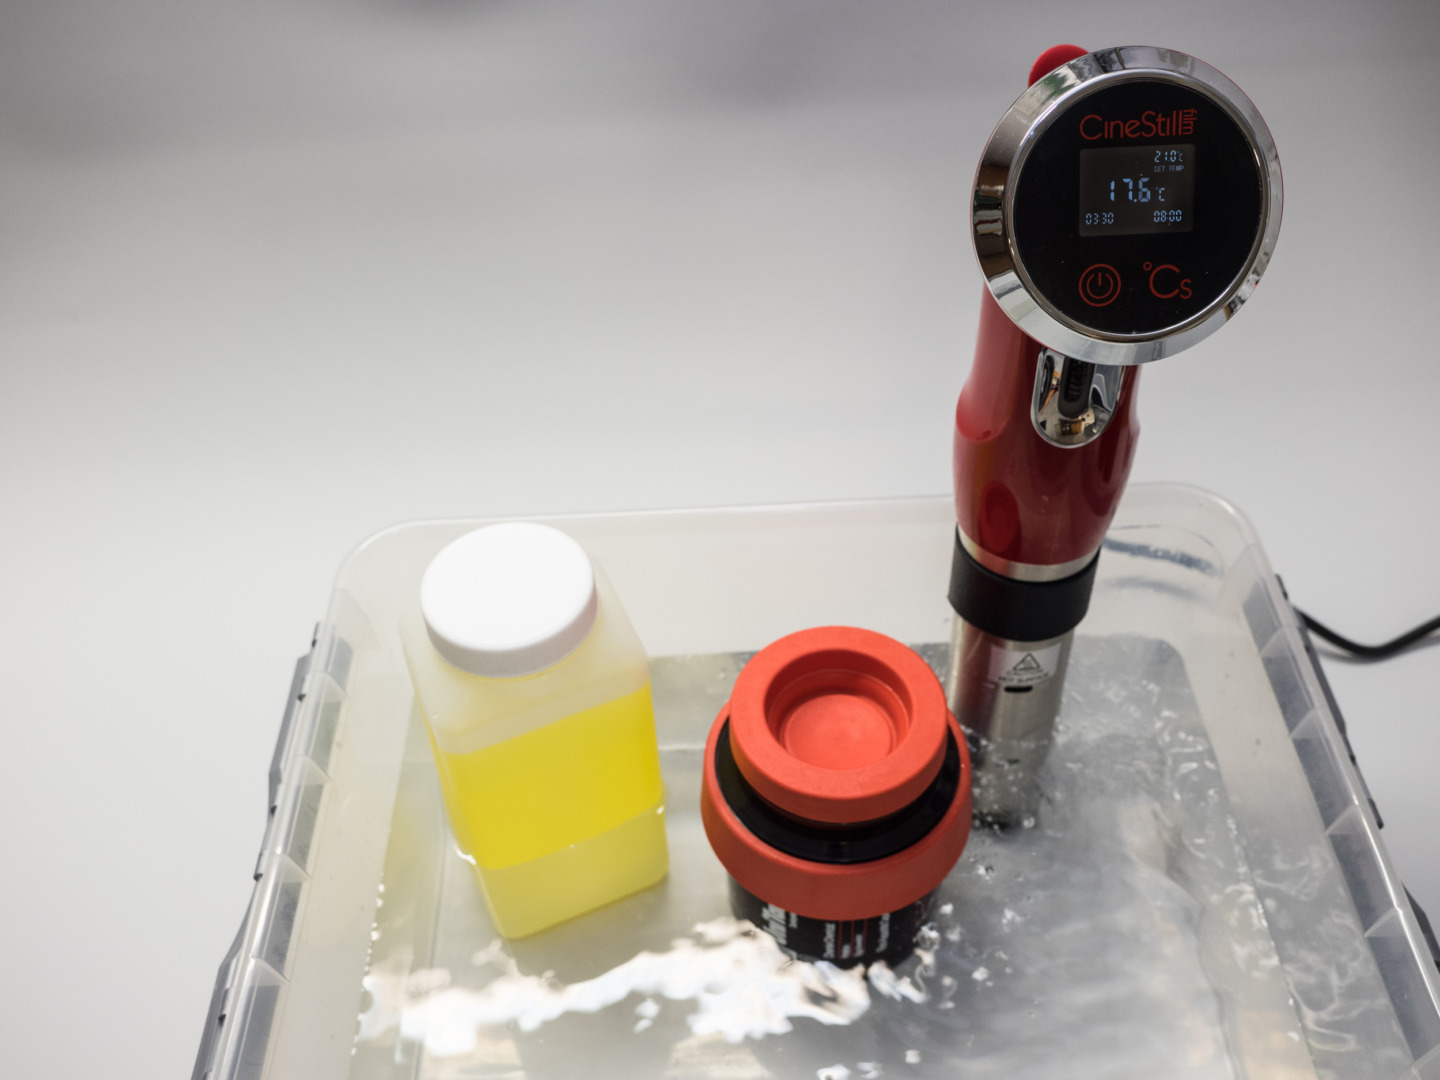
Chemicals, developing drums and all other accessories are widely available. With the “analogue” renaissance, even some innovations were launched such as the useful daylight developing tank from Ars Imago and the very clever CineStill Immersion Circulator Thermostat. The latter looks suspiciously similar to a sous-vide cooker, so using such an appliance might be a clever hack. There are even nice starter kits with Paterson tank, chemicals and all necessary accessories, practical and very affordable packages of three films with developer and fixer, and the small-quantity Ilford liquid chemicals in plastic sachets. In this respect, the way is paved. A recommended source, especially for EU readers, is Fotoimpex in Berlin.

One last lesson: Don’t forget that progress has not passed the good old analogue technology by and that there are some real improvements compared with the situation of 20 years ago.
If you’re up for giving home developing a try, I highly recommend using the Massive Dev Chart app on your smartphone. This is an amazing tool to program your process steps (10 mins developing, moving the tank once in 30 secs, 2 mins stop bath… and so on) and to calculate the single times, for example when you use warmer or colder chemicals, if you pushed your Tri-X to ISO 800, if you use an unknown type of developer. There are other apps as well, but I found that Massive Dev Chart is the best I’ve tried so far.


Photography is all about a process. In the lab, you can extend it to the max
Long story short, processing a roll of film yourself does have a special attraction. When you direct the negatives to a source of light for the first time and assess what you’ve shot, it is a very special moment many of us have strangely fallen out of love with. I would like to encourage you to give it a try. It is neither exceptionally expensive nor all too difficult to develop a roll of 35mm or type 120 roll film. And you will not take your daughter’s wedding as a perfect occasion to try home developing. It’s not difficult to limit your risk.
The biggest obstacle I see are the limited possibilities to digitalise your images yourself – while making your own prints is very rewarding for sure, it requires so much more (equipment, space, time, chemicals). I did it (the film processing, that is) several times again after this first fallback. So to speak – I have developed, from Britney Spears to Freddie Mercury, from „Oops, I did it again“ to „A kind of magic“.
And the lovely Leica M1 turned out to be in the best order by the way.
What about you? Do you continue to develop films yourself? Or have you just started or re-started? Do you enjoy the lab work or are you just happy you do not have to do it again? Do you have a standard process with a certain film and developer combination? And do you use clever helpers such as timer and calculation apps for your process steps? Do you think lab work has an educational value and would you encourage young photographers to try it out? Or is film photography simply obsolete and something that will not be missed? Feel free to discuss all this and more in the comments section.
Read more from the author
Make a donation to help with our running costs
Did you know that Macfilos is run by five photography enthusiasts based in the UK, USA and Europe? We cover all the substantial costs of running the site, and we do not carry advertising because it spoils readers’ enjoyment. Any amount, however small, will be appreciated, and we will write to acknowledge your generosity.
I was in the darkroom for about 30 years. Back then I never took any safety precautions. No mask when mixing chemicals and the dust from the powder would get airborne. I didn’t like thongs, so used my hands in the chemicals. Now that I’m old I wish I had taken better care of my health.
I gave up darkroom work for a number of reasons. A flood wiped out my photos from the 80s and 90’s, negs and all. Luckily I still had some early work from the 70’s. Digital came into being and I didn’t have any room for a darkroom at my new local. So, I moved on to digital. And am very happy with my move.
Looking back on the film era, I didn’t like darkroom work that much. In the beginning, when I started to develop and print in my mom’s bathroom or kitchen, it was magical. But the magic soon wore off and it became just drudgery necessary to get the print.
I had read some comments awhile back about the kids shooting on manual with their digital cameras and bragging like it was something special. Huh, it was just what we did back then. All cameras were manual, we thought nothing of it. Same with the wet darkroom…it was just what we did…if we wanted a photograph.
After black and white, I graduated to color. I pretty much stuck with Type-C prints and chromes. I did a few dye transfer prints, but they required an expensive densitometer to do them right. Always on a tight budget, I never got one. In the 1950’s dye transfer had replaced carbro color prints as the ultimate in color photography. But they both processes produced beautiful color prints.
Here are some details of the dye transfer process.
https://archive.org/search.php?query=Bob%20Pace%20The%20Dye%20Transfer%20Process%20VHS
Once in a while I have the urge to go back in the darkroom. Nostalgic, I guess. But the amount of control you have with digital is astounding compared to the wet prints. So, the nostalgia soon passes.
Dear Daniel, thanks for your feedback. You are perfectly right that the darkroom was/is not the healthiest of all places to say the least. I can fully understand everbody who happily gave up darkroom work, and I also agree that digital post processing can be as fascinating as lab work. How good that there are several options, and I would never want to go entirely back to film photography. All the best, JP
Leicas?, exciting or fetish’s , though a fantastic camera can be bought for few quids.
Two tips.
Get metal tanks and spirals. There are two kinds of plastic spirals: one just impossible and the other better but not far from messy often. The point is when stuck there’s no return by opposite to metal reels.
Use distilled water for the las bath before drying. Together with flu flu. Hard water stains are common
Dear George, absolutely right. There are so many great film cameras and most of them are screaming bargains. As to metal tanks and spirals – I never worked with them and got along very well with my Job drum so far. We have quite soft water here, otherwise distilled water is a good idea for the last wash. If you have a modern electric tumble dryer, you can use the water that comes from it (filter it first through a common paper coffee filter). JP
I must say, the water quality around here is my main deterrent to dusting off the old Jobo tank and storage bottles. It’s slightly annoying that the quality of my b&w film developing is worse now than it was 40+ years ago, simply because of the quantity of bits floating in our water supply which seem almost magnetically attracted to film emulsion. Distilled water for the final wash(es) is fine, and maybe I should use it when mixing up the chemicals too, if I can find a bulk supply – but overall, it’s easier to send the occasional film to someone like Peak Imaging (in the UK), then let the Coolscan work its magic on the negatives. My loss, no doubt.
“.. if I can find a bulk supply..”
Available on Amazon.co.uk. Price varies around £25 for 25 litres, and pro rata.
Thanks, David, very helpful. By the way, I’m trying to ignore your mention of the daylight loading tank, telling myself that I don’t shoot enough b&w to justify a nearly £200 addition to the toy cupboard – but it may be a chicken and egg sort of thing …
Ah, that’s the thing about getting ‘Early Bird’ or ‘Super Early Bird’ discounts on crowdfunding; the price is usually 50% – or so – cheaper ..that’s if the product actually makes it into production ..though it often turns up 2 years late! (..Except for Jane Giles’ wonderful book about the Scala Cinema: that’s the only thing I’ve ever backed which turned up on exactly the date which was promised!)
But you can get old non-daylight-loading tanks for about 3d on eBay, or Etsy, or whatever the other ‘vintage’ sales sites are. Average price about £12 – £24 ..though I’ve just seen a ‘Vintage 1960s AGFA Rondinax 60 Daylight Film Developing Tank’ offered for £100′ sitting in Saltburn-by-the-Sea ..but that’s the seller’s price. I’d start with an old ‘Vintage popular Developing Tank’ for £12 and go from there ..I think my old ‘Polly’ tank for 127-film which I got the other year cost just £6 ..complete with spool, plus original cardboard box!
But then, as you say ..chicken & egg – paying something more may just nudge you into actually doing a few films with it!
For me it’s a must. Bulk supply? You find bottles in gas stations (for battery) and supermarkets (for ironing). Very easily. About 2 or 3 £ 5 litters. Enough for more than 20-30 35 mm rolls. The last wash before driving enough.
I have many rolls with ugly stains before using it.
As someone who has processed film for sixty years with a misspent ten years on digital I am largely in agreement. Regular prcocessing to an invariable routine slowly makes the difficulties diaappear. One can sill find Valloy or Focomat enlargers. And the sense of fun and achievement is incredible. Leica Ms are readily available on eBay and are no more expensive than a half decent digital camera. They may need a service but will last for ever.
So unless you really lover your laptop more than photography and want your camera do do all the work for you, go film. Luckily my darkroom doubles as a kitchen.
Geoffrey Rivett
I couldn’t agree more, Geoffrey, with one exception. Even without a Leica M film photography is great. I just wrote an article for Macfilos on Olympus OM cameras. Get any of these or a nice old Pentax, Minolta, Nikon, Canon, Yashica, Konica…, make sure it works and got out. You will have great fun at a moderate cost (compared to investing in good digital camera equipment). JP
An excellent article for those considering the prospect of entering or re-entering the world of film. I enjoyed film when I was younger but I now prefer my lightroom (actually Capture one).
I wish you all the best on your re-adventure. Merry Christmas.
Thanks, Brian, I hope you have/had merry Christmas, too. In many instance, I also enjoy the fact that I can exchange the darkroom for lightroom, and I thought for a long time I would never go back to the lab. Now I see that it’s just two very different things. And I like them both… JP
.
My cousin Merton showed me how to develop and print when I was 7 (..so that’s about 67 years ago!..) using 127-size film ..so the pics didn’t really need enlarging: I did ‘contact’ prints in a contact printing frame ..so the finished pics were the same size as their negatives.
Many years later, I taught dev and print – and photography – for an outfit which ran courses for schoolchildren who didn’t want to go to school ..they could come to our premises and do painting, clay throwing, photography, etc, as if it was a school course, but away from the school buildings. We had about four enlargers, and I bought a set of ‘Cosmic Symbol’ (sometimes called ‘Smena Symbol’) cheap Russian plastic cameras, and a few Russian Zeniths – they all had adjustable shutter speeds, focusing and apertures, and Zeniths could take interchangeable lenses!
Then, on ‘Practical Photography’ magazine, we had a huge walk-in darkroom downstairs on the ground floor, and enlargers which could handle most film sizes, though it was normally 35mm. But that was a chance to try and test different enlarging lenses – Rodenstock, Minolta, Nikon, Leitz, etcetera. There were always ready to use chemicals, and it took next to no time to load a tank, develop, stop and wash, fix, wash again – with a drop of wetting agent, or Fairy liquid – (to make the wash water wetter!) – and then a final rinse with a little meths (methylated spirits) added so that the rinse water evaporates faster. [Extra tip, there, J-P! ..But I bet Don knows, from his newspaper work!]
When devving a few months ago – what else could you do in lockdown? – I used an Ars Imago daylight-loading tank which J-P mentions (I backed it on a crowdfunding site) and it’s SO much simpler than fumbling film into a spiral in the dark. It has a handy handle on the side, too, for turning the film (‘agitation’) instead of tilting a tank upside down every so often – and getting dev drips down your sleeve!
I don’t have an enlarger any more, but I slide negs into a Nikon Coolscan scanner, and the results pop up onscreen, so they’re available for printing with an inkjet, or adjusting in a photo program first, but I then upload my photos to Blurb, and create bound photo-books for gifts, or just to have at home and turn the pages.
I joined ‘Photofusion’ in Brixton, south London, a few years ago ..like the darkroom William mentions (above), where they’ve an assortment of enlargers, all the chemicals you need, and they run esoteric throw-back courses such as ‘Salt Printing’, ‘Kallitype & Platinum Printing’, and introductions to all aspects of chemical developing and printing!
Devving yourself is simple: if you can mix anti-freeze for your (petrol or diesel) car engine, you can dev photos! If you can make a cup of coffee, you can dev films.
Thank you, David,
for sharing all these memories and knowledge. I think, young people are well advised to learn the whole process of photography (see my reply to William Fagan above), and a darkroom is creative space for sure.
Fairy liquid (in Germany, the traditional washing-up product is called Pril) works well, and distilled water is also a good idea. I never used methylated spirits however. Seems to be a good idea, but in my then newsroom, we were more robust and used (really…) an electric hairdryer when we were in a big hurry.
And I agree, developing a film is not that difficult, you just have to pay the dues in the very beginning. The Ars Imago box might be very helpful in this respect because it helps you to keep your lab environment clean – and that’s really important (clean sleeves are nice, too, I don’t know how often I had chemicals running down my arm).
All the best, JP
As an alternative to Ars Imago’s Lab-Box I can recommend an old Rondinax daylight processing tank. It came in two sizes – for 120 (Rondinax 60) or 135 film (Rondinax 35). It may not be easy to find one in good condition (it was first produced in 1949 and is made out of Bakelite), but it is otherwise very easy to use.
Excellent addition, fiatlx, thanks a lot. The Ars Imago box is basically a remake of the Agfra product with the only big difference that you can process both 135 and 120 films as long as you habe both adapters. But given the quite hefty price for the Ars Imago box it is a good idea to search eBay and flea markets (once they take place again…) for a Rondinax. I personally get along very well with my Jobo drum and the changing bag. If you have routine with getting the film onto the reel, the rest is easy. JP
A wonderful article Jörg Peter that took me back down to memory lane. The toilets were the place for the Paterson tank. The films would dry on the clotheline in the bathroom and my Meopta enlarger was in the kitchen. I might take it up again if I find a camera club who still got everything to process.
Thanks very much and have a great christmas with your family.
Jean
Thanks, Jean, and you have a wonderful christmas as well. And maybe the new year will take you into some photo lab. Not the worst place to be in times of enforced isolation… JP
Great article Joerg Peter. I have never had a darkroom at home and I doubt if one would be ‘allowed’ at this stage. Just before Covid struck, I met Mella Travers, a photographer, who owns the Darkroom business in Dublin and I had only just done my first two rolls of film when lockdown occurred. I had earlier given Mella some of my Leica FILCA cassettes, which I had thought might have contained film, but they remained in the Darkroom for a long period. In August 2020 I went into the Darkroom to process some rolls of film and Mella produced the two FILCAs and said ” we might as well do these while you are here”. One of them had an empty short piece of film and the other one contained the ‘Swiss Photos’ which featured here about a year ago.
In the year just ending I have done just a few rolls of film as I don’t really go into public spaces willingly these days. Mella has about 8 or 9 enlargers in her darkroom and young photographers are coming in and out all of the time. I am hoping that, if Covid wanes in 2022, I will find the time to go into the Darkroom to do much more processing. I have, however, taken on board duties with two photographic organisations which will definitely eat into my time during the coming year. I can manage most aspects of processing, apart from using the changing bag, which Mella irreverently calls ‘the nun’s knickers’. My arthritic hands cannot manage doing such tasks ‘blind’ so she usually helps out with that, particularly putting the film on a reel.
You have definitely encouraged me to go back into the darkroom as soon as it is safe to do so again.
William
Thank you, William, and I am bit flattered of course to read that my small article encouraged you to go back into the darkroom. So will I, and I think there is no better way to understand and improve the process of photography than putting a film into your camera, carefully exposing is, processing the roll and creating some nice prints at last. It was something I missed without really noticing it.
As a matter of conincidence, the postman broght my my two last rolles of Adox Scala back from the lab at Stuttgart (they ceased the bw slide service just this week, and for good) yesterday. On the one hand, this was very nice and almost a Christmas present on December 24, and on the other hand, I felt a bit melancholic. I still have some rolls here, maybe I try to process on my own (there is a specail kit available, but it is quite tricky).
All the best, JP