
Displaying a pair of carefully chosen photographs, side-by-side, can make a bigger visual impact than either photograph alone. But what is the best way to generate such a composite image, with control over how each photo is positioned? My approach is to use some Photoshop editing, and here is a simple ‘how-to’ guide for how it’s done.
I recently described my interest in presenting street photographs as diptychs. Inspired by religious art from medieval times, photographic diptychs comprise a related pair of images, sitting side-by-side. The intention is that visually, this new composite image adds up to more than the sum of its parts.
An obvious way to create a single image comprising two photographs is to place them on a neutral background. It is then straightforward to post the dyptich on social media, include it in an article, or print it.
So, what’s the best way to do that?
In the first article in this series on Photoshop editing, I explained how to place a single image on a background. The primary objective in that case was to create a border around the image. However, with a few minor changes to the process, you can also use it to create a diptych.
Familiarizing yourself with that first article will make this one easier to follow. But, even if you have not read it, you should still be able to make sense of this one. My aim throughout is to provide a step-by-step guide for readers who have rarely, or never, used Photoshop.
Let’s get started
As in the previous article, I will illustrate the Photoshop editing process using screenshots at relevant points. The example will employ a pair of square images, just to keep things simple. But the same process can be used for rectangular images, in landscape or portrait format.
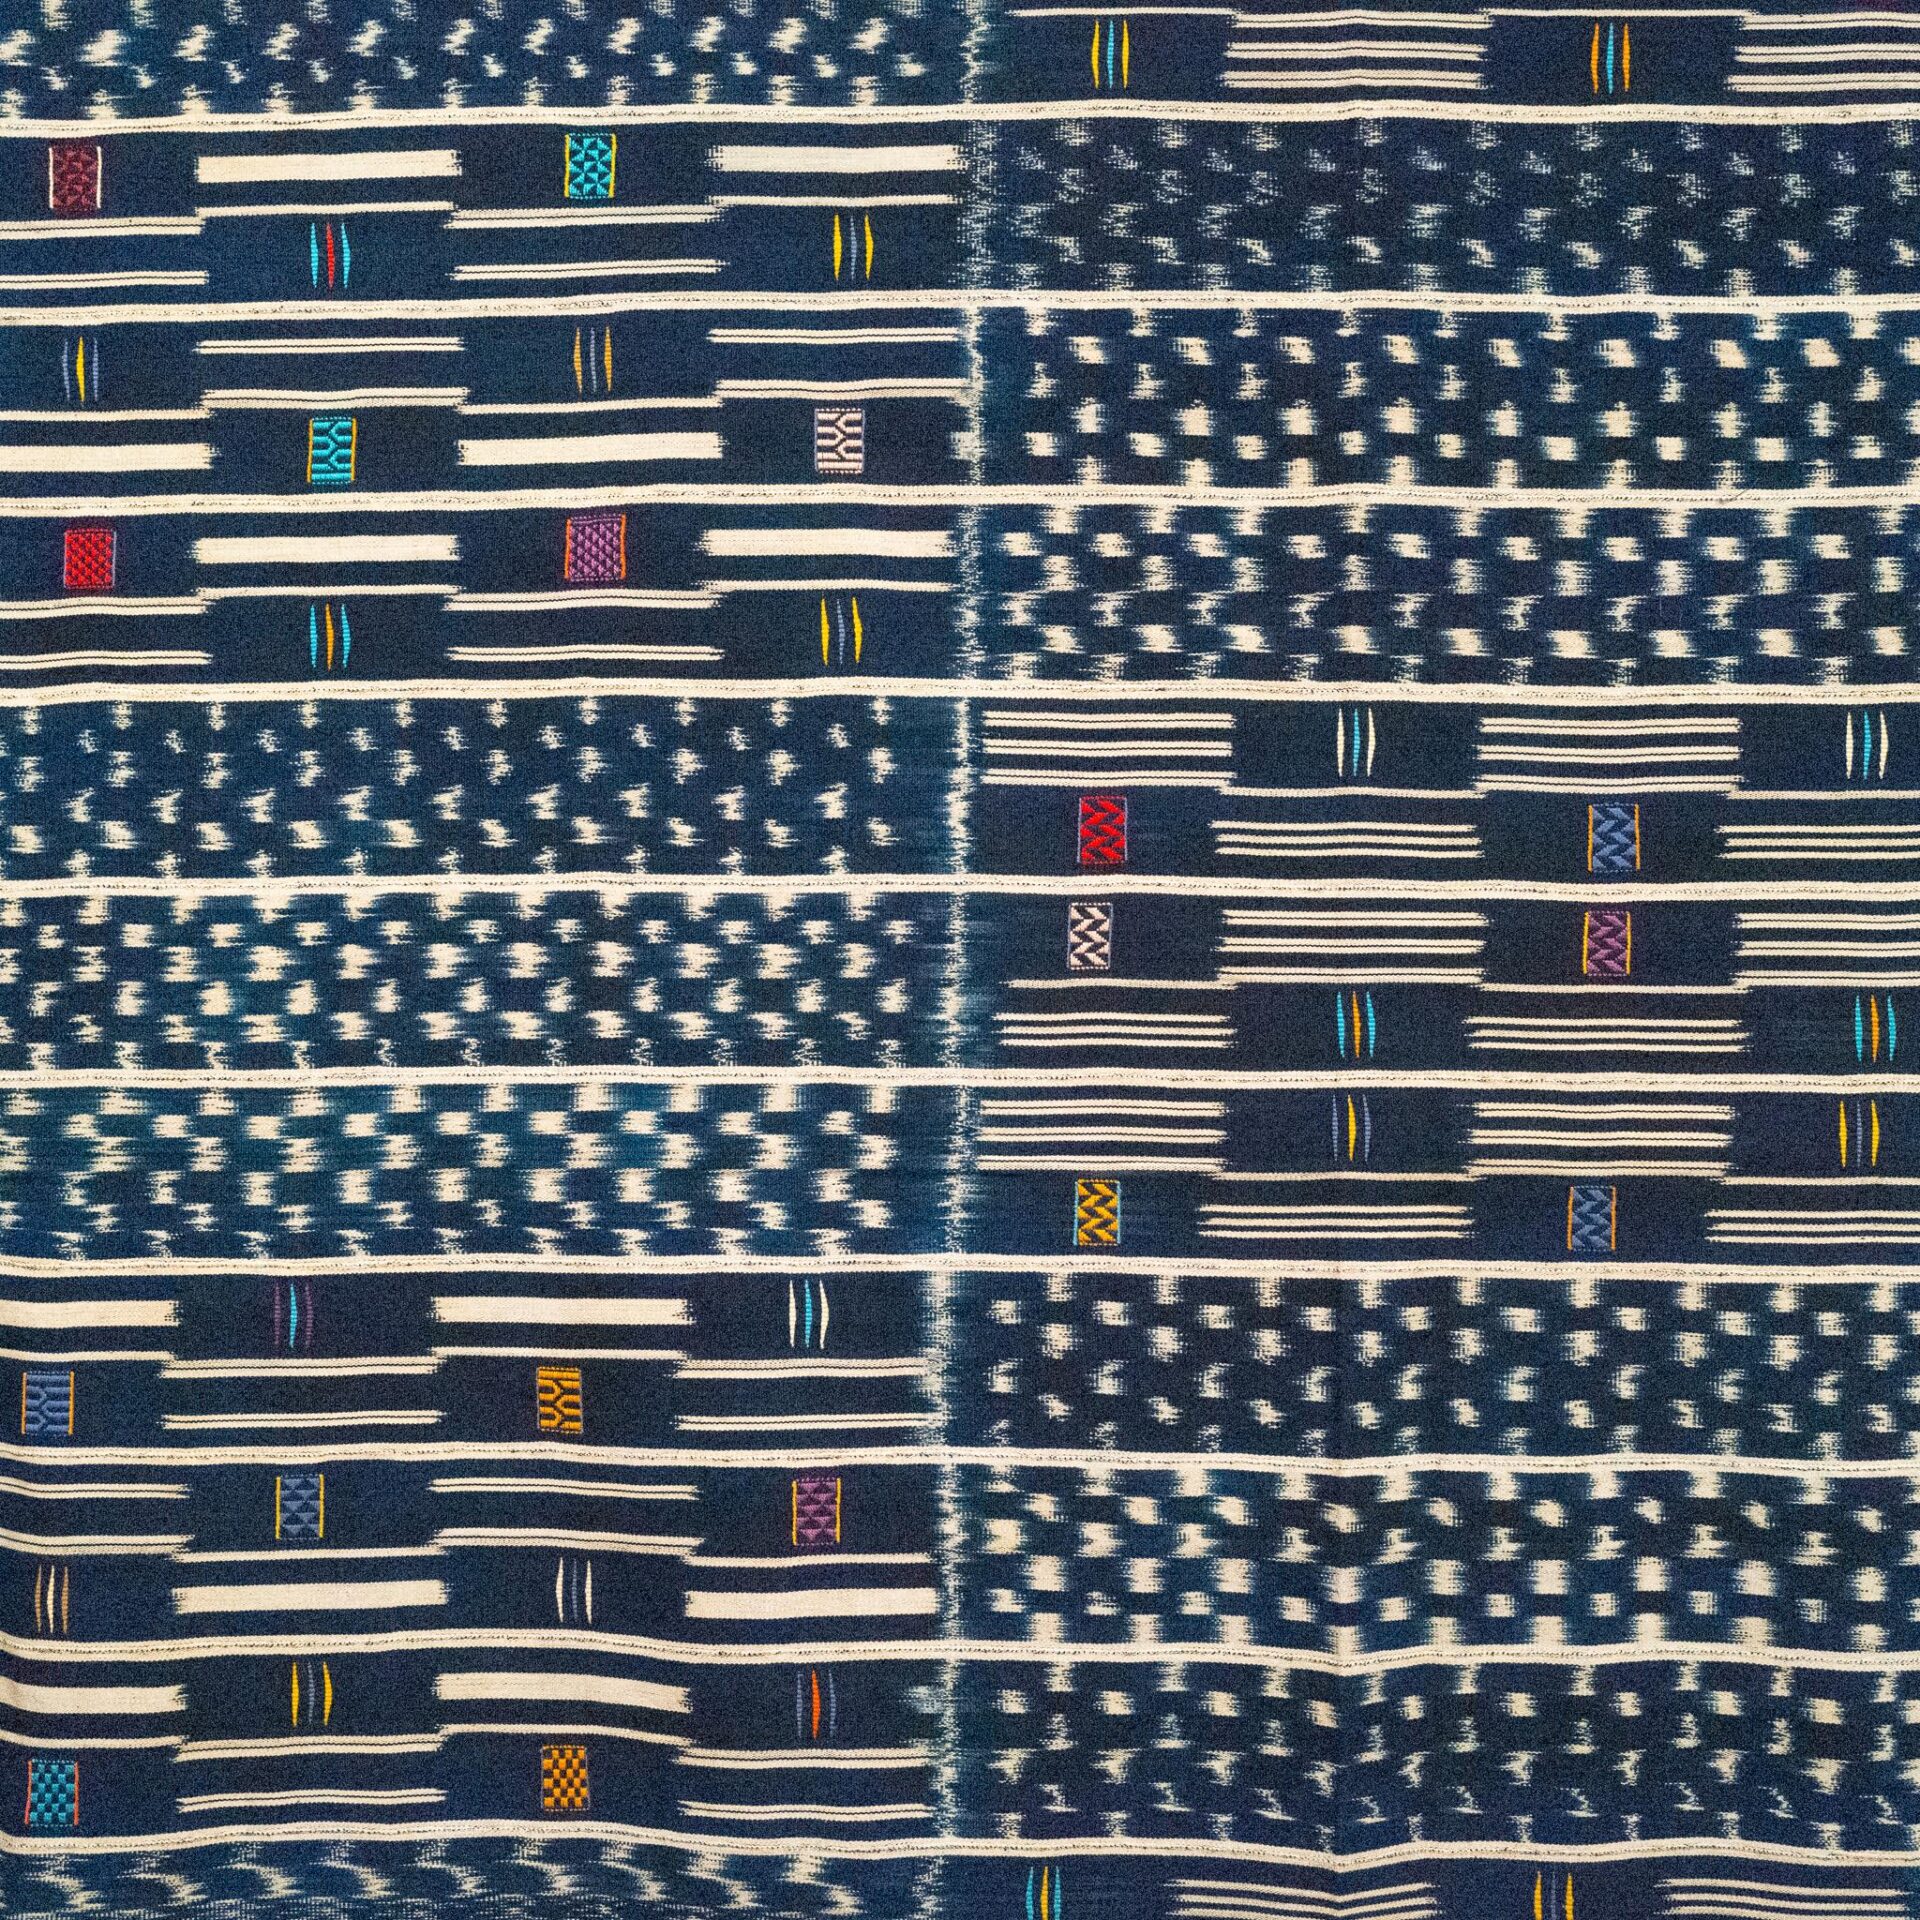
I took the two photos I will be using in this tutorial at the Mingei International Museum in Balboa Park, San Diego. One is of an exterior wall, in the museum’s patio. The other is of a fabric exhibit at an exhibition exploring the origins and use of indigo dyes in cultures around the world. They might not be the perfect pair for presentation as a diptych, but I like them.
I generated the examples in this article using Photoshop 2024 on a MacBook Air. I assume the instructions will be readily transferable to earlier versions, or versions run on a PC.
Importing images into Photoshop
The first step is to import the pair of images you have chosen into Photoshop.
With Photoshop open on your device, go to the menu bar at the top of the screen and click on File and then Open.
At the lower left of the screen is a button, labelled on your computer. Clicking on this allows you to navigate to the relevant JPEG file.
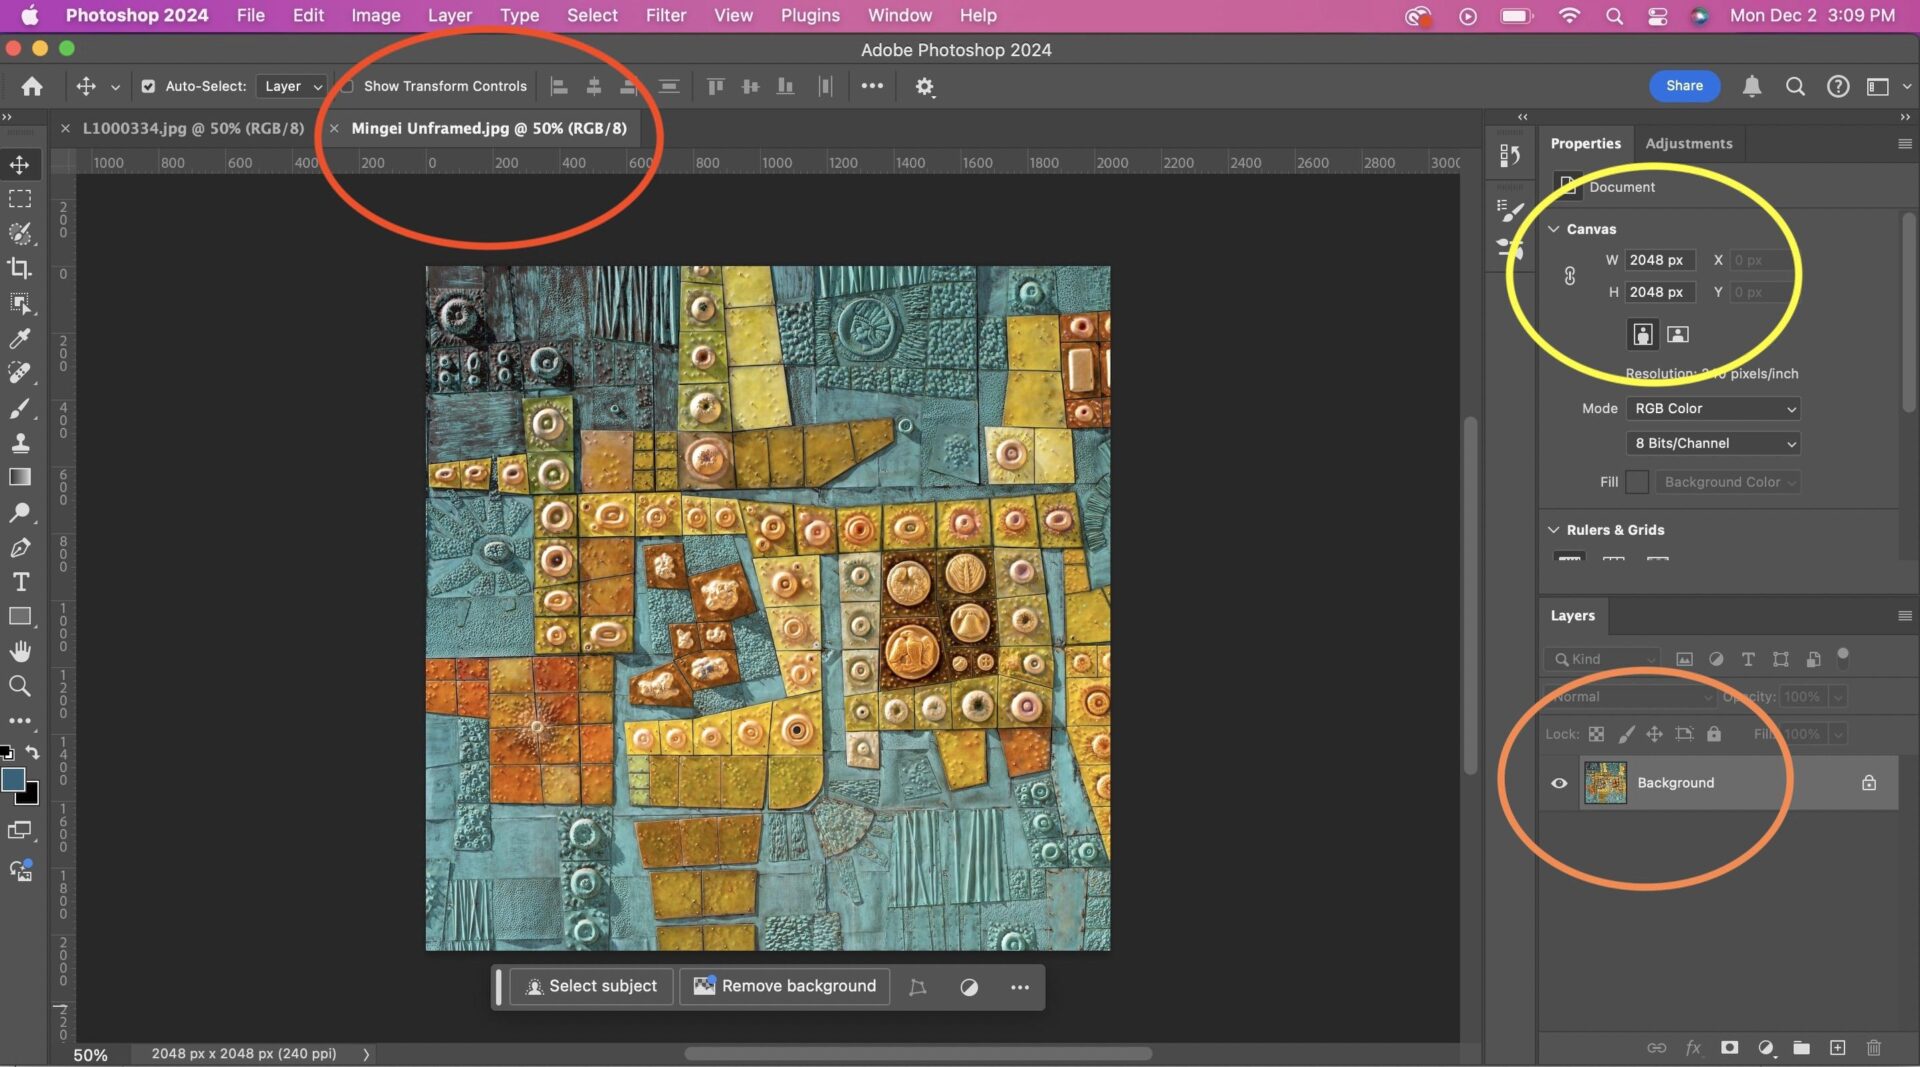
Opening the file creates a Photoshop editing workspace page, which you can see above. The upper-left area (red oval) shows the name of the file you have loaded. The lower-right area, (orange oval), shows that your image is the background layer. And the upper-right area (yellow oval) shows you the x- and y-dimensions of your image in pixels.
After importing image 1, repeat the procedure to import image 2.
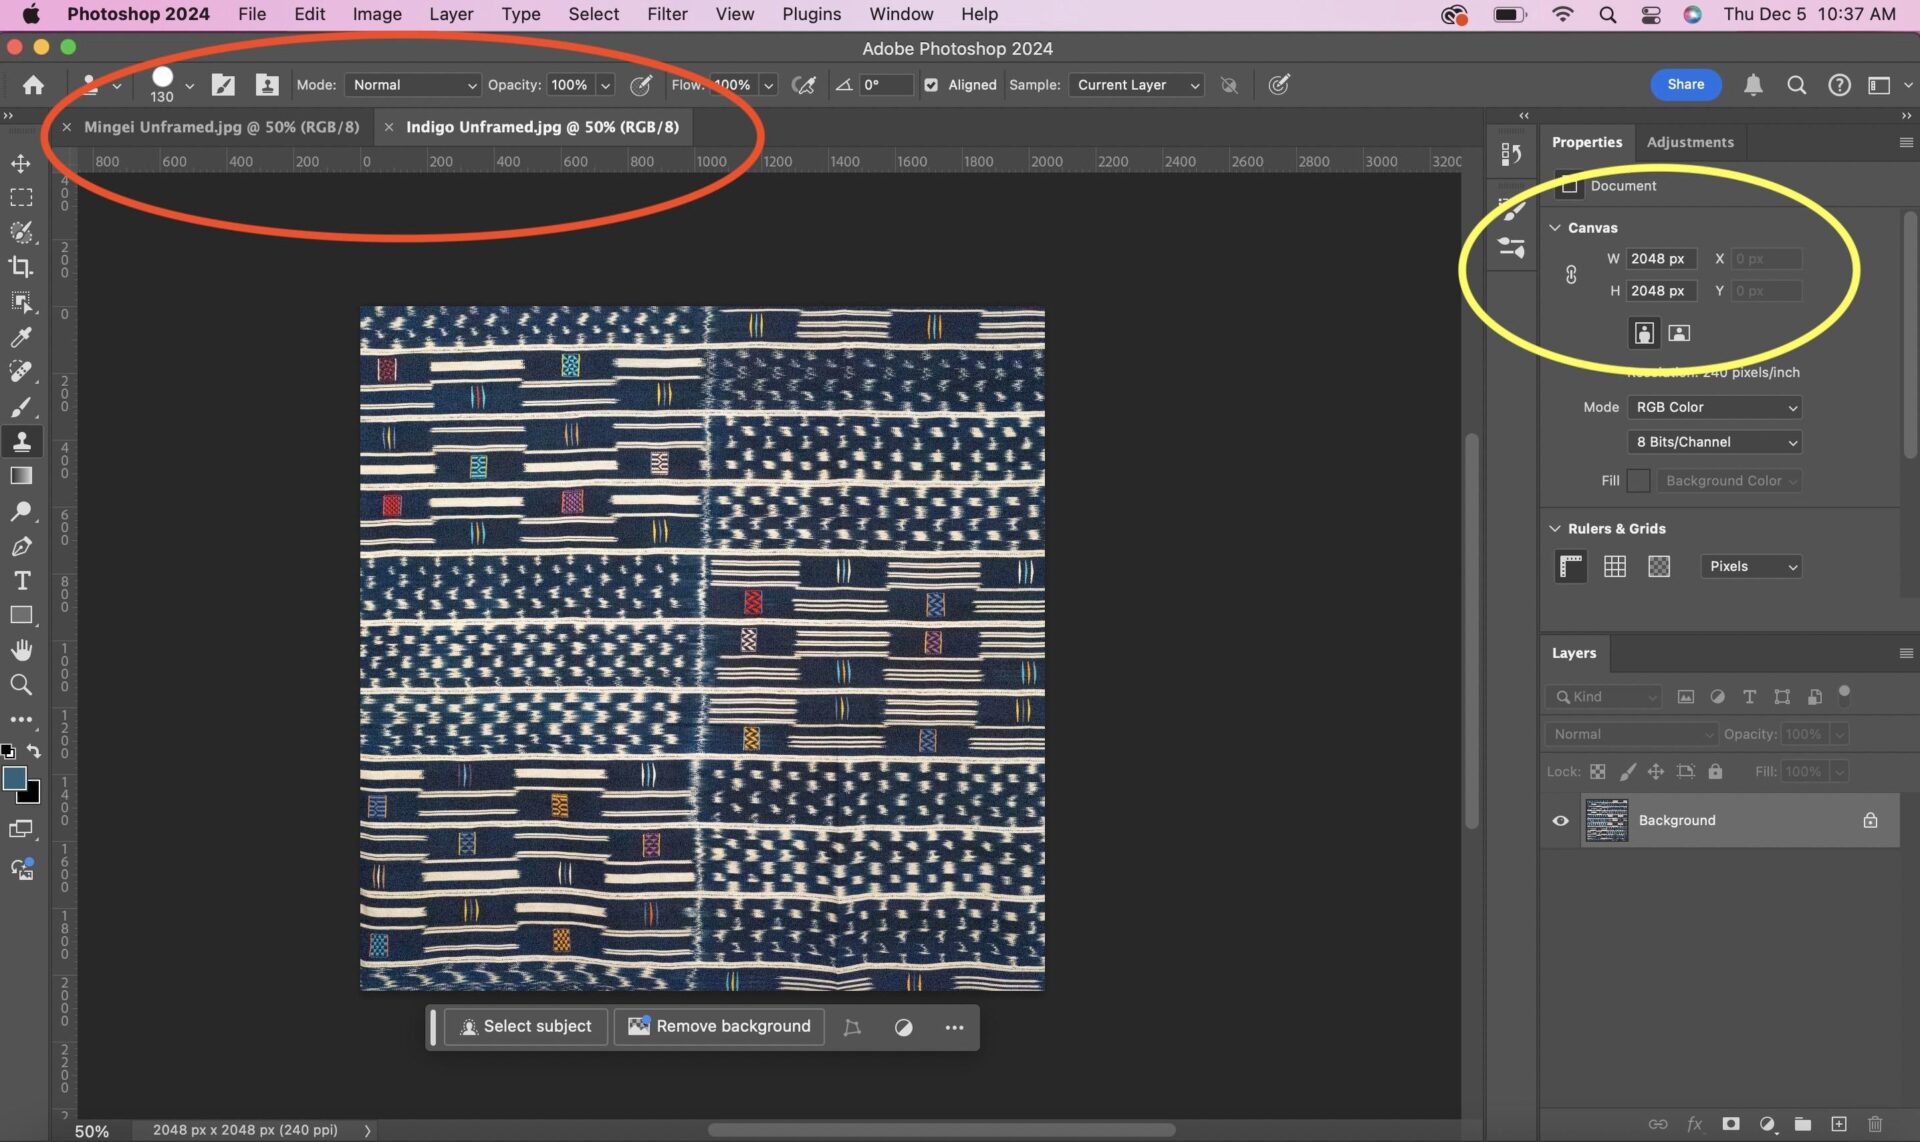
The two images are accessible via adjacent tabs (red oval) and the second image has the same dimensions as the first (yellow oval).
Adding the diptych background layer
We now need to calculate the size of the background, onto which we will place the images. I reach for my calculator, pencil, and paper for this step.
To ensure equal spacing around and between the images, I do the following calculation. I want the size of the new layer to be 115% along the vertical side. This is my personal preference, since I think it creates an appropriate size border. If you would like more space around the images, you can adjust accordingly.
I also prefer a white background for my diptychs. In a future article, I will describe how to generate different background colours.
Let’s therefore create a white background layer corresponding to the addition of 7.5% of the photo dimension, above, below and between the images.
My photos are 2048 pixels along this vertical edge. Therefore, I want the vertical size of the new layer to be 2355 pixels (115% of 2048). This means (2355-2048)/2 = 153.5 pixels above and below.
In the horizontal dimension of the new layer, I want equal spacing besides and between the images. This means 153.5 + 2048 +153.5 +2048 + 153.5 = 4557 pixels. Get it? That corresponds to: space+image+space+image+space dimensions.
With the dimensions in hand…
Enough arithmetic, let’s get back to Photoshop editing. To create this new background layer, go to File, then New. This opens up a new page, offering a set of existing templates.
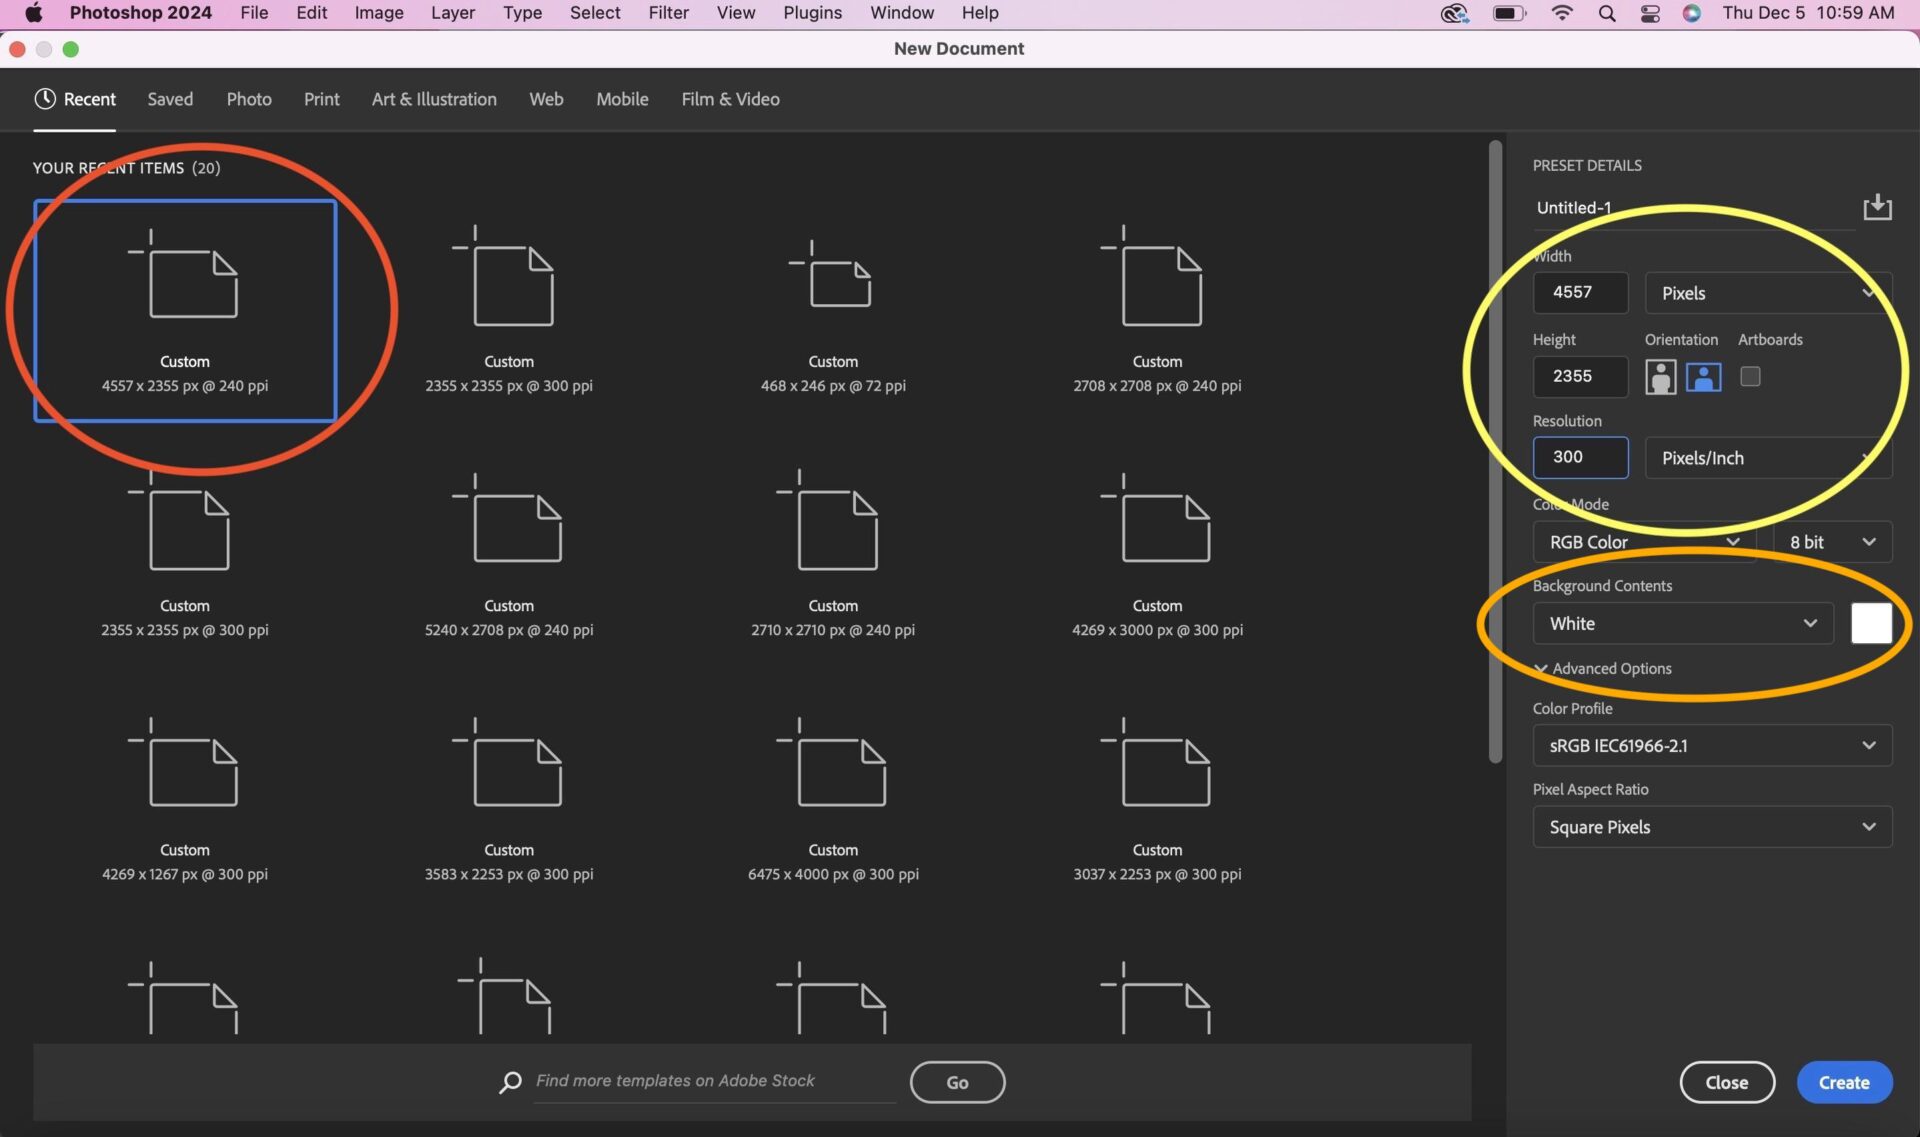
Since I have previously used a 2355 x 4557 pixel background, this is amongst the set of options (red oval).
But, starting from scratch, I can specify a new layer size using the fields highlighted by the yellow oval. These indicate width, height, and resolution in dots per inch (dpi). I enter width of 4557 and height of 2355 pixels in the appropriate fields. To ensure sufficient resolution, I specify 300 dpi.
Since I want a white border, the background contents have to be selected as white (orange oval).
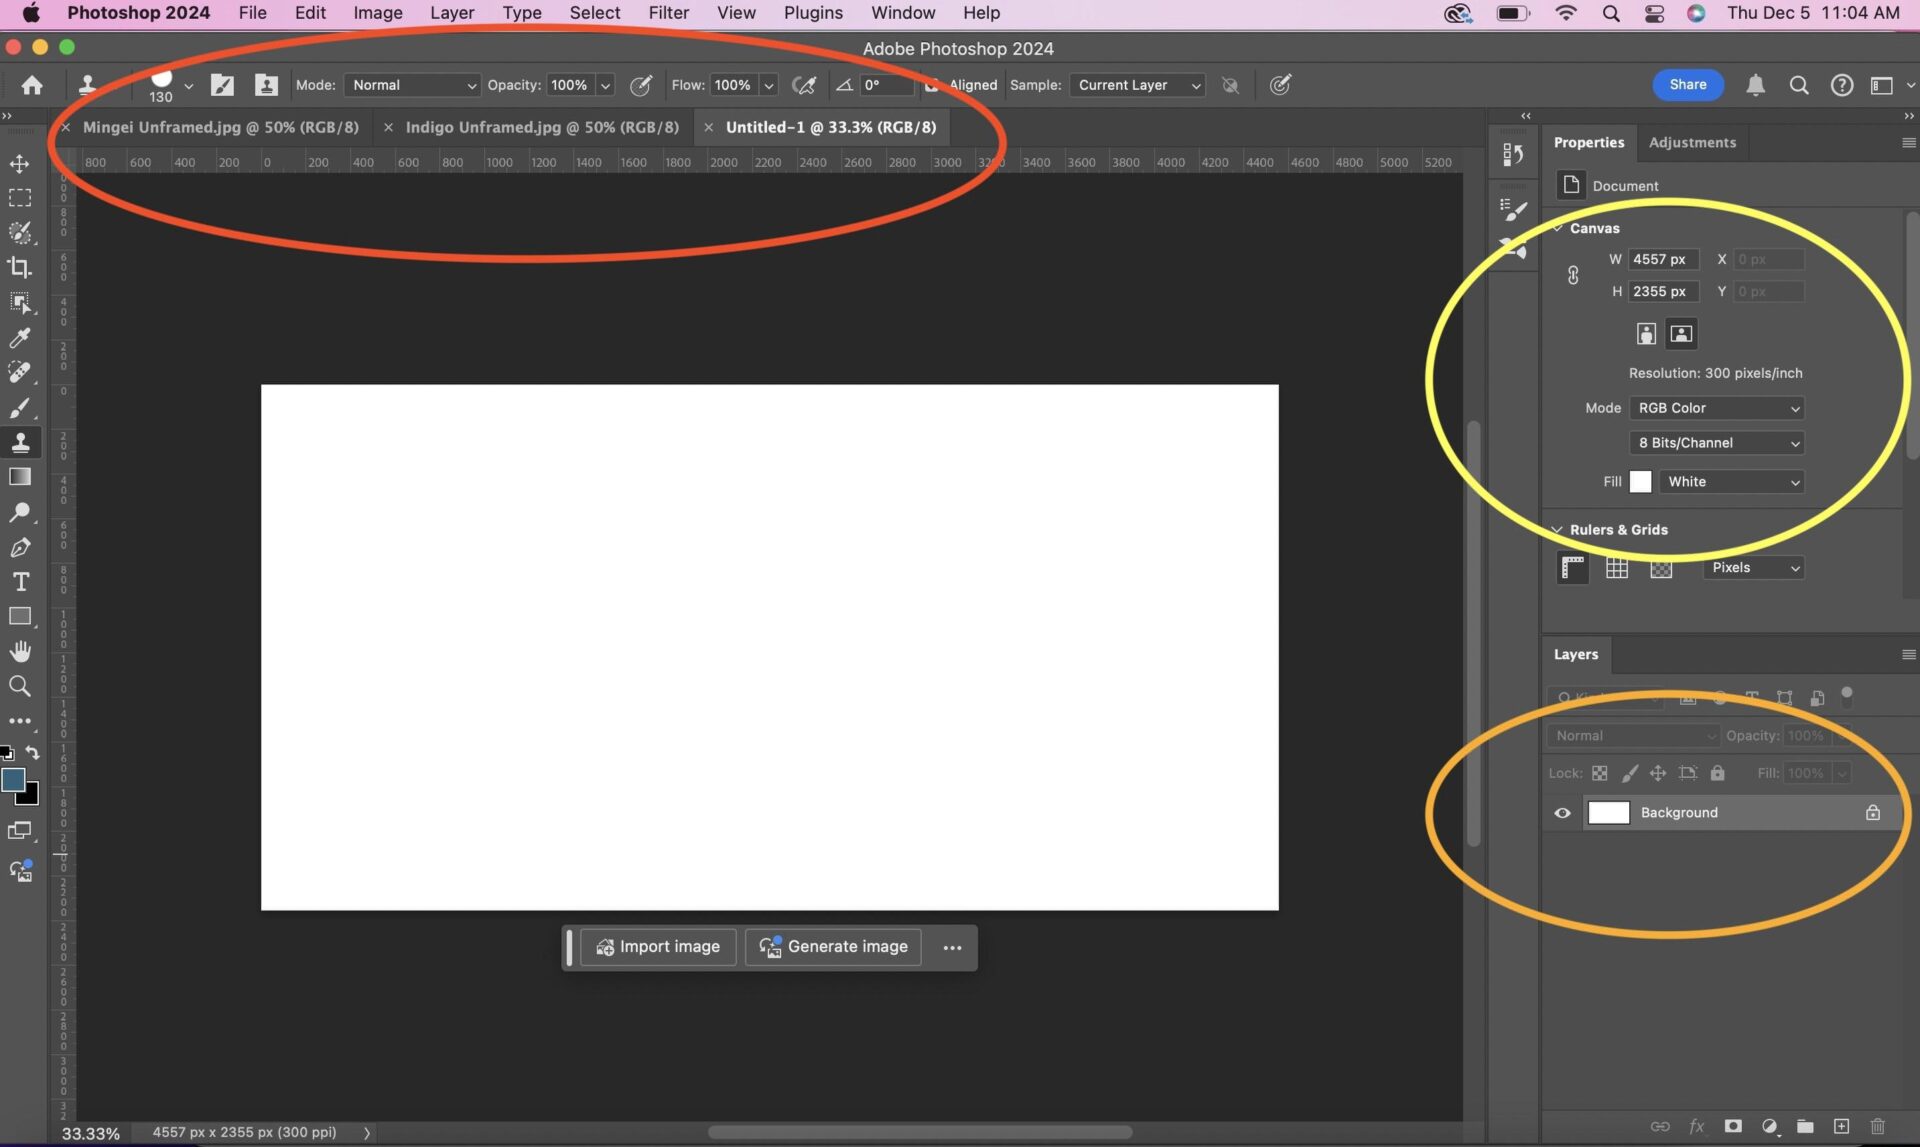
Pressing the create button generates the new background layer (orange oval), adjacent to my two images (red oval). The new file is currently unnamed. It has the correct dimensions, resolution, and colour (yellow oval).
Final steps
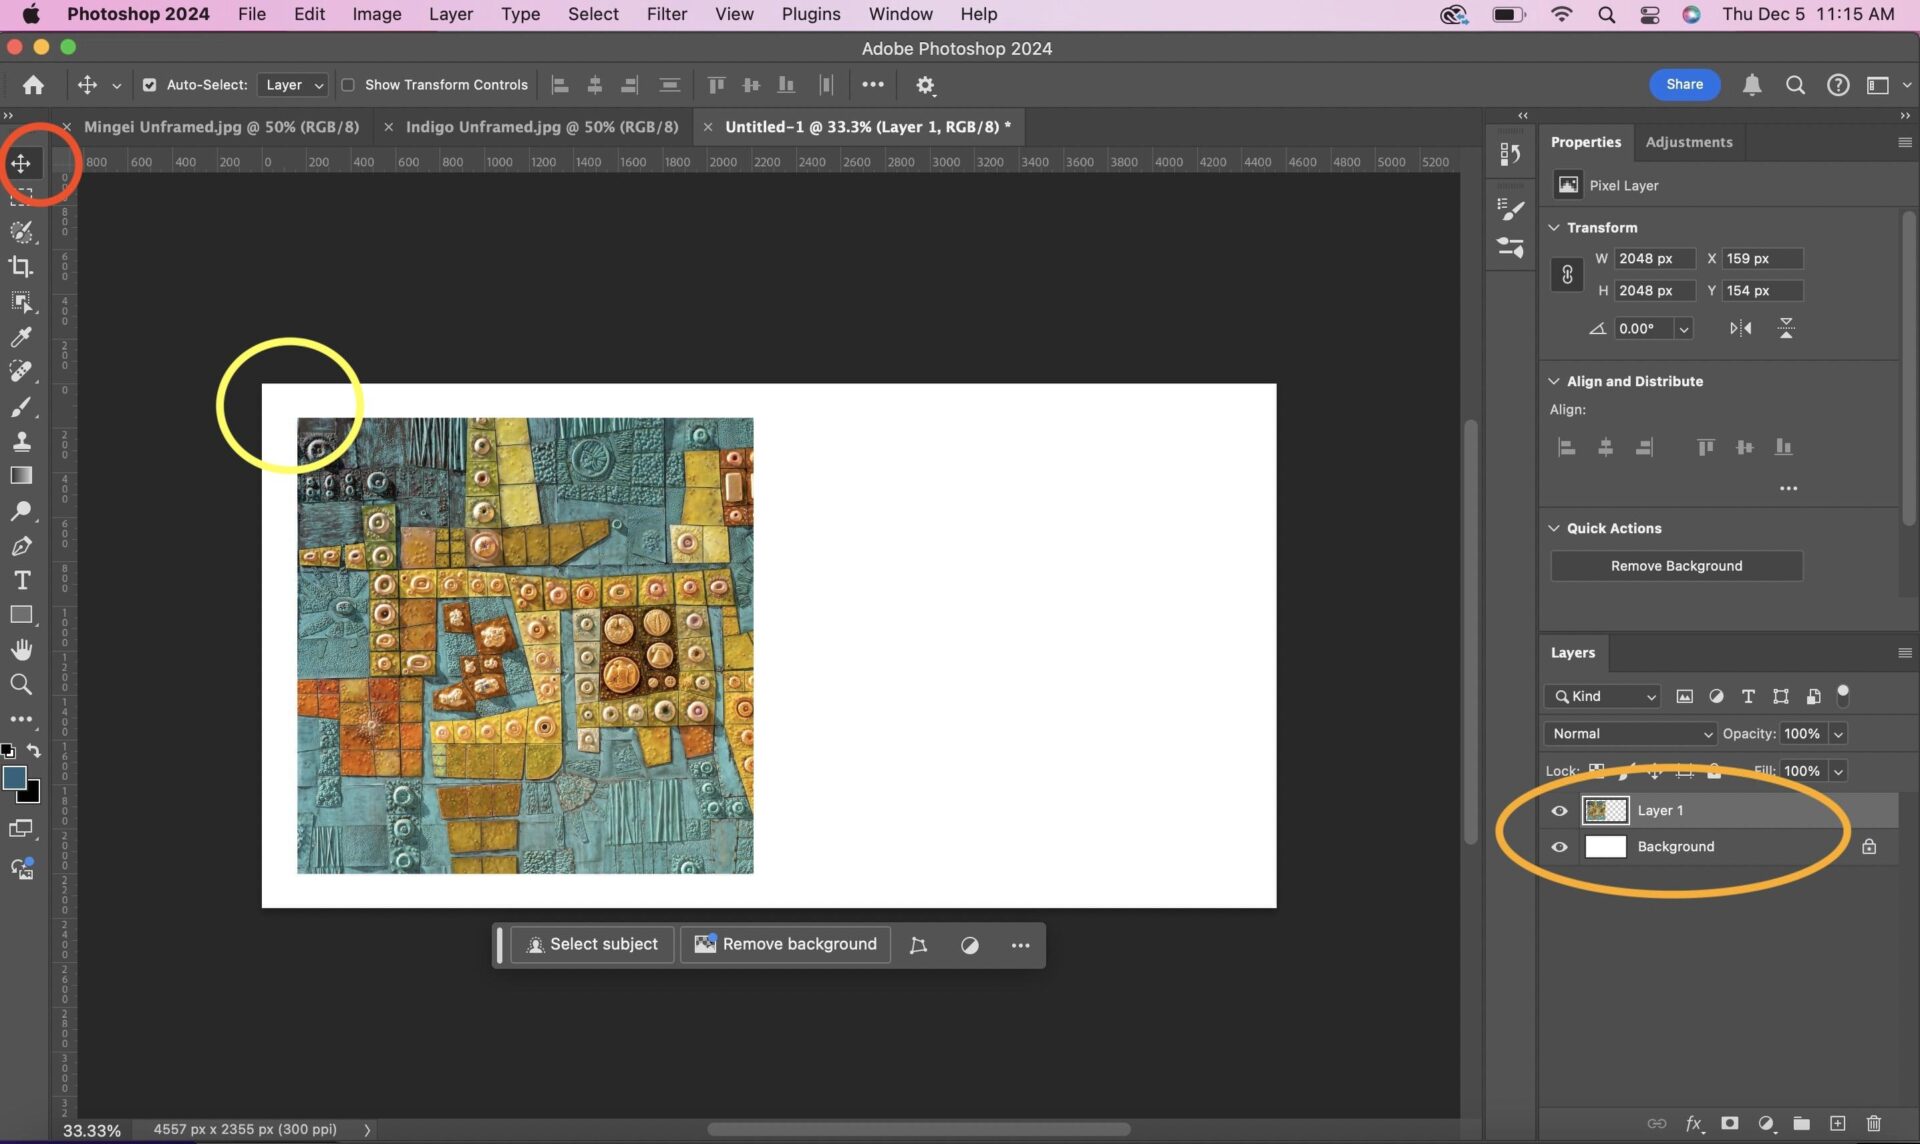
You now insert the two images into this background layer, sequentially. Firstly, go to the tab for the first image, then using Select, then All, grab it. You can tell that it is selected via the ‘crawling ants’ around its periphery.
Choose Edit, then Copy (command-C on a Mac) to copy the image to the clipboard. Return to your new, untitled page by clicking on its tab.
Using Paste (command-V on a Mac), insert the image directly into the new layer.
The image appears in the middle of the white background layer. You can see the new image layer 1, and the background, in the lower right panel (orange oval).
Using the Move tool (red oval), grab the image. Position it so that, when it is on the horizontal middle line of the background, the space above and to the left looks equal (yellow oval).
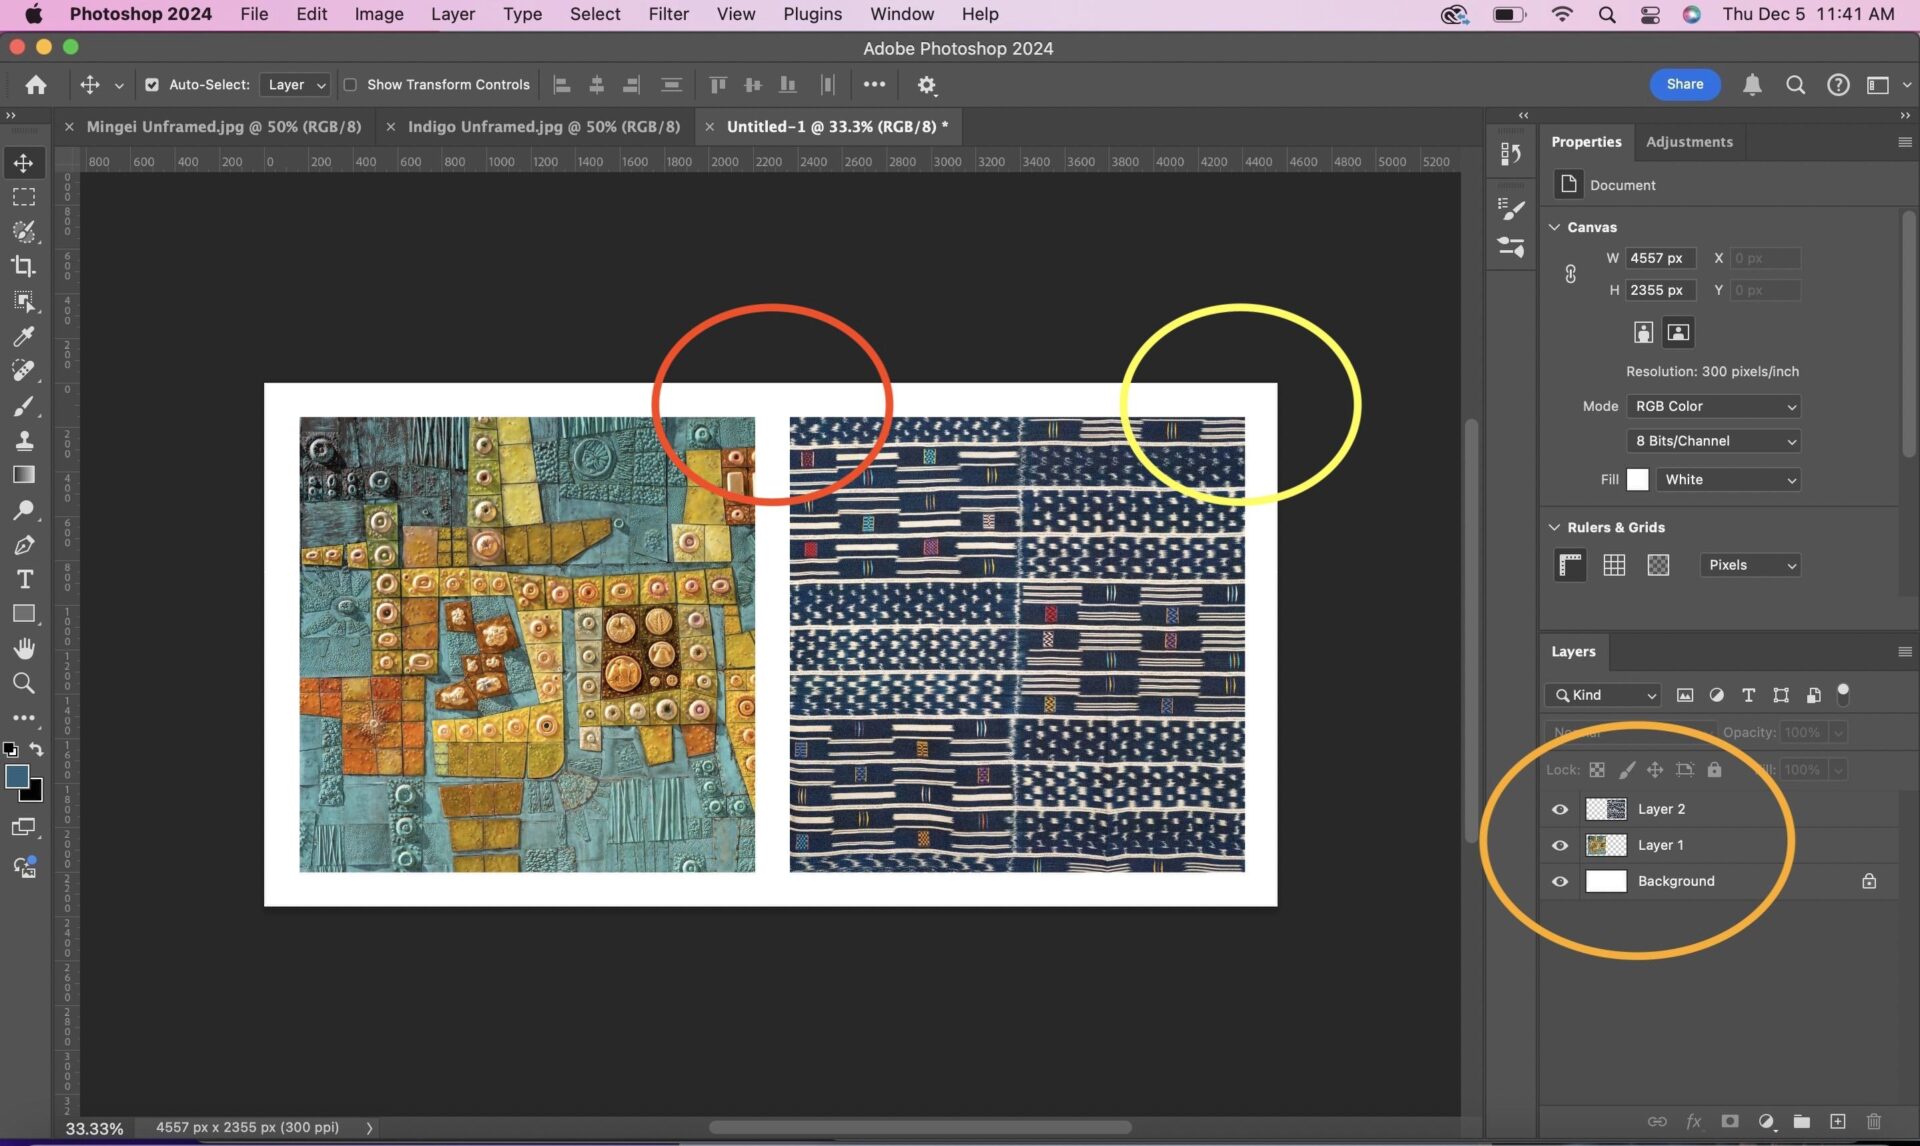
Insert the second image using the same steps. In this case, after pasting it, grab the image and move it to the right of the first image.
Again, position it so the space above and beside (yellow oval), and between the images (red oval) look equal. See the screen shot below. You can make fine adjustments to either image by selecting it and using the cursor keys to move it in small increments.
The three separate layers are indicated in the lower right panel (orange oval).
You can save the new file by selecting File, then Save, and naming it appropriately.
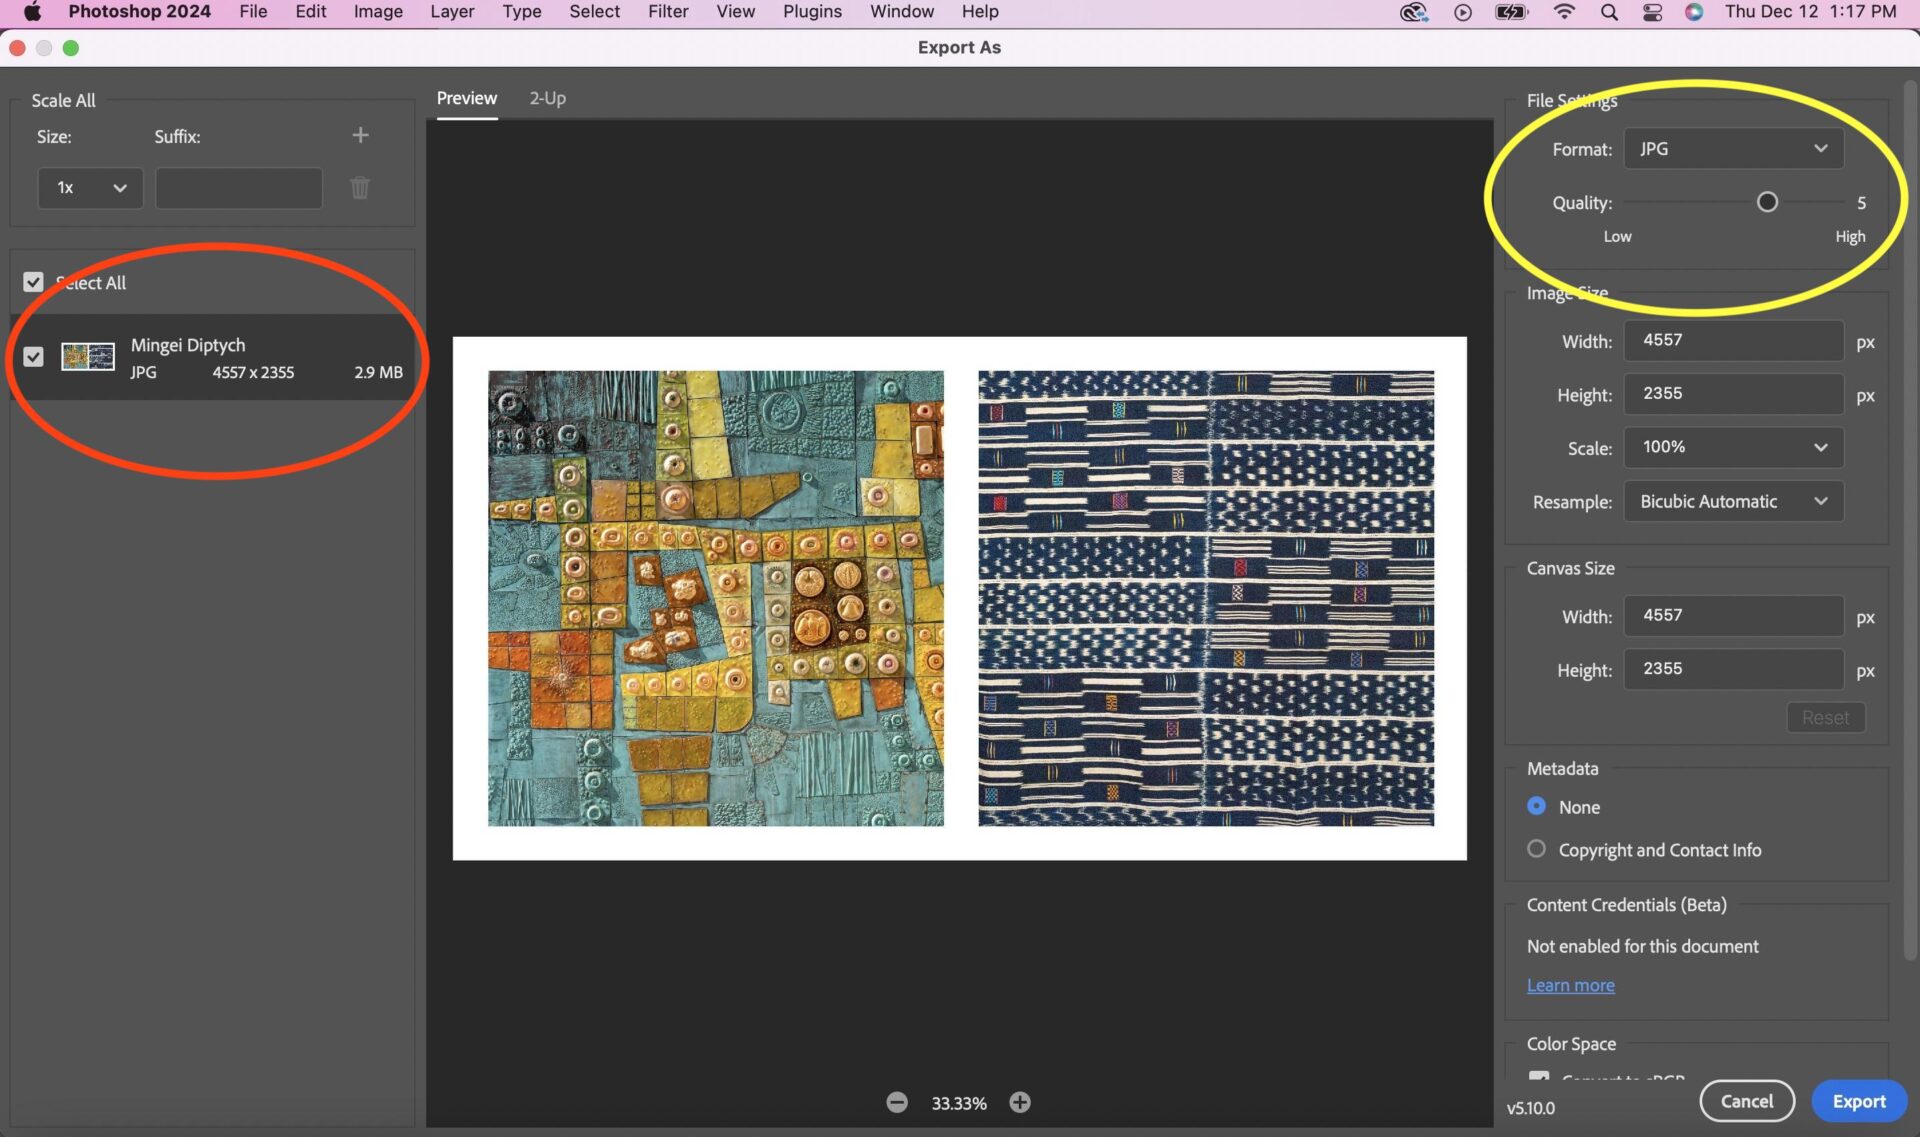
You can also export it, for example as a JPEG, by selecting File, Export, then Export As.
This opens up a screen allowing selection of JPEG quality (yellow oval), and the resultant size in megabytes (red oval).
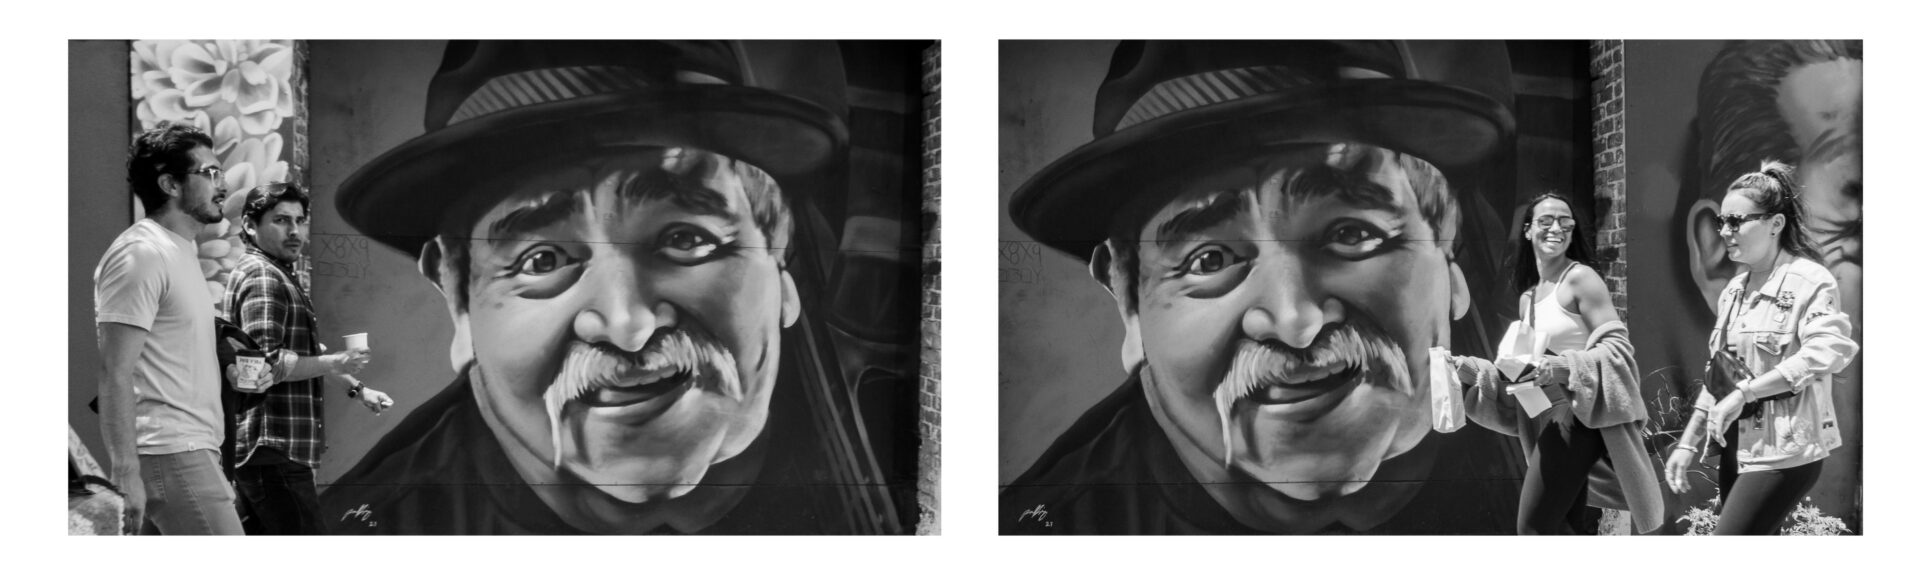
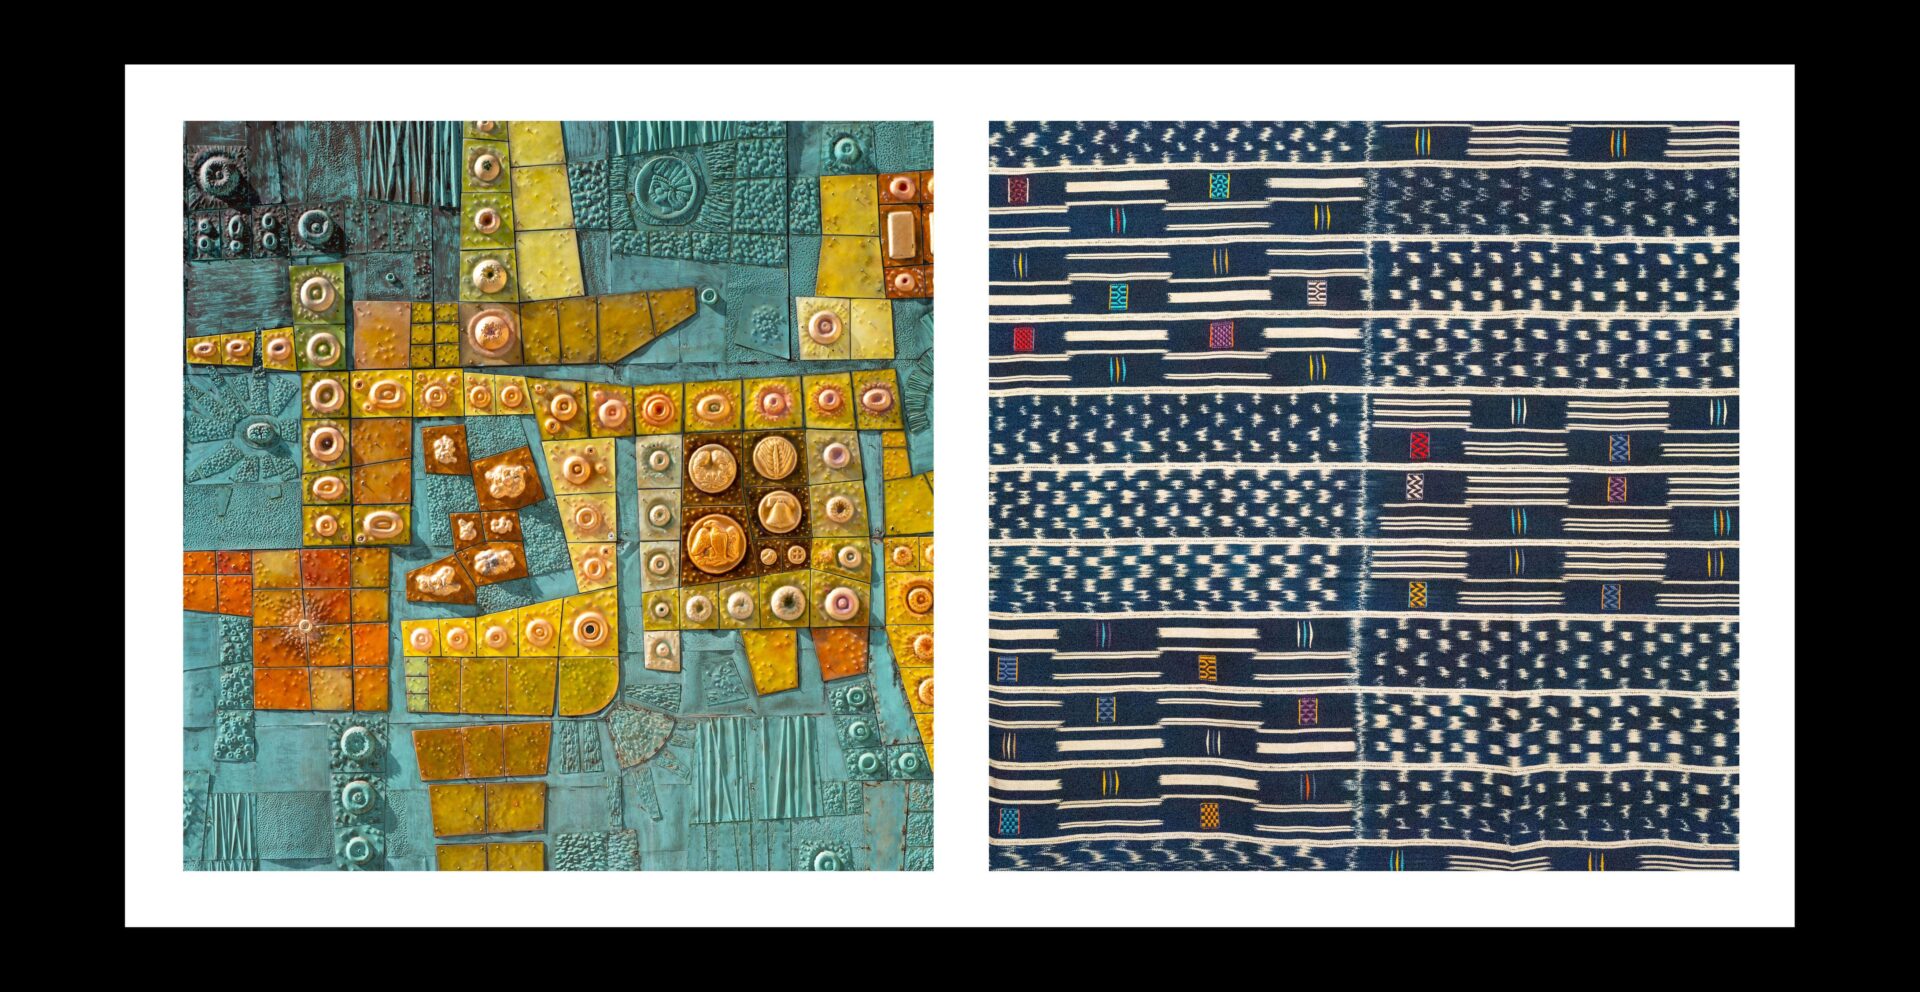
Here is the exported diptych. I set it on a black background (new layer!) so that you can appreciate the white border.
Conclusion
I hope this, and the previous example of Photoshop editing, have illustrated how to manipulate layers. It is a foundational concept in Photoshop, and the basis of many types of image editing. Although I used square-format images throughout, the images could be of any aspect-ratio.
Similarly, I used a specific ratio of background layer to image. But in principle, any ratio can be used. Just be sure to keep that calculator, and pencil and paper handy.
Next time, I will describe how to use Photoshop editing to create a non-white background.
Read the first article in this series
More articles by Keith James
Make a donation to help with our running costs
Did you know that Macfilos is run by five photography enthusiasts based in the UK, USA and Europe? We cover all the substantial costs of running the site, and we do not carry advertising because it spoils readers’ enjoyment. Any amount, however small, will be appreciated, and we will write to acknowledge your generosity.