
If you are a seasoned Photoshop user, this article is definitely not for you. If you are a photographer who has not used Photoshop, but are tempted to try, you have come to the right place. It’s a quick ‘how-to’ on adding a border around your image. This is the first of a series of dip-your-toe-in-the-water articles to introduce Photoshop.
Perhaps, like me, your purchase of Lightroom also provided you with access to Photoshop. Perhaps also, as in my case, it has languished, an intimidating presence, somewhere on your computer.
A few months ago, I decided to overcome my hesitation and try Photoshop on for size.

I wanted to present my photographic images differently, and decided the best way to do that was using Photoshop. So, I took a big gulp and dived into the world of Photoshop editing. Through on-line tutorials, I figured out how to accomplish my modest objective. I also learned a few other techniques for enhancing my images.
A first step in Photoshop editing
On the assumption that there might be other Macfilos readers tempted to dip their toe into the murky Photoshop waters, I decided to share some of what I have learned. In this article, I will describe how to import an image and place a border around it. In future articles, I will share some other ‘tricks’ I have learned.
There are plenty of instructional videos available on YouTube explaining how to use Photoshop. Many are aimed at users with an interest in graphic design. I employ Photoshop from the perspective of a photographer who has already edited their image in Lightroom. For me, it’s a way of adding extra oomph to an image that could already stand alone.
Before diving into that Photoshop ‘how to’, it’s probably worth a brief comment on why someone might want to add a border around their photograph. My interest was triggered by a series of abstract images I had taken. To emphasize the ‘painterly’ nature of these images, I decided to place them within a white border. In my view, this gave the impression of a ‘matte’ into which the image had been placed.
Jumping in
Here is the process I use to add a border. I will illustrate it using screenshots taken at relevant points. This first example will use a square image, just to keep things simple. But you can use the same process for rectangular images, in landscape or portrait format.
I created the examples using Photoshop 2024 on a MacBook Air. I assume the instructions will be readily transferable to earlier versions, or versions run on a PC.
By way of background, I took the photograph around which I am creating a border at the Mingei Museum, in Balboa Park, San Diego. It is a multimedia wall at one side of the outdoor dining area.
Importing an image
With Photoshop open on your device, go to the menu bar at the top of the screen and click on File and then Open.
At the lower left of the screen is a button, labelled on your computer. Clicking on this allows navigation to the relevant JPEG file.
Opening the file reveals a Photoshop workspace page, which you can see here.
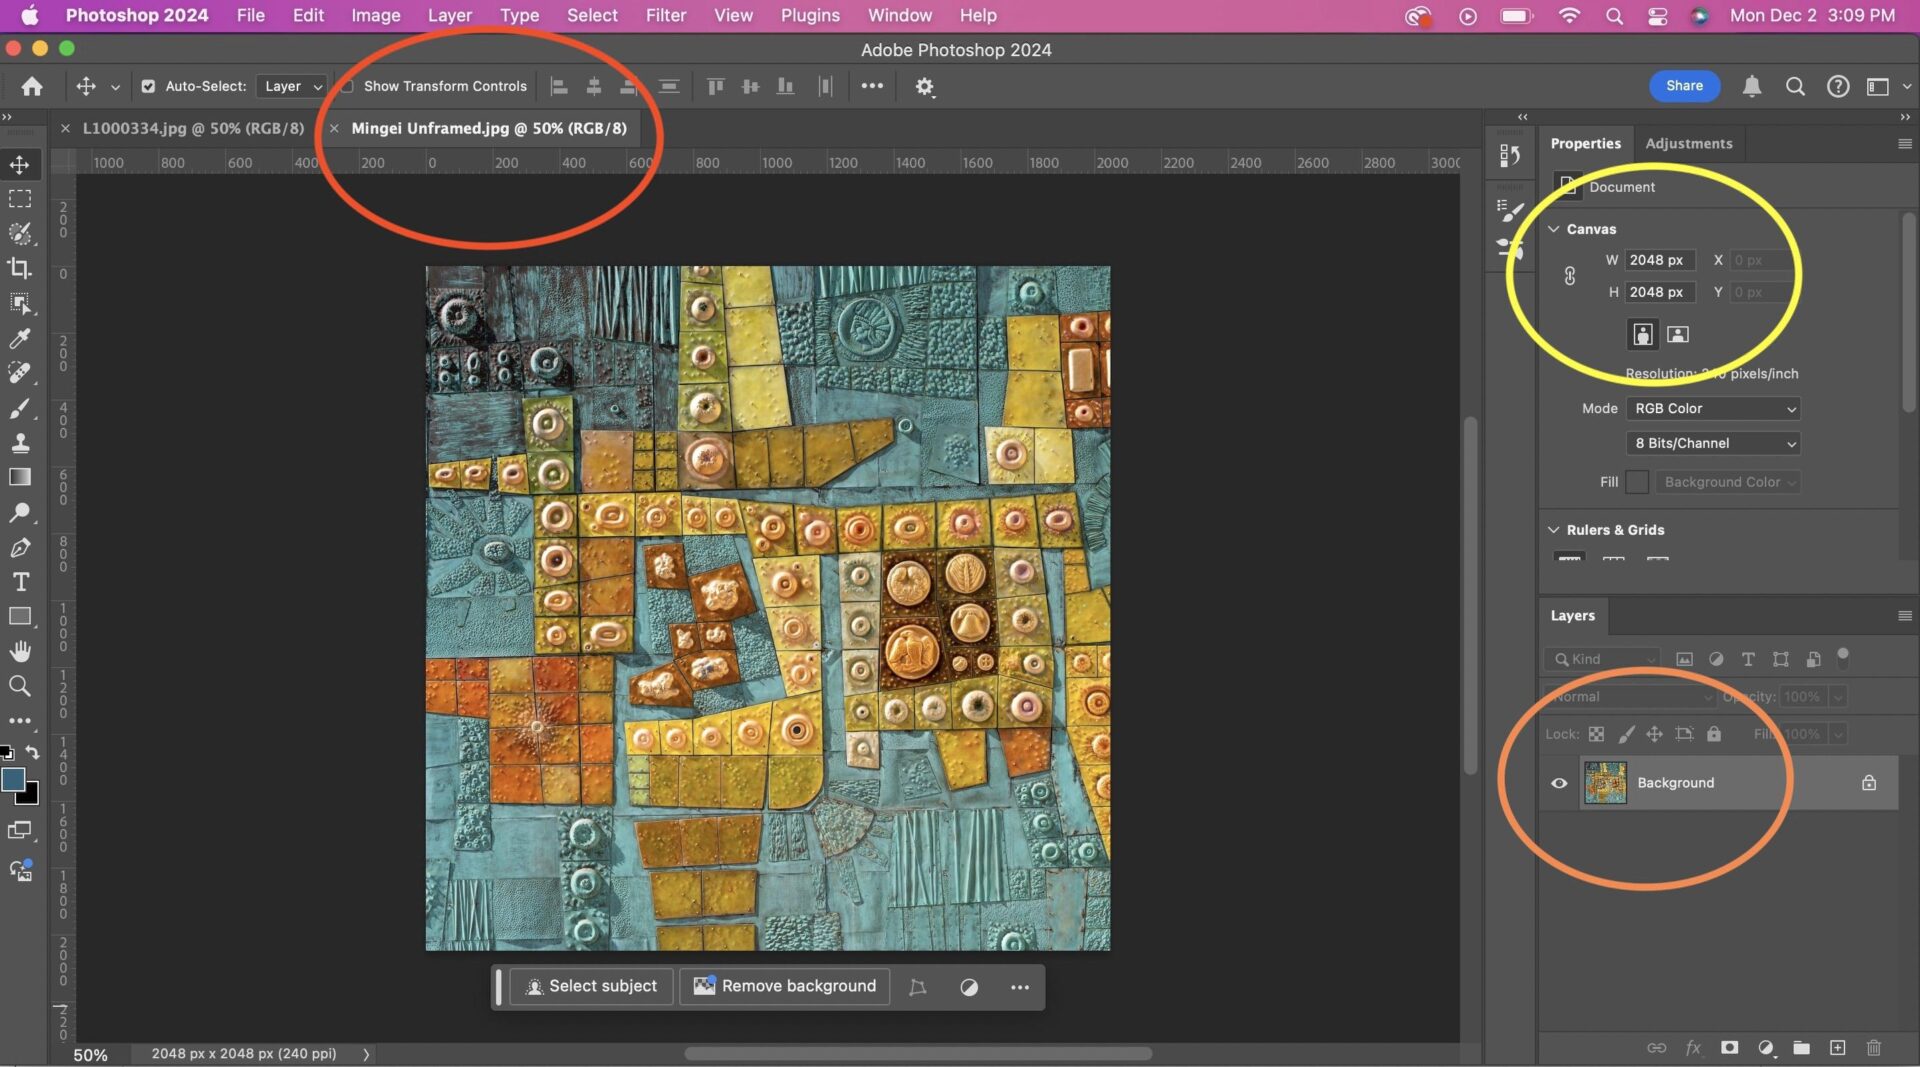
The upper-left area (red oval) shows the name of the file you have loaded. The lower-right area, (orange oval), shows that your image is the background layer. And the upper-right area (yellow oval) shows you the x- and y-dimensions of your image in pixels.
I usually add borders which are 15% wider and taller than the image itself. To achieve this, I create a new ‘background layer’ whose size is 115% of my image. Since the dimensions of my image are 2048 × 2048 pixels, I need a new layer of 2355 × 2355 pixels (2048 × 1.15). It’s handy to have a calculator app on my computer, and a pencil and paper nearby.
Bear these dimensions in mind for the next step.
Adding a new background layer
Go to File, then New. This opens up a new page, offering a set of existing templates. Since I have previously used a square canvas of 2355 × 2355 pixels, this is among the set of options (red oval).
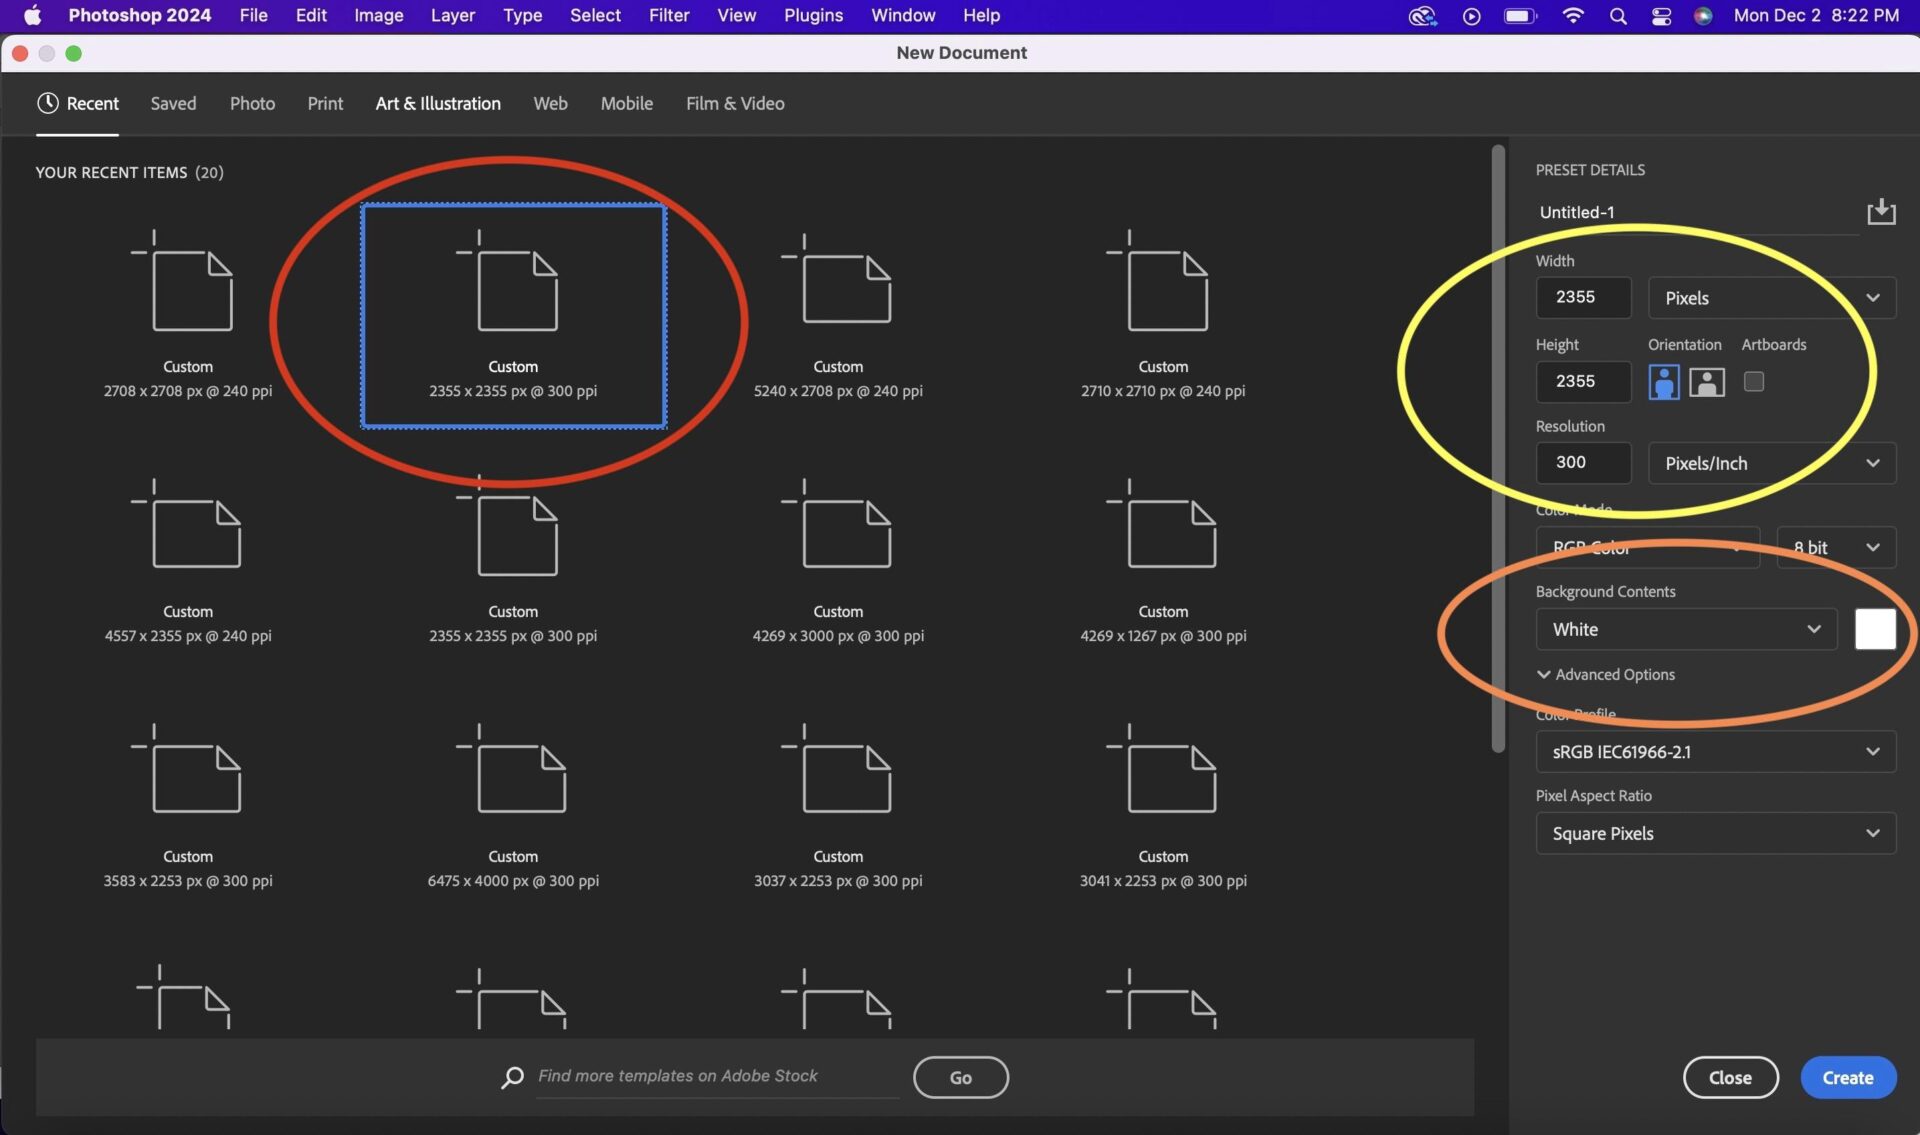
Alternatively, I can specify a new layer size using the fields highlighted by the yellow oval. These indicate width and height in pixels, and resolution in dots per inch (dpi). I enter width and height of 2355 pixels in the appropriate fields. To ensure sufficient resolution, I specify 300 dpi.
Since I want a white border, I select the background contents as white (orange oval).
Final steps
Pressing the create button generates a new file with a single new layer.
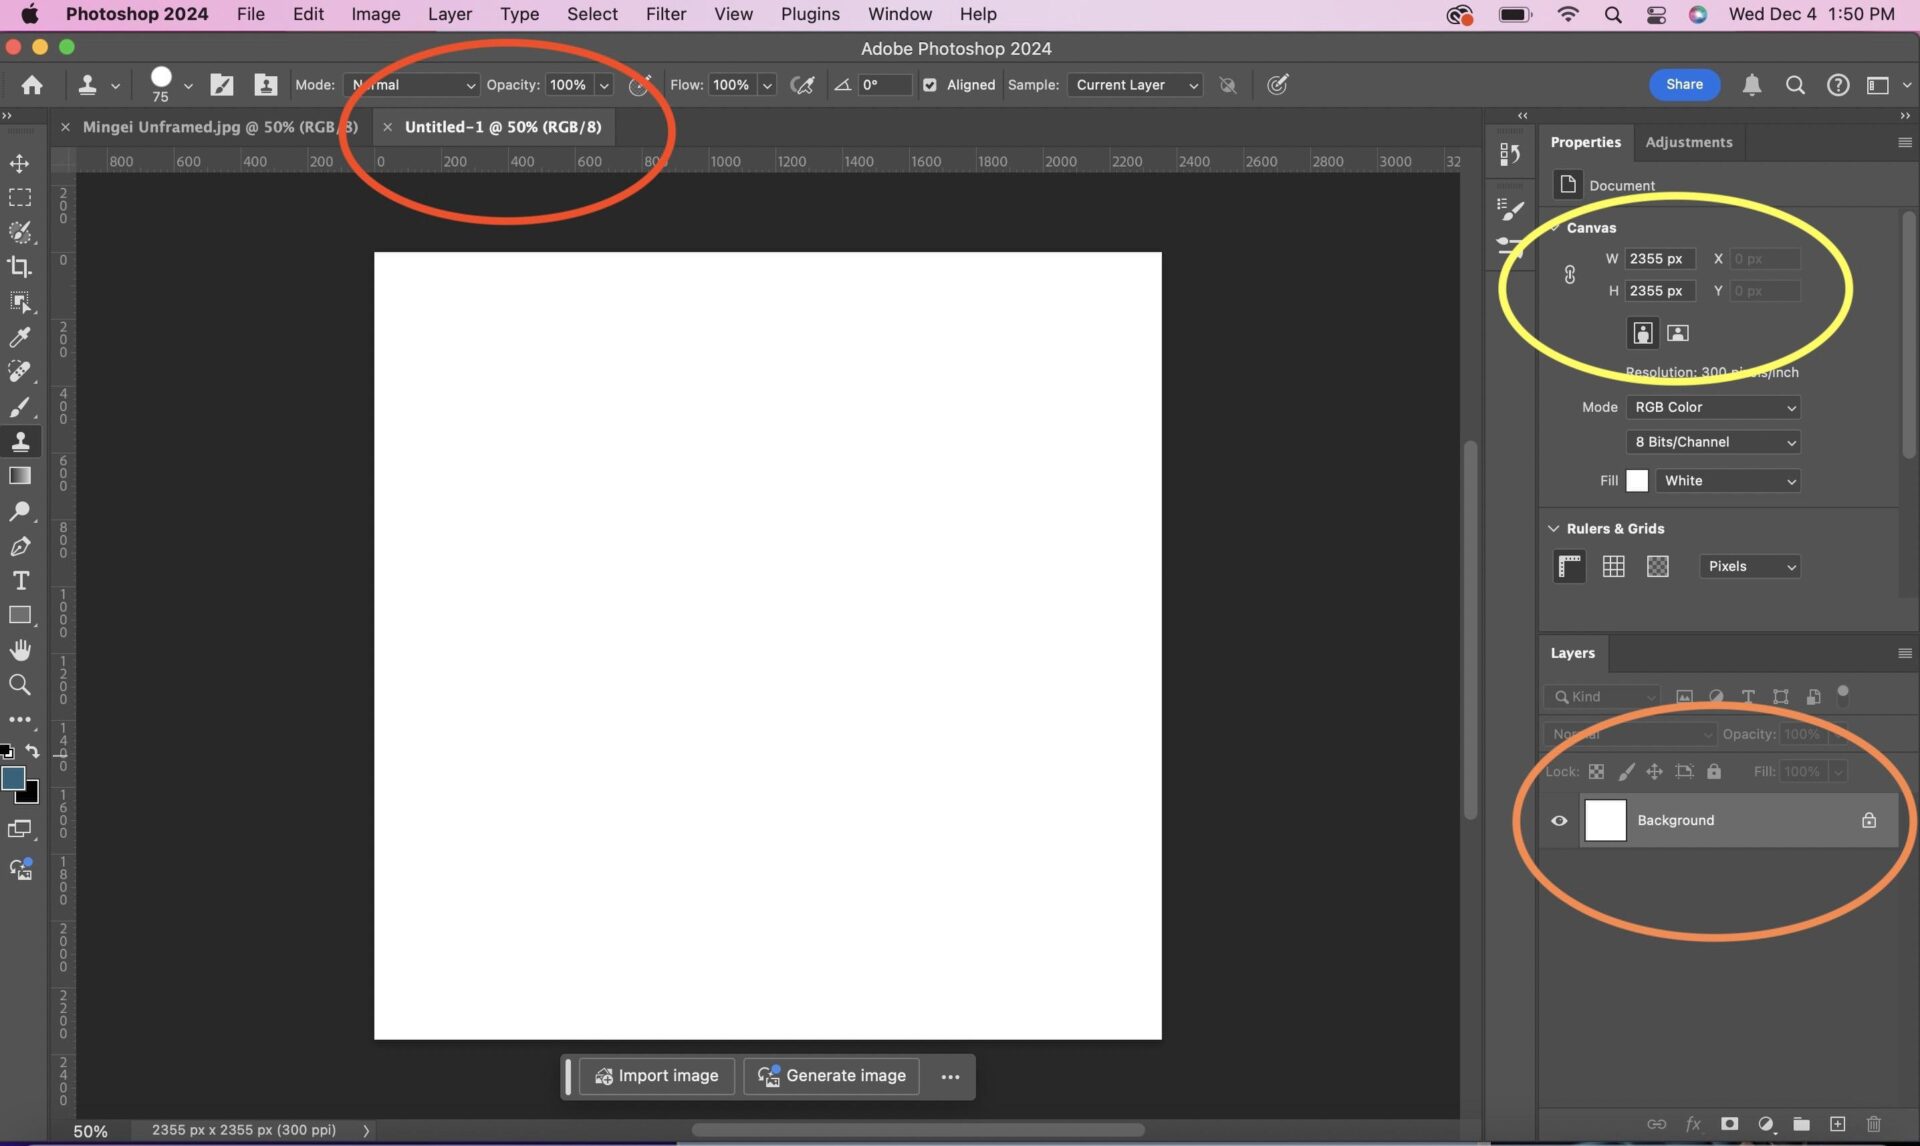
I have yet to name the new file, but will do that shortly (red oval). The size of the new layer is specified (yellow oval) as is its colour, which in this case is white (orange oval).
Now, go back to the image file you uploaded, by clicking on its tab.
Choose Select, then All, from the menu, which highlights the entire image. The ‘crawling ants’ around its periphery indicate that it is selected.
Choose Edit, then Copy (Command-C on a Mac) to copy the image to the clipboard. Return to your new, untitled page by clicking on its tab.
Choose Edit, then Paste (Command-V on a Mac) to paste the image as a new layer.
You now have an image that looks like this:
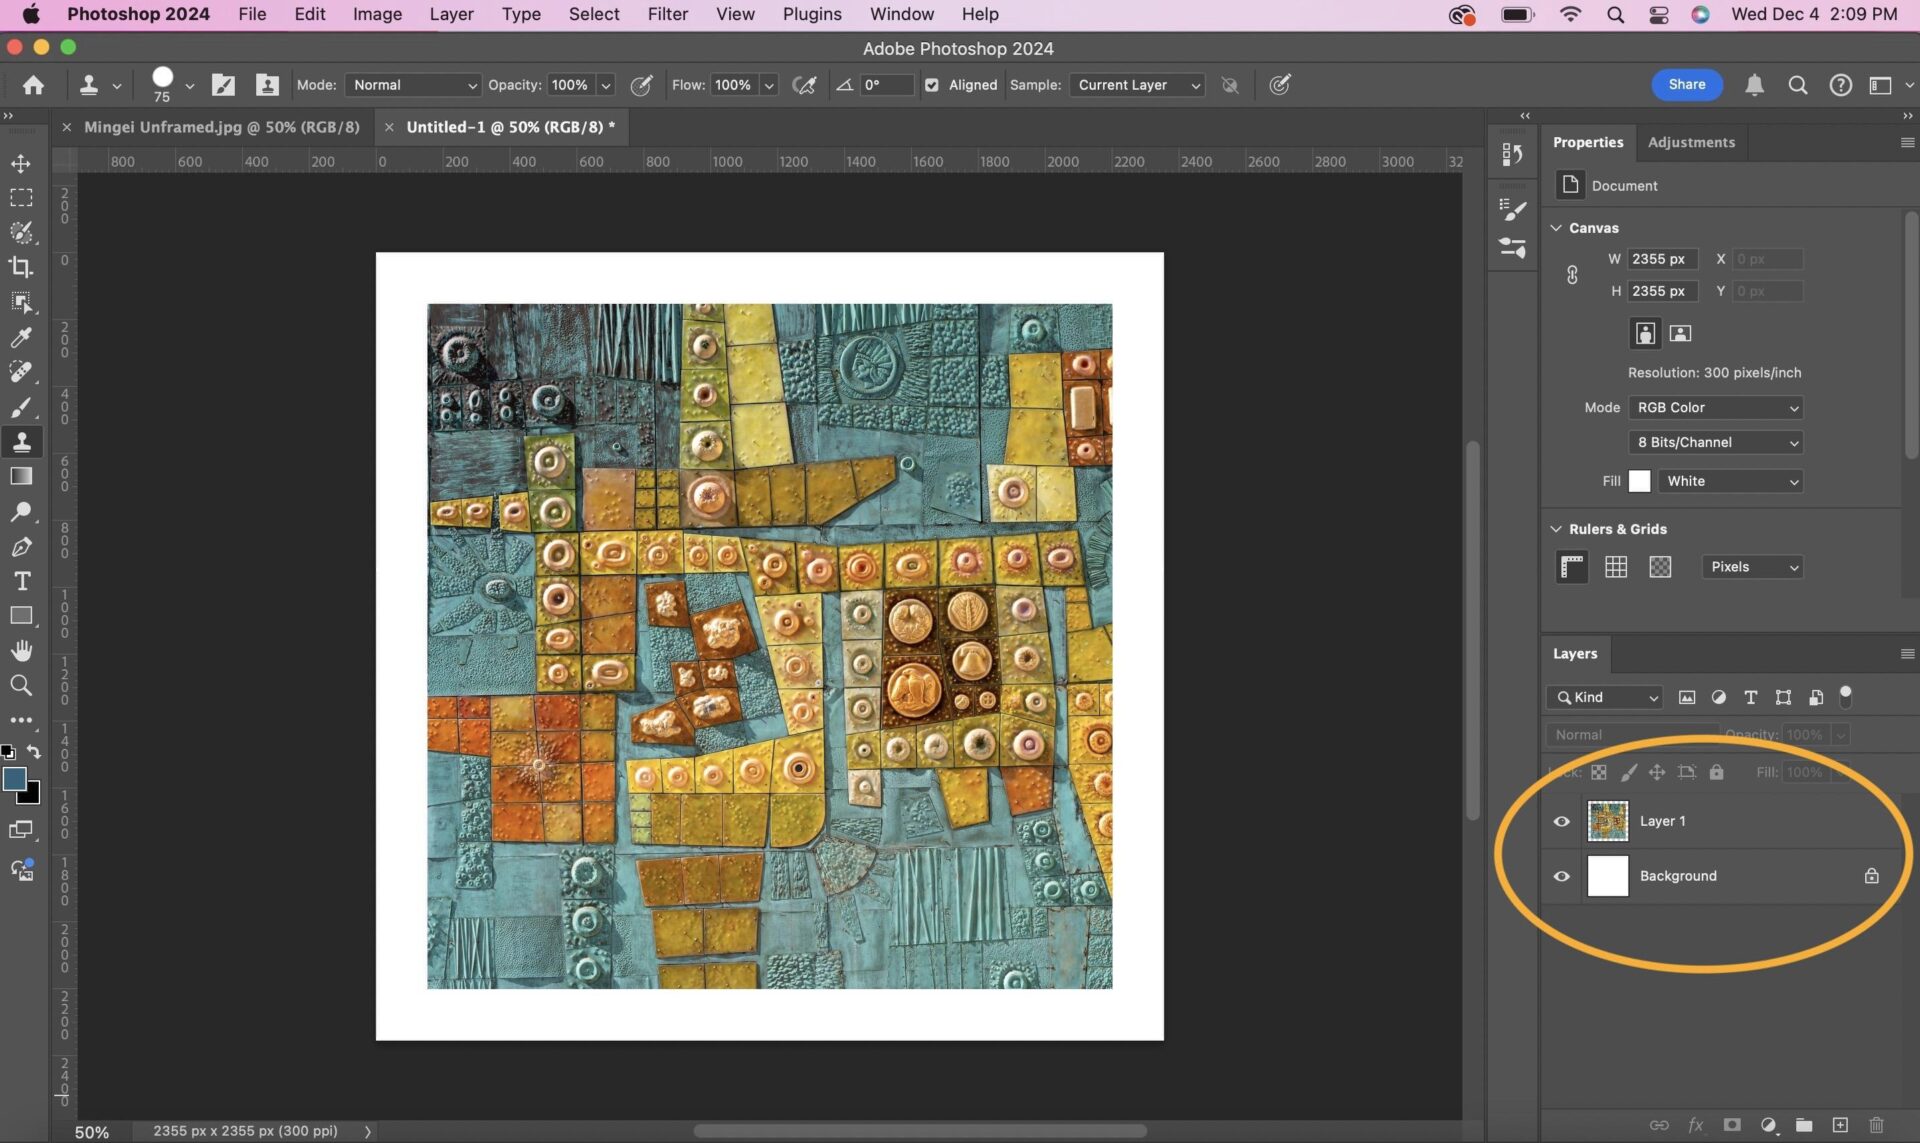
The photograph now has a border. The lower right panel (orange oval) shows two layers: the white background, and the photo image as layer 1. You can turn these layers on and off by pressing the eye icon next to them, and select them independently, by clicking on them.
Saving and exporting
The new file can be saved by selecting File, then Save, and named appropriately.
You can export the file, for example as a JPEG, by selecting File, Export, then Export As. This opens up a new dialogue box.
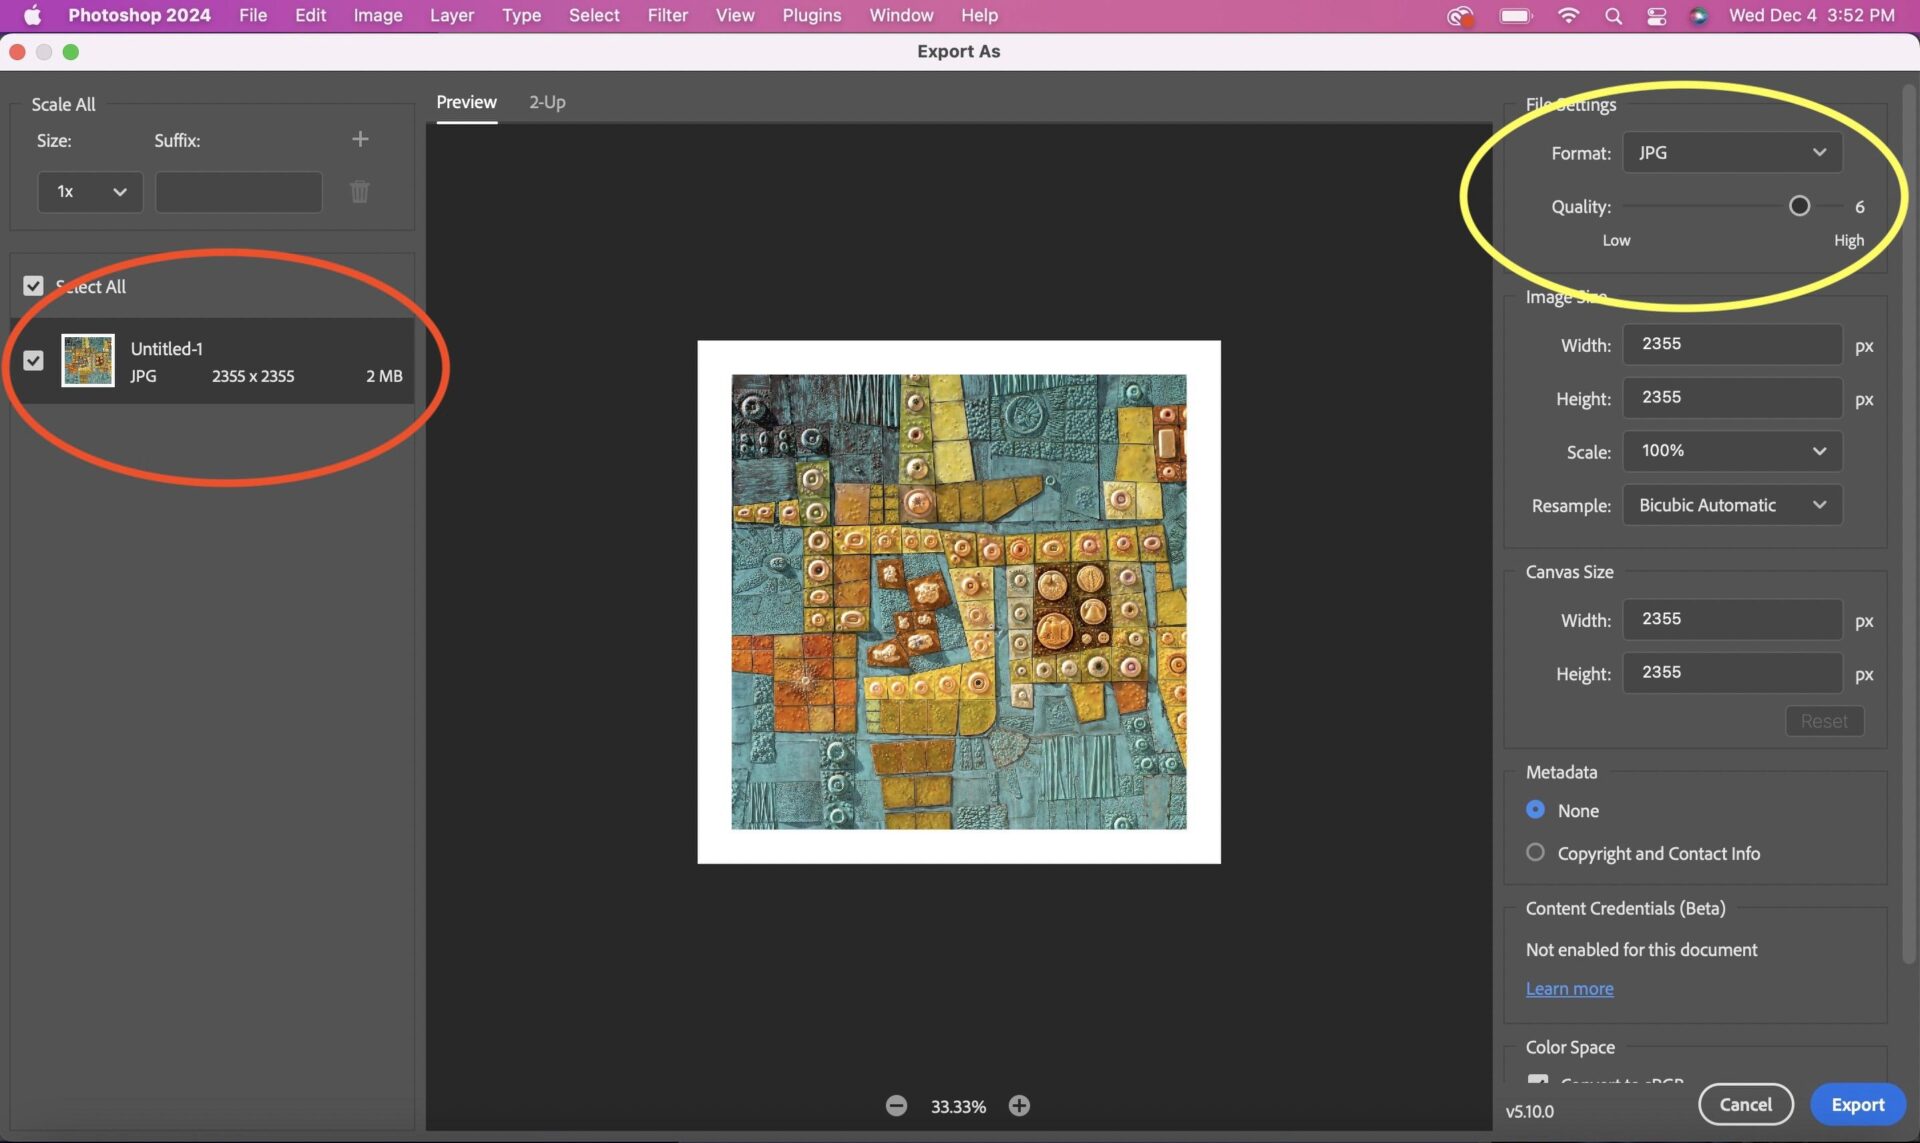
You can now select the output format and quality (yellow oval) governing size (orange oval). When you press the export button, you can specify where the new image should be saved.
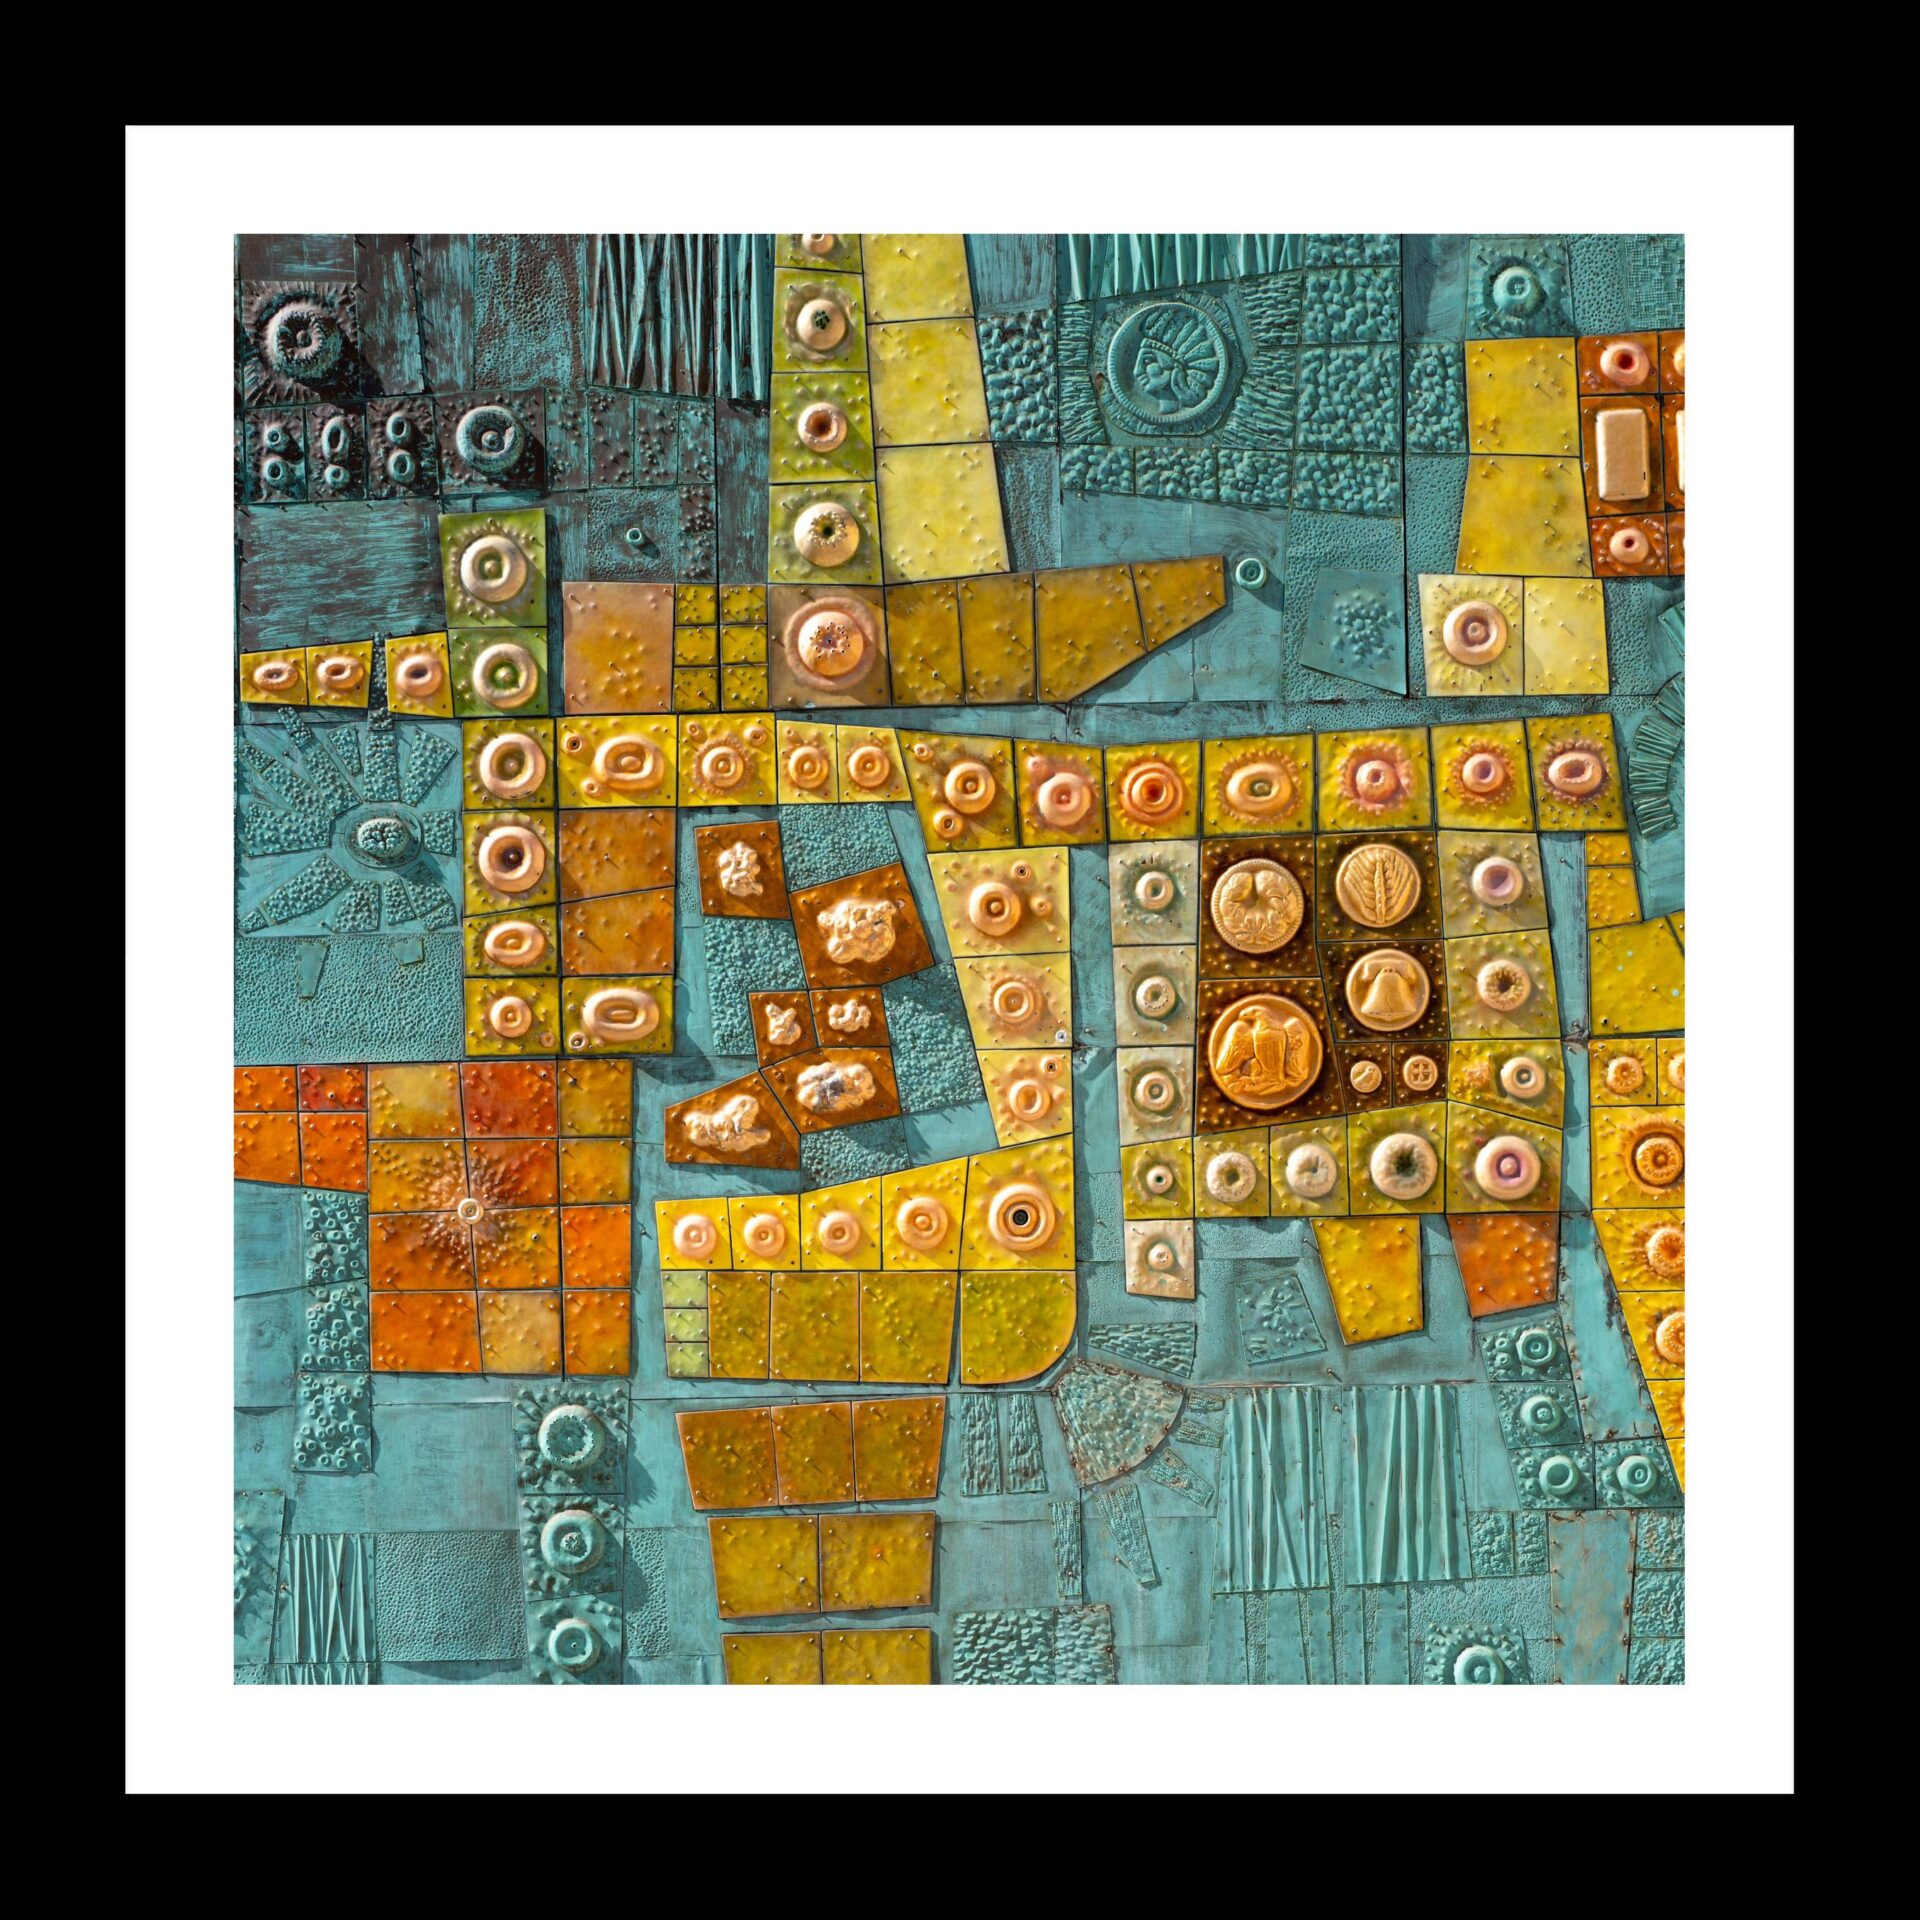
Here is the exported image, which you saw earlier. I set it on a black background (another layer!) so that you can appreciate the white border:
Just the start
I hope these directions were easy to follow, and tempt you to try it yourself. Creating and manipulating layers is a fundamental skill in Photoshop. Becoming comfortable with layers is therefore an important first step towards eventual mastery of this extremely useful and often misunderstood post-processing tool.
In the next article in the series, I will expand on the process described above by creating a border around a pair of images. Diptychs, here we come!
Read more from Keith James
Make a donation to help with our running costs
Did you know that Macfilos is run by five photography enthusiasts based in the UK, USA and Europe? We cover all the substantial costs of running the site, and we do not carry advertising because it spoils readers’ enjoyment. Any amount, however small, will be appreciated, and we will write to acknowledge your generosity.
Very helpful Keith. You’re right – Photoshop can be intimidating, but your article helps get over that hurdle.